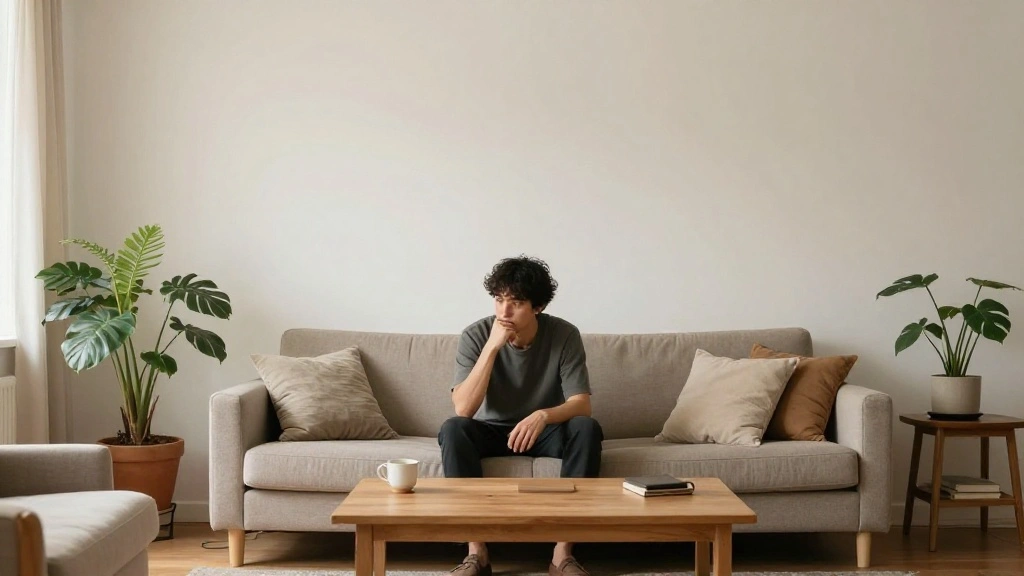
Do you feel like your walls are bare and lifeless? Are you yearning for some creativity in your living space but worried about the cost of art? You’re not alone! Many people face the dilemma of wanting beautiful wall art without breaking the bank. Fortunately, there’s a solution that allows you to unleash your creativity and beautify your home for almost nothing.
In this guide, you’ll learn how to create stunning wall art using items you already have at home. From repurposing old materials to utilizing nature-inspired elements, you’ll discover how to transform your living space into a gallery of your own making. By the end of this guide, you’ll have unique pieces that reflect your personality and style.
This project is designed for beginner crafters, with an estimated time of just 2-3 hours to complete. Whether you’re looking to add a touch of color, texture, or an artistic flair to your home, this guide will provide you with the steps you need to create eye-catching wall art. Let’s get started!
TL;DR Summary
- Create wall art using items you have at home.
- Follow 7 easy steps to craft unique pieces.
- Beginner-friendly with a time estimate of 2-3 hours.
- Learn tips and tricks to enhance your artwork.
TL;DR Summary
Editor’s Choice

Pro Grade Paint Brushes, 5-Piece Paint Brush Set, Flat & Angle Brushes f…

Simetufy 12 Pack 8×10 Canvas Boards for Painting, Blank Flat Canvas Pane…

Caliart 176PCS Art Supplies Sketching Kit with 100 Sheets 3-Color Sketch…
Prerequisites/Materials Needed
- Cardboard or old picture frames
- Paints (acrylic or watercolor)
- Old magazines or newspapers
- Scissors
- Glue or Mod Podge
- String or twine
- Natural elements (leaves, flowers)
- Canvas or thick paper (optional)
Prerequisites/Materials Needed
Editor’s Choice

Apple Barrel, Vibrant Spectrum Collection Acrylic Craft Paint, PROMOABII…

iBayam 3-Pack 8″ Heavy Duty Scissors with Ultra Sharp Blades and Comfort…

Gloss Sealer, Glue & Finish: All-in-One Craft Solution- Quick Dry, Easy …
Skill Level & Time Estimate
Skill Level: beginner
Total time estimate: 2-3 hours
Breakdown:
- Gathering materials: 30 minutes
- Creating the art: 1.5-2 hours
- Drying time: 30 minutes
Skill Level & Time Estimate
Editor’s Choice

Mont Marte Acrylic Colour Paint Set Signature 24pc x 1.21 US fl.oz (36ml…

KEFF 24-Pack 𝗣𝗥𝗘𝗠𝗜𝗨𝗠 Canvas for Painting, 6 of 5×7,…

Soucolor Acrylic Paint Brushes Set, Easter Basket Stuffers, 20Pcs Round …
Step 1: Gather Your Materials
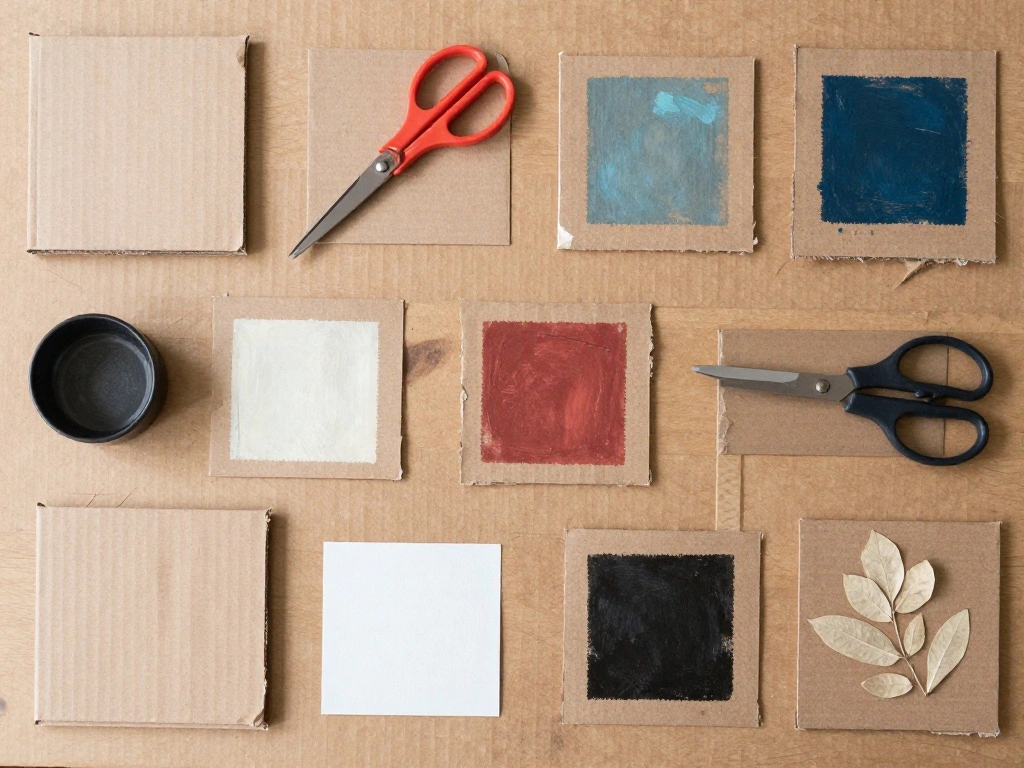
Start by collecting all the items you need for your wall art projects. This will help you stay organized and make the process smoother. Follow these sub-steps:
- Check your recycling bin for cardboard and old magazines.
- Look for unused picture frames or canvases around your home.
- Gather paints, glue, scissors, and any natural elements like leaves or flowers.
Pro Tip: Lay out all materials on a flat surface to visualize your options.
Why this matters: Having everything ready in one spot saves time and keeps your creative flow uninterrupted.
Estimated time for this step: 30 minutes.
Step 1: Gather Your Materials
Editor’s Choice

Shuttle Art Acrylic Paint, 36 Colors Acrylic Paint Set with Brushes & Pa…

Scotch 6″ Precision Scissors, Great for Everyday Use (1446)
150 PCS Hot Glue Sticks, Full Size 8″ Long x 0.43″ Diameter Glue Sticks …
Step 2: Choose Your Art Style
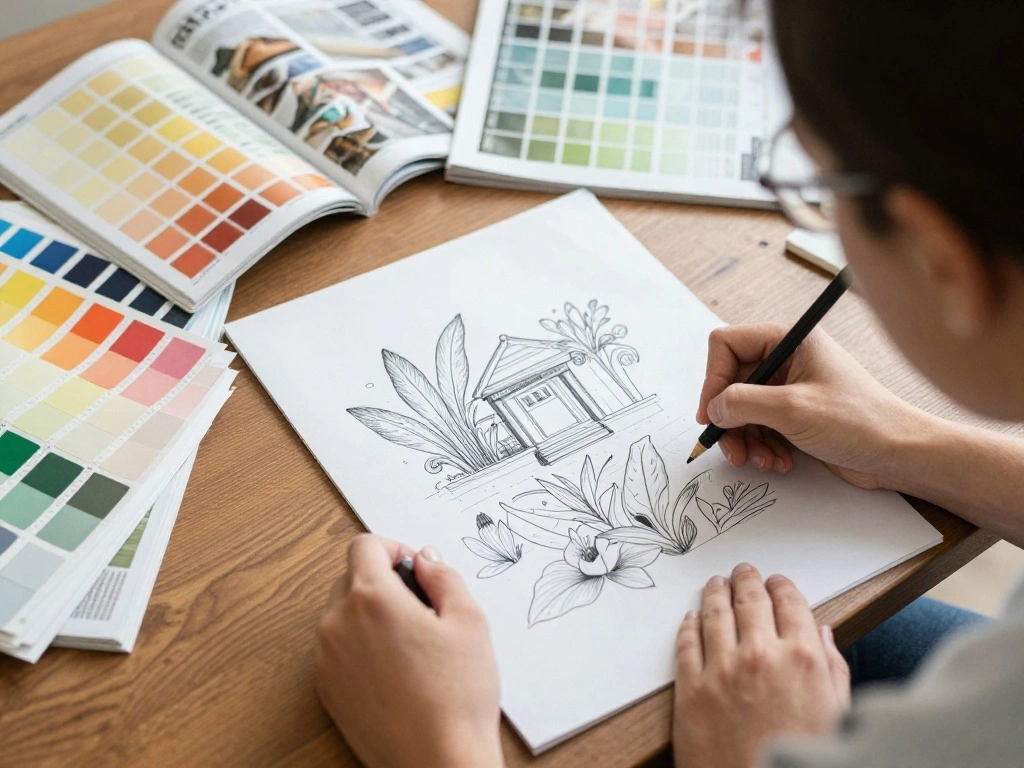
Decide on the style of art you want to create. This could range from abstract to collage or nature-inspired designs. Follow these steps:
- Look through magazines for images or patterns that catch your eye.
- Sketch out a rough idea of your artwork on paper.
- Choose a color palette that complements your home decor.
Warning: Avoid overwhelming your space with too many colors; stick to 2-4 main colors for a cohesive look.
Why this matters: Defining your style helps guide your creative process and ensures a more polished final product.
Estimated time for this step: 20 minutes.
Step 2: Choose Your Art Style
Editor’s Choice

1,500 Color Mixing Recipes for Oil, Acrylic & Watercolor: Achieve precis…
Shuttle Art Acrylic Paint, 36 Colors Acrylic Paint Set with Brushes & Pa…

Soucolor 9″ x 12″ Sketch Book, 100 Sheets Top Spiral Bound Sketchbook wi…
Step 3: Create Your Base Layer
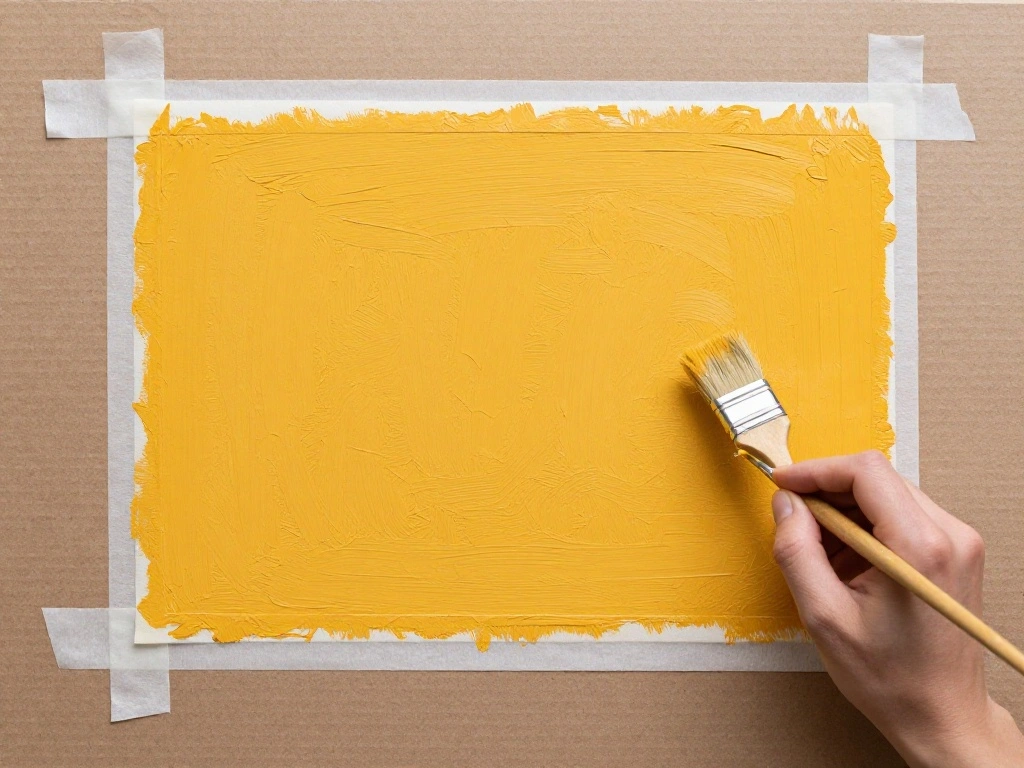
Your base layer sets the tone for the entire piece. Here’s how to create it:
- If using cardboard or canvas, paint it in your chosen base color.
- Allow the base layer to dry completely before moving to the next step.
- If you wish to add texture, consider gluing down some natural elements at this stage.
Pro Tip: Use a foam brush for even paint application and fewer brush strokes.
Why this matters: A well-prepared base layer enhances the overall look of your wall art.
Estimated time for this step: 30 minutes (including drying time).
Step 3: Create Your Base Layer
Editor’s Choice

Bates- Foam Paint Brushes, 2 Inch, 16 Pack, Wooden Handle, Sponge Brushe…

Liquitex BASICS Acrylic Paint, 250ml (8.5-oz) Tube, Titanium White
Krightlink Hot Glue Gun Kit with 30 Glue Sticks, Fast Preheating Hot Mel…
Step 4: Design Your Artwork
Now it’s time to bring your creativity to life! Here’s how to design your artwork:
- Cut out images or shapes from your magazines that resonate with your theme.
- Arrange them on your base layer without gluing initially to find the best layout.
- Once satisfied, start gluing down the pieces in layers to add depth.
Warning: Be careful with the amount of glue to avoid soggy paper.
Why this matters: Layering different elements creates visual interest and makes your art stand out.
Estimated time for this step: 45 minutes.
Step 4: Design Your Artwork
Editor’s Choice

Scissors Bulk Set of 25-Pack, Niutop 8″ Multipurpose Sharp Sewing Craft …

DlaeKua Art Lovers Gifts for Women Artist Gifts Painters Bracelet Art Te…

Liquid Fashion Tape – Clear Body Glue & Fashion Glue for Women – Cus…
Step 5: Add Finishing Touches
This step is all about refining your piece. Here’s how to add those final details:
- Use paint to add highlights or outlines around your cutouts for a polished look.
- Consider adding text or quotes using a marker or paint.
- Allow everything to dry thoroughly before moving on.
Pro Tip: Use a fine brush for detailed work to enhance your design.
Why this matters: Finishing touches can elevate your artwork from basic to stunning.
Estimated time for this step: 30 minutes.
Step 5: Add Finishing Touches
Editor’s Choice
Sharpie Permanent Markers, Ultra Fine Point, Black, 2 Count – Home, Scho…

Anezus Tiny Detail Paint Brushes 30 Pcs Fine Paint Brushes Set with 3 Si…
Apple Barrel, Vibrant Spectrum Collection Acrylic Craft Paint, PROMOABII…
Step 6: Prepare for Hanging
Get your artwork ready to be displayed! Here’s how:
- If using a frame, place your artwork inside and secure it.
- If hanging directly, attach string or twine to the back.
- Ensure it’s securely fastened to avoid accidents.
Warning: Make sure to use appropriate wall anchors if hanging heavy pieces.
Why this matters: Proper preparation ensures that your artwork is safely displayed and lasts longer.
Estimated time for this step: 20 minutes.
Step 6: Prepare for Hanging
Editor’s Choice

PerkHomy Natural Jute Twine 600 Feet Long Twine String for Crafts Gift W…

Command 15 lb Large Picture Hanging Strips 14 Pairs (28 Strips), Damage-…

TOGGLER SNAPTOGGLE Drywall Anchor with Included Bolts for 1/4-20 Fastene…
Step 7: Hang Your Artwork

Now it’s time to showcase your creation on the wall:
- Choose the perfect spot on your wall that complements your decor.
- Mark the spot where you’ll hang it, ensuring it’s level.
- Carefully hang your artwork and step back to admire your work!
Pro Tip: Use painter’s tape to outline where the frame will go; this helps visualize placement.
Why this matters: Hanging your artwork correctly enhances its visibility and impact.
Estimated time for this step: 15 minutes.
Step 7: Hang Your Artwork
Editor’s Choice

Torpedo Level Magnetic, Firecore 9 Inch Shockproof Small Leveler Tool wi…

Scotch Greener Masking Tape, 0.94 in x 60 Yard, 2050, 1 roll
Command 15 lb Large Picture Hanging Strips 14 Pairs (28 Strips), Damage-…
Pro Tips
- Color Harmony: Choose colors that complement your home’s existing palette.
- Texture Play: Incorporate materials with different textures for a dynamic look.
- Layering Techniques: Experiment with layering different elements to create depth.
- Seasonal Changes: Refresh your art with seasonal themes or colors for a new look.
- Involve Family: Make it a fun family activity by letting everyone contribute their ideas.
Pro Tips
Editor’s Choice
Simetufy 12 Pack 8×10 Canvas Boards for Painting, Blank Flat Canvas Pane…

28 PCS Precision Craft Tools Set Vinyl Weeding Tools Kit for Weeding Vin…

Colorations Paraben-Free Washable Tempera Paint for Kids – 1 Gallon Valu…
Common Mistakes to Avoid
Warning: Don’t rush the drying process. Rushed drying can ruin the final look.
Warning: Avoid overcrowding your design. Too much clutter can distract from your main focus.
Warning: Don’t skip measuring your hanging spots. Incorrect placement can lead to frustration.
Warning: Avoid cheap materials that may not hold up over time. Invest in a few quality items for longevity.
Warning: Don’t neglect to clean your workspace. A cluttered environment can stifle creativity.
Common Mistakes to Avoid
Editor’s Choice

20 Pcs Paint Brushes, Acrylic Painting Brush Set, Watercolor Brushes, Ac…
Simetufy 12 Pack 8×10 Canvas Boards for Painting, Blank Flat Canvas Pane…

GDMINLO Soft Tape Measure Double Scale Body Sewing Flexible Tailor Craft…
Troubleshooting Section
Problem: My paint isn’t sticking.
Solution: Ensure your surface is clean and dry before applying paint.
Problem: My artwork looks flat.
Solution: Add layers of texture or dimension using various materials.
Problem: The glue is seeping through the paper.
Solution: Use a lightweight glue and apply it sparingly.
Problem: My colors are muddy.
Solution: Stick to a limited palette and mix colors on a separate palette.
Problem: My art isn’t hanging straight.
Solution: Use a level tool to ensure it’s straight before securing it.
Troubleshooting Section
Editor’s Choice

Bluebird Thick Modeling Paste White 28.2 Oz / 800gm – High Density, Acry…

Elmer’s Clear Liquid School Glue, Washable, Safe, Nontoxic, 32 Ounces (1…

Winsor & Newton Galeria Acrylic Paint, 10 x 60ml (2–oz) Tube Paint Set
Variations/Alternative Methods
If you want to explore different styles, consider these options:
- Collage Art: Instead of paintings, use only magazine cutouts for a modern look.
- Nature Prints: Use leaves or flowers dipped in paint to create natural prints.
- Fabric Art: Repurpose old fabric scraps for a textile-based artwork.
Each method offers unique textures and styles, allowing you to customize based on your preference.
Variations/Alternative Methods
Editor’s Choice
Simetufy 12 Pack 8×10 Canvas Boards for Painting, Blank Flat Canvas Pane…
iBayam 3-Pack 8″ Heavy Duty Scissors with Ultra Sharp Blades and Comfort…

Smallbudi 15 Colors Large Acrylic Paint Set (33.8 oz,1000 ml) Art Painti…
FAQs
What if I don’t have paint? You can use markers, colored pencils, or even crayons as alternatives.
How long should I let my artwork dry? Allow at least 30 minutes for the glue and paint to dry fully.
Is it safe to use natural elements? Yes, but ensure they are dried and treated to prevent mold.
What if I don’t have canvas? Cardboard works great as a substitute for canvas.
Can I change my artwork later? Absolutely! You can always add to or modify your art as you wish.
FAQs
Editor’s Choice

Shuttle Art Acrylic Paint Set, 15 x 12ml Tubes Artist Quality Non Toxic …

Aleene’s AR6-2 Clear Gel Tacky Glue, 4 oz., 4 oz., Multicolor
Conclusion
Congratulations! You’ve taken the initiative to turn your bare walls into a reflection of your creativity. By following these steps, you’ve not only learned how to make wall art but also discovered the joy of crafting with items at home. Your space now speaks to your personal style and creativity.
As you admire your work, consider exploring more crafting projects or inviting friends and family for a DIY art night. Keep creating and let your walls tell your unique story!