Looking to refresh your home decor without breaking the bank? You’re in the right place! With the weekend approaching, many of us find ourselves craving a creative outlet. The joy of crafting something unique for your walls can be both fulfilling and eco-friendly, especially when you can use materials you already have. This post is dedicated to those who want to add a personal touch to their living space while being kind to the planet.
If you’re someone who loves home decor and enjoys DIY projects, then these easy DIY wall art ideas are just for you. They are perfect for individuals, families, or anyone looking to channel their inner artist without spending a fortune. Each project is designed to be simple yet impactful, making your space feel warm and inviting.
In this guide, I’ve gathered ten fun and budget-friendly art projects that not only look great but also allow you to unleash your creativity over the weekend. From painted rocks to fabric scrap wall hangings, you’ll find ideas that suit various tastes and skill levels. So grab your supplies, gather your loved ones, and get ready to transform your walls into a masterpiece!
Key Takeaways
– Discover 10 easy DIY wall art ideas that fit any skill level, allowing you to create stunning decor with minimal effort.
– Each project uses eco-friendly materials, many of which you might already have at home, making them budget-friendly and sustainable.
– Unleash your creativity with various artistic styles, from painted rocks to string art, ensuring there’s something for everyone.
– These DIY wall art projects are perfect for weekend crafting, giving you a fun way to spend your time while enhancing your living space.
– Transform your home with personalized touches that reflect your style, creating a warm and inviting atmosphere for you and your guests.
1. Painted Rock Wall Art
Transforming ordinary rocks into stunning wall art is a delightful way to express your creativity. The vibrant colors and intricate patterns you paint can bring joy and personality to your living space. Picture smooth stones adorned with inspiring quotes, cheerful mandalas, or whimsical designs, arranged beautifully on your wall or in a shadow box.
To make the most of this project, gather stones of similar sizes for a unified look. Opt for durable acrylic paints and finish with a clear coat for longevity. Choose a theme that resonates with your decor style, such as earthy nature motifs or playful abstracts.
Consider these tips to enhance your painted rock art:
– Pair different sizes of rocks for dynamic arrangements.
– Use bright colors to create eye-catching contrasts.
– Incorporate seasonal themes to keep your decor fresh.
This engaging project is not just fun; it also adds a personal touch to your home!
Painted Rock Wall Art
Editor’s Choice

Artkey Acrylic Paint Set, 16 Colors 2 oz/59 ml Acrylic Paint Kit for Pro…

Professional Artist Paint Brush Set of 12 – Painting Brushes Kit for Kid…

Mod Podge Spray Acrylic Sealer that is Specifically Formulated to Seal C…
2. Fabric Scrap Wall Hangings
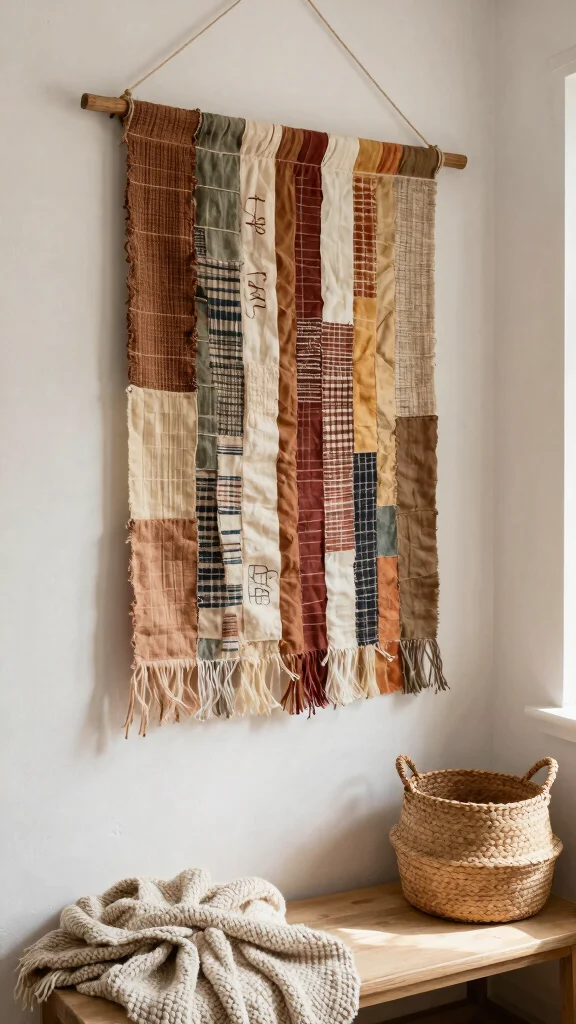
Fabric scrap wall hangings are a wonderful way to showcase your style while adding warmth and texture to your home. By combining various fabrics with unique colors and patterns, you can create a tapestry that reflects your personal taste. Imagine strips of fabric tied to a wooden dowel, forming a stunning display that enhances your space.
To implement this idea, mix solid and patterned fabrics for added visual depth. You can also embellish your hanging with beads or feathers for that bohemian touch. Hang this piece in a prominent area, like above a bed or sofa, to make a statement.
Try these suggestions for creating your fabric wall art:
– Use a variety of textures to enrich the visual experience.
– Incorporate natural tones for a serene vibe.
– Experiment with different lengths of fabric strips for variety.
This creative project not only recycles materials but also makes a bold decorative statement!
Fabric Scrap Wall Hangings
Editor’s Choice

50Pcs Wooden Dowel Rods 1/4 x 12 Inch Wood Sticks for Crafts, Precut Woo…

Boao 3 Pieces 3 Yards 62 Inch Wide Floral Cotton Fabric Rose Pattern Flo…
3. Upcycled Bottle Art
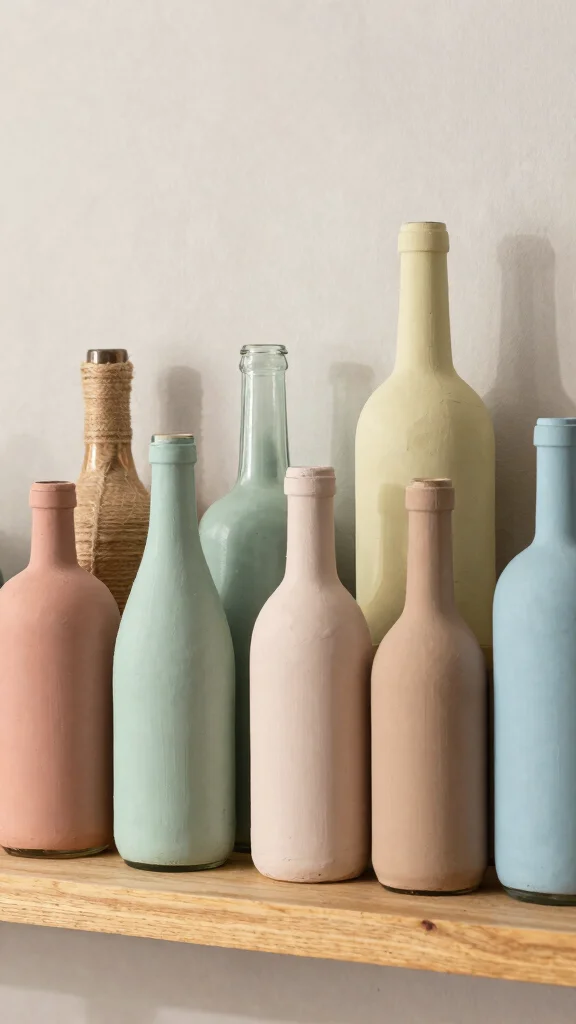
Upcycling glass bottles into captivating wall art is a fantastic way to blend sustainability with creativity. With some cleaning and drying, you can turn these bottles into colorful pieces that elevate your decor. Imagine grouping painted or twine-wrapped bottles on your wall, creating a beautiful display that suits your style.
Choose a color palette that complements your home, whether it’s coastal blues or rustic greens. Arrange bottles in clusters for a striking visual effect, or place them on shelves for a charming collection.
Keep these ideas in mind for your bottle art:
– Mix various bottle shapes for added interest.
– Add LED lights inside for a warm, inviting glow.
– Arrange them in odd numbers for a more dynamic presentation.
This project is not only visually appealing but also promotes eco-friendly practices!
As part of easy DIY wall art ideas, upcycled bottle art proves you don’t need cash to wow a room. Clean, paint, and cluster a few bottles on a wall, and you’ve created a colorful, eco-friendly focal point that feels personal and stylish.
Upcycled Bottle Art
Editor’s Choice

PerkHomy Natural Jute Twine 600 Feet Long Twine String for Crafts Gift W…
Shinylin 8 Set Pre Drawn Canvas Bags Set Paint and Sip Kit for Adults Fl…

upsimples Acrylic Shelves for Wall Decor, 15″ Display Shelf for Perfume,…
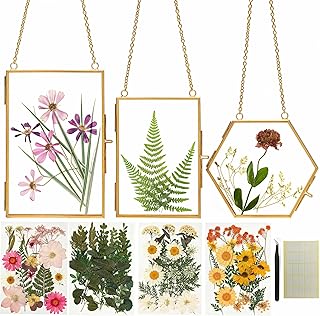
4. Nature Print Wall Art
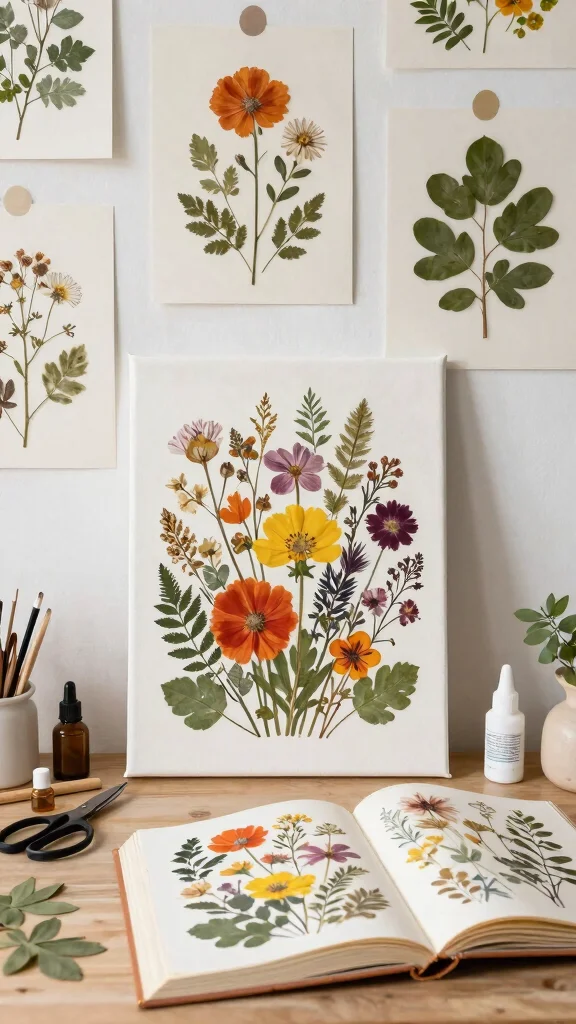
Bring the serene beauty of nature indoors with stunning nature prints! By collecting leaves, flowers, or ferns and pressing them, you can create organic pieces that resonate with the outdoors. Picture these pressed elements arranged on a canvas, forming a beautiful composition that adds life to your walls.
Experiment with different shapes and colors for a vibrant display. Layer overlapping prints for added depth, and consider framing your artwork to elevate its visual impact.
Here are some tips for your nature prints:
– Use a variety of plants for a diverse arrangement.
– Consider creating a gallery wall with multiple prints.
– Use natural wood frames to enhance the organic feel.
This simple yet striking project celebrates nature and brings a refreshing touch to your decor!
Nature Print Wall Art
Editor’s Choice

Inspirational Wall Art for Bedroom, Motivational Office Wall Art Decor, …
Relaxing Garden Pressed Flower Craft Kit for Adults & Women, DIY Floatin…
Framed Canvas Wall Art Beautiful Woman With Colorful Flowers, White Flow…
5. String Art Creations
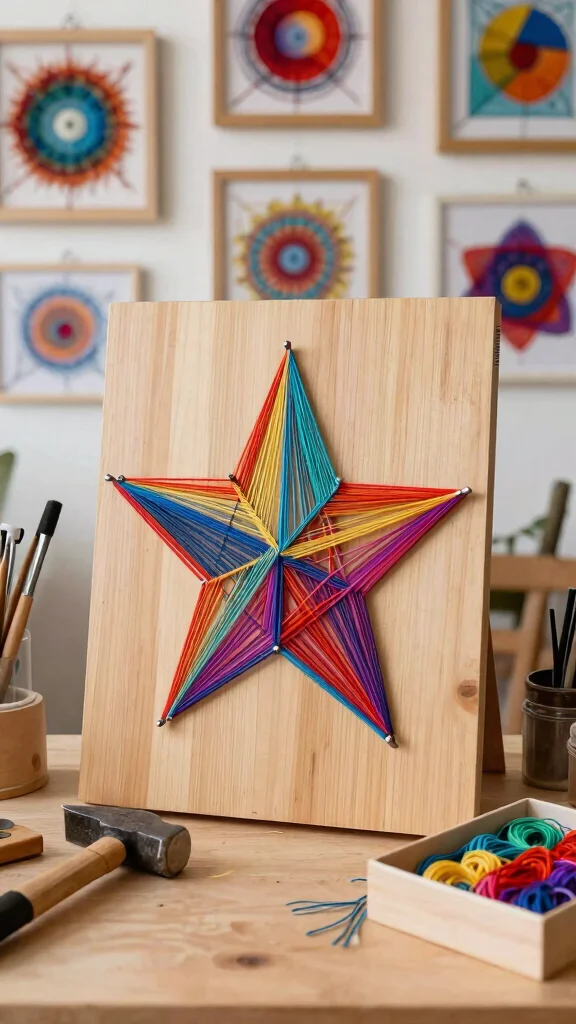
String art is a captivating way to merge creativity with craftsmanship, resulting in eye-catching designs. By hammering nails into a wooden board, you can outline shapes, such as hearts or stars, and fill them with colorful string. This DIY project not only sparks joy but also allows for endless customization with your favorite hues.
Secure the nails firmly to avoid damaging the wood, and select contrasting colors for your string to enhance your design. Consider creating a series of smaller pieces to form a fun gallery wall.
Take note of these tips for your string art:
– Use thicker string for a bolder look.
– Experiment with different patterns for unique designs.
– Incorporate personal elements to make it truly yours.
This engaging project results in beautiful artwork that will surely impress!
🖼️ Perfect Your Gallery Wall
Transform your space with our step-by-step workbook to create stunning wall displays effortlessly and stylishly.
String Art Creations
Editor’s Choice

Cousin 4472 Craft and Jewelry Mini Hammer, 6-Inch

HSTECH 12 Rolls 2mm 3 ply Colorful Natural Jute String for Artworks, Han…
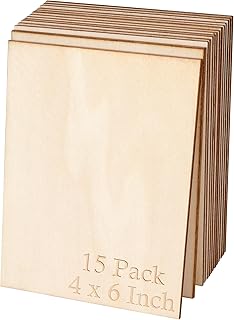
Blisstime 15PCS 4×6 Inch Wood Squares Unfinished Square Wood Pieces for …
6. DIY Wall Mural with Stencils
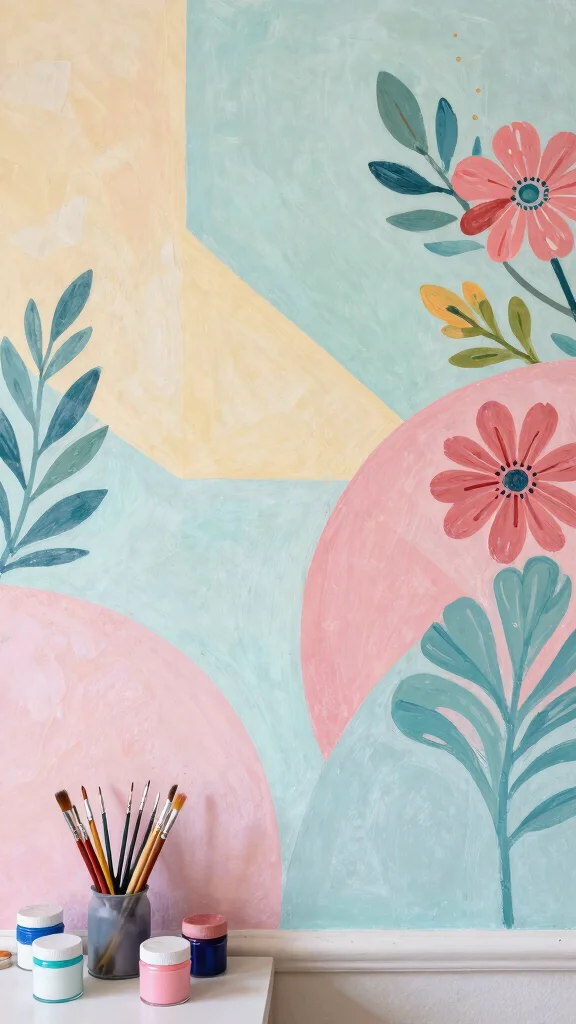
Elevate your decor with a stunning DIY wall mural using stencils! Choose a design that resonates with you, whether it’s geometric patterns, floral motifs, or whimsical scenes. Applying the stencil and filling it in with non-toxic paint transforms your wall into a work of art with minimal effort.
Plan your design on paper first to visualize the layout and use painter’s tape for crisp edges. Experimenting with colors can create depth and bring your mural to life.
Consider these suggestions for your stencil mural:
– Choose a large design for a dramatic effect.
– Layer colors to achieve a three-dimensional look.
– Use removable stencils for easy adjustments.
This project is an effortless way to infuse your space with personality and style!
📹 Related Video: How to Paint a Fresco Mural with Stencil Kit by Cutting Edge Stencils. DIY decor ideas.
DIY Wall Mural with Stencils
Editor’s Choice

5 Large Leaf Stencils – 12 x 16 Inch, Reusable Palm & Fern Leaf Stencils…

4 Rolls Premium Painters Tape, Blue Tape, Masking Tape, Paint Tape for M…

Shuttle Art Acrylic Paint, 36 Colors Acrylic Paint Set with Brushes & Pa…
7. Macramé Wall Hanging

Macramé is a charming way to introduce a bohemian flair into your home decor. By crafting knots with natural cotton ropes, you can create stunning wall hangings that showcase your artistic side. With numerous online tutorials available, you can choose designs ranging from simple to intricate, perfect for any skill level.
Hang your macramé piece above a couch or bed to add warmth and texture to the space. Select a color that harmonizes with your existing decor, and try different knotting techniques for unique patterns.
Here are some ideas to enhance your macramé art:
– Use a wooden dowel for a rustic touch.
– Experiment with color gradients for visual interest.
– Consider adding embellishments like wooden beads.
This fun project not only relaxes your mind but also adds an artistic touch to your home!
Difficulty Rating & Requirements
Overall Difficulty Rating: Easy
These DIY wall art projects are rated as easy, making them perfect for both beginners and seasoned crafters. You don’t need extensive skills or experience to get started. The techniques range from simple to slightly more involved but remain accessible, allowing anyone to create stunning pieces of art for their home.
Time Estimate:
⏱ Estimated time: 1-4 hours per project. Most projects can be completed in a single weekend. For example:
– Preparation and Planning: 30 minutes
– Execution: 1-3 hours depending on the complexity of your chosen art piece
– Drying/Finishing Time: Up to 24 hours for certain projects like painted canvases
Skill Requirements:
– Required skills: Basic crafting skills, painting, cutting, and design layout
– Beginner-friendly: Yes! Most projects can be done by anyone with a little time and patience
– Skills that can be learned include painting techniques and design principles, while skills like sewing for fabric art may require some prior experience
Tools & Materials Needed:
🧰 Essential items checklist:
– Paints (acrylic or watercolor) – Required
– Brushes or sponges – Required
– Canvas or wood boards – Required
– Scissors – Required
– String or yarn for string art – Required
– Glue (hot glue or craft glue) – Required
– Stencils (optional but helpful) – Optional
– Framing materials (optional if you want to frame your art) – Optional
Step-by-Step Overview:
1. Choose Your Project (30 minutes): Select from a variety of options like painted rocks or fabric wall hangings. Gather inspiration online or from your surroundings.
2. Gather Materials (1 hour): Collect all tools and materials from your checklist. Ensure you have a clear space to work.
3. Create Your Art (1-3 hours): Follow the specific steps for your chosen project. Whether you’re painting, gluing, or stringing, take your time to enjoy the process.
4. Dry and Finish (Up to 24 hours): Allow your artwork to dry completely. If you’re using paint or glue, ensure everything is fully set before hanging it up.
Cost Comparison:
Professional vs DIY: Hiring a professional artist can cost anywhere from $100 to $500 or more for custom wall art. In contrast, you can create your own beautiful wall decor for as little as $20-$50, depending on the materials you select. If you want a unique, personal touch, DIY projects are the way to go! Consider hiring help only if you’re looking for something very specific or complex that you’re not comfortable tackling alone.
Macramé Wall Hanging
Editor’s Choice

Macramè Plant Hangers Patterns: 50+ Easy Steps With HD Illustrations T…

NOANTA Natural Macrame Cord 3mm x 109Yards, Beige Macrame Rope, Cotton C…

MIGO Creates DIY Macrame Kit for Beginners with 9 Macrame Projects Ebook…
8. Washi Tape Art
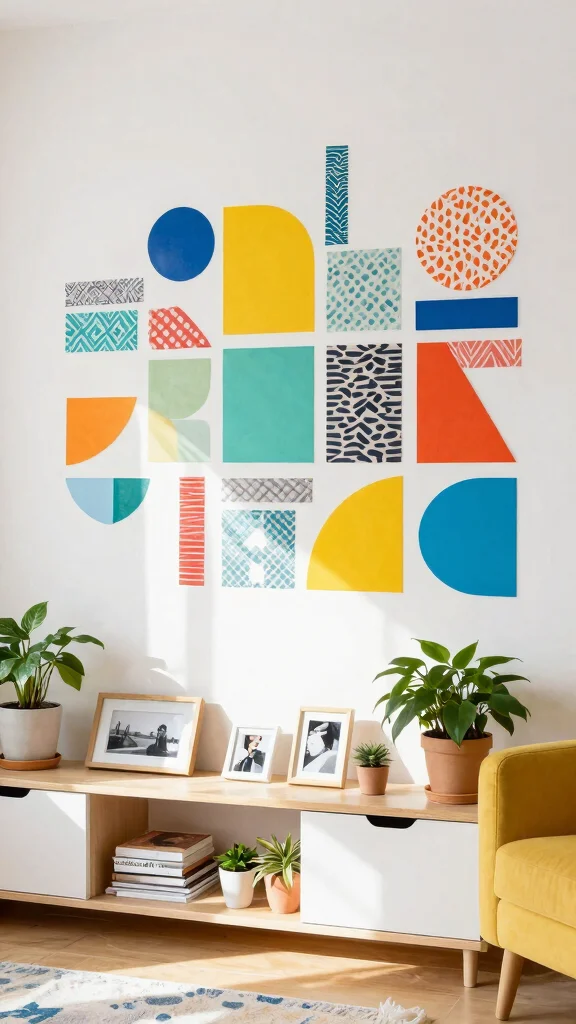
Create playful and colorful wall art with washi tape, an easy and mess-free alternative to paint. With a wide selection of patterns and colors, you can design anything from simple shapes to intricate lines. Simply peel and stick the tape onto your wall, allowing your creativity to flow freely.
Consider layering different tapes for added depth and visual interest. This project is perfect for those who want a temporary installation that can be easily changed or removed. You can also use washi tape to frame photos for a cohesive look.
Here are some tips for your washi tape art:
– Experiment with geometric patterns for a modern touch.
– Use bright colors to create a cheerful atmosphere.
– Mix various widths of tape for added dimension.
This creative endeavor is a fun way to brighten your space and express your personality!
Washi Tape Art
Editor’s Choice

PAGEMORE 32 Rolls Colorful Cute Floral Writable Washi Tape Set, Decorati…

Makeup Bag Gifts for Artists Women, Art Lover Gift Thank You Gifts for P…
Relaxing Garden Pressed Flower Craft Kit for Adults & Women, DIY Floatin…
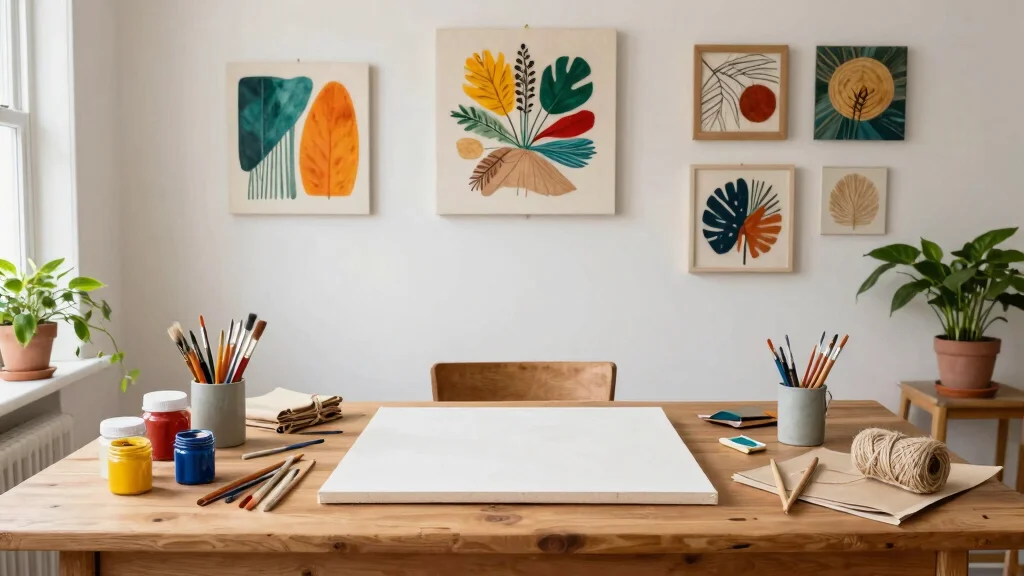
9. Painted Canvas Art
Unleash your inner artist with painted canvas art that reflects your unique vision. Grab a blank canvas and let your creativity soar using non-toxic paints to create anything from abstract pieces to serene landscapes. There’s truly no wrong way to paint, so enjoy the process and let your imagination guide you.
Begin with a color palette that resonates with your room’s style, and don’t hesitate to layer colors for depth and texture. Experiment with different brush techniques to achieve various effects.
Consider these suggestions for your canvas art:
– Start with a simple design and build complexity.
– Use bold colors to create an impactful statement piece.
– Sign your artwork to personalize your creation.
This rewarding project not only beautifies your home but also allows you to express your artistic voice!
Painted canvas art is your fastest route to personalized wall art, and it’s an easy DIY wall art idea you can finish this weekend. Start with a simple color palette, layer colors for depth, and use non-toxic paints to keep your space eco-friendly. No rules, just your style.
Painted Canvas Art
Editor’s Choice

Simetufy 12 Pack 8×10 Canvas Boards for Painting, Blank Flat Canvas Pane…

TMOL Acrylic Paint Set, 24 Colors (2 oz/Bottle) with 12 Art Brushes, Art…

20 Pcs Paint Brushes, Acrylic Painting Brush Set, Watercolor Brushes, Ac…
10. Photographic Collage
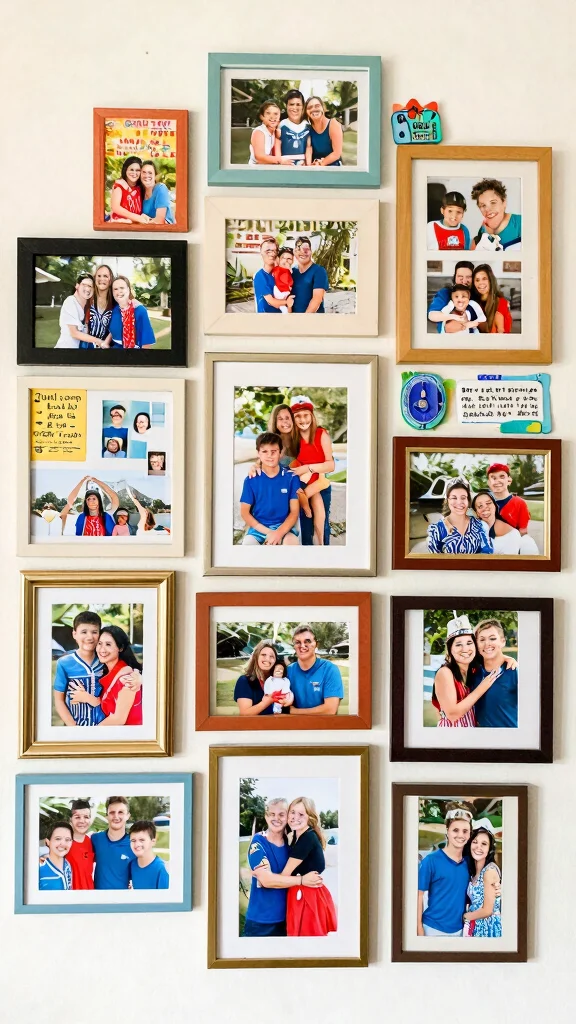
A photographic collage is a heartfelt way to showcase your cherished memories in a creative format. Select a range of photos that capture joyful moments, adventures, or loved ones, and print them in various sizes for visual interest. Arranging these images on a poster board or directly on your wall creates a stunning visual display that tells your story.
Consider mixing in decorative elements like quotes or small artwork to add character. You can choose to use various frames for an eclectic look or keep it uniform for a minimalist style.
Here are some ideas to enhance your collage:
– Use a theme to guide your photo selection, like travel or family.
– Create a balanced layout that draws the eye.
– Utilize removable adhesive to protect your walls.
This meaningful project personalizes your space while celebrating your most treasured memories!
Photographic collages turn memories into wall art you can finish this weekend. Use photo prints in mixed sizes, a few thrifted frames, and eco-friendly materials for easy DIY wall art ideas you’ll be proud to display.
Photographic Collage
Editor’s Choice

Free Period Press Collage Kit Vol. 1: 120 Pages of Photos, Illustrations…

Jkolalin Customized Best Friend Birthday Gifts for Women, Personalized P…

Great Quotes from Great Women: Words from the Women Who Shaped the World…
Conclusion
Creating your own wall art not only personalizes your space but also allows you to explore your creativity without breaking the bank.
These easy DIY wall art ideas are perfect for a weekend project, and they make use of eco-friendly materials, proving that sustainability can be beautiful. What’s more? You get to enjoy the satisfaction of crafting something unique and stunning for your home. Whether you choose to paint, build, or collage, each of these projects is sure to bring a touch of your personality into your living space. Happy crafting!
Note: We aim to provide accurate product links, but some may occasionally expire or become unavailable. If this happens, please search directly on Amazon for the product or a suitable alternative.
This post contains Amazon affiliate links, meaning we may earn a small commission if you purchase through our links, at no extra cost to you.
Frequently Asked Questions
What are some easy, eco-friendly wall art ideas I can start this weekend?
Here are a few easy DIY wall art ideas that are eco-friendly and perfect for a weekend DIY crafts sprint. First, try an upcycled magazine collage on a stretched canvas or sturdy cardboard: tear colorful pages into shapes, arrange into a composition, and seal with a thin layer of mod podge. Let it dry and frame it for instant impact.
Second, make a nature-inspired leaf print panel: collect clean leaves, apply a thin layer of water-based paint, and press onto canvas or paper, repeat with complementary colors. Finish with a clear non-toxic sealer.
Third, create a fabric scrap wall hanging by layering scraps on a fabric-backed board or stretching on a small frame; use safe fabric glue or a few stitches, then trim edges for a neat look.
Fourth, design a reclaimed wood plank art: sand a piece of scrap wood, paint a simple pattern or quote with stencils, and seal with a water-based finish. All ideas use budget-friendly art ideas and produce striking DIY home decor.
How can I create budget-friendly wall art using recycled materials?
Eco-friendly doesn’t have to be expensive. Start with wall art projects like a magazine collage on cardboard, a fabric patchwork panel, or a simple cardboard cutout painted with non-toxic paints. For each, gather materials you already have: old magazines, fabric scraps, cardboard, or bottle caps for texture. Apply glue and seal with a matte spray or mod podge. Frame or mount on a cheap wood board for a polished finish. Tip: pick a cohesive color palette to keep it looking intentional rather than random. With a little planning, you can achieve budget-friendly art ideas that still look high-end.
What simple tools and supplies do I need for weekend DIY crafts for wall decor?
Here’s a lean, eco-friendly toolkit for weekend DIY crafts wall decor: scissors, a craft knife, a metal ruler, a pencil, a hot glue gun with low-VOC glue, a small hammer if you’re framing, and non-toxic paints in a few colors with brushes. Add a few canvases or lightweight frames, scrap materials like fabric or paper, masking tape, and a water-based sealant. You can often source many items second-hand to keep it budget-friendly. Pro tip: pick one project at a time and lay out materials before you start to stay organized.
How can I tailor eco-friendly wall art projects to fit different rooms and styles?
Match your creative wall decoration to the room by choosing colors, textures, and frame styles that echo the space. For a living room, go bold with a large canvas or reclaimed wood piece in contrasting colors; for a calming bedroom vibe, use muted tones and natural textures like linen or jute; for an office, opt for clean lines, geometric shapes, and a crisp color palette. Use interchangeable pieces or modular frames so you can refresh the look with wall art projects without starting over. Always sketch a quick palette first to keep things cohesive with DIY home decor goals.
How long do these easy DIY wall art ideas take and how should I plan a weekend project?
Most easy DIY wall art ideas can be planned in a couple of hours and finished by the end of the weekend depending on drying times. Plan about 1 hour for gathering materials and setup, 1–2 hours for execution, and 1–4 hours of drying time if you’re using paint or glue. Treat it as a weekend DIY crafts session: start with a quick mock-up on paper, then build the final piece. If you finish early, you can start a second piece or swap in a different color palette to keep things moving and fun.
Related Topics
easy DIY wall art
eco-friendly decor
budget-friendly art
weekend crafts
creative wall decoration
DIY home decor
wall art projects
beginner friendly
upcycled art
minimalist design
colorful wall art
art for small spaces