Problem Statement: Renting a home often comes with restrictions, especially when it comes to hanging art. Many landlords prohibit drilling holes in the walls, leaving you unsure how to display your favorite pieces.
Solution Preview: This guide provides you with simple, effective methods to hang art weighing over 5 pounds without damaging your rental walls. By following these steps, you’ll create a stylish space that reflects your personality while keeping your security deposit safe.
What You’ll Learn: You will learn various techniques and tools that allow you to securely hang your art, ensuring it stays in place without the need for drilling.
Difficulty Level: beginner
Time Estimate: 30-60 minutes
Engaging Hook: Why let your walls remain bare when you can showcase stunning art without a single drill?
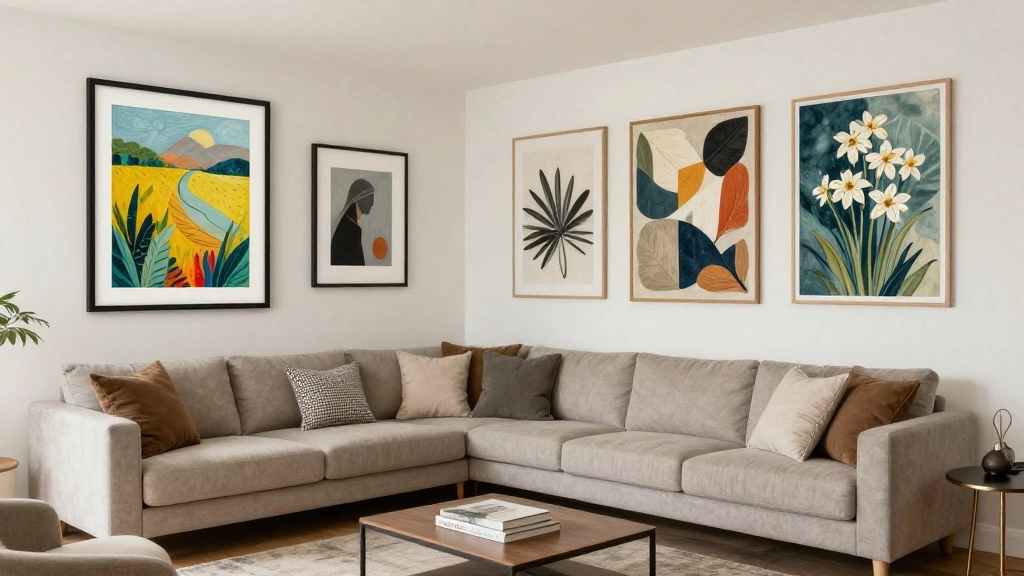
Image Prompt: Show a living room with art pieces hung on the walls without visible hardware.
TL;DR Summary
- Use adhesive hooks or strips to hang art without drilling.
- Consider using a gallery wall for multiple pieces.
- Use a level to ensure straight placement.
- Always check weight limits for adhesive products.
TL;DR Summary
Editor’s Choice

Torpedo Level Magnetic, Firecore 9 Inch Shockproof Small Leveler Tool wi…

Command 15 Lb XL Heavyweight Wall Hook, Damage Free Hanging Wall Hook wi…

Command 15 lb Large Picture Hanging Strips 14 Pairs (28 Strips), Damage-…
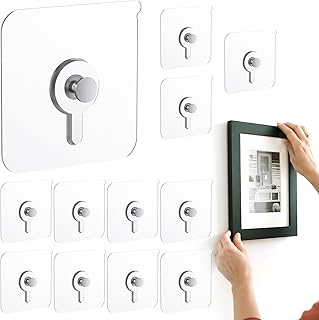
Prerequisites/Materials Needed
- Adhesive hooks or strips (make sure they can hold over 5 pounds)
- Level tool
- Measuring tape
- Pencil
- Clean cloth (for surface preparation)
Prerequisites/Materials Needed
Editor’s Choice

Adhesive Wall Hooks for Hanging Heavy Duty 50 lbs Large Hooks for Walls …

Gorilla Heavy Duty Double Sided Mounting Tape, Black Tape, 1″ x 120″ (Pa…

PREXISO Multi Surface Laser Level LED Light Vial, 30Ft Horizontal & Vert…
Skill Level & Time Estimate
Skill Level: beginner
Time Estimate: 30-60 minutes
Breakdown:
- Gather materials: 5-10 minutes
- Prepare the wall: 5-10 minutes
- Measure and mark for placement: 10-15 minutes
- Attach hooks/strips: 10-15 minutes
- Hang art: 5-10 minutes
Skill Level & Time Estimate
Editor’s Choice

ZESLMG Adhesive Wall Hooks for Hanging, 16 Pack Self Sticky Hooks Heavy …
Step 1: Gather Your Materials
Before you begin, ensure you have all the necessary materials at hand. This includes adhesive hooks or strips, a level, measuring tape, a pencil, and a clean cloth.
1. Check the weight capacity of your adhesive hooks or strips; make sure they can hold more than 5 pounds.
2. Lay out your tools on a flat surface for easy access.
3. Clean the wall area where you plan to hang the art using the cloth to remove dust or grease.
Pro Tip: Read the instructions on the adhesive hooks or strips to understand their specific application processes.
Why this matters: Having everything ready saves time and ensures a smoother process.
Time Estimate: 5-10 minutes.
Image Prompt: Show all materials laid out on a table.
Step 1: Gather Your Materials
Editor’s Choice
Torpedo Level Magnetic, Firecore 9 Inch Shockproof Small Leveler Tool wi…
Command 15 lb Large Picture Hanging Strips 14 Pairs (28 Strips), Damage-…
12 Pcs Picture Hangers without Nails, 20 Ibs Load Heavy Duty Self Pictur…
Step 2: Measure and Mark the Wall
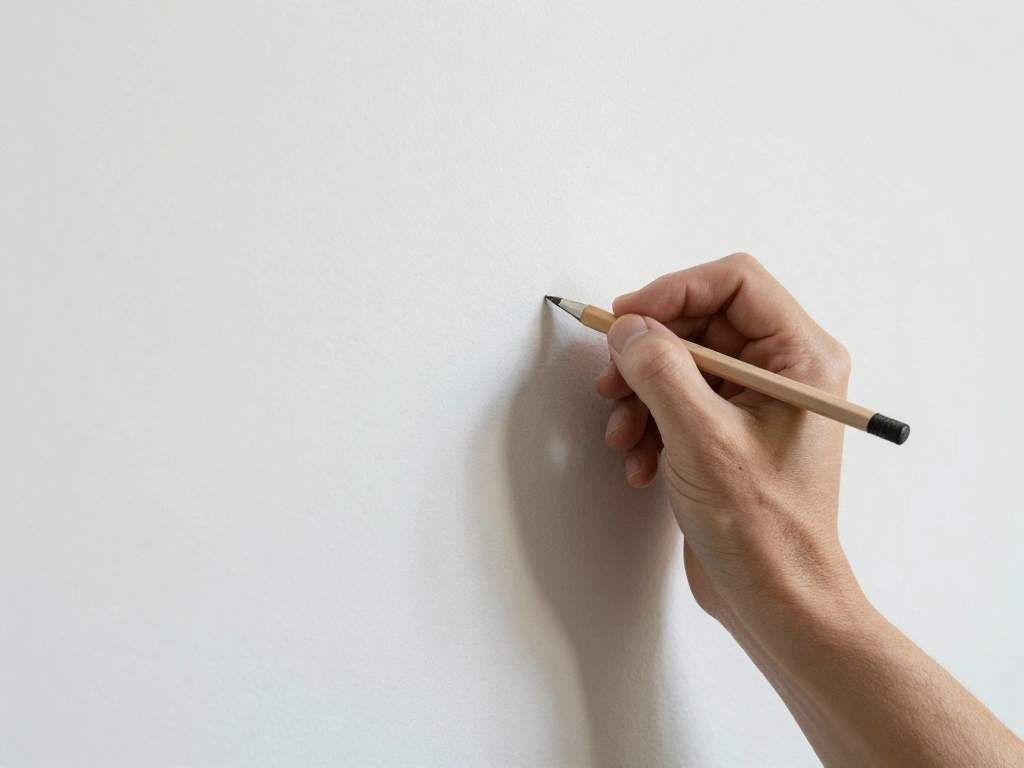
Now it’s time to decide where you want to hang your artwork. Accurate measurements are key to achieving a polished look.
1. Use the measuring tape to find the center of the wall space you want to use.
2. Mark the center point lightly with a pencil.
3. Hold your artwork up and use it to determine where the top will sit.
4. Measure down from the top of the piece to find the ideal placement for the adhesive hook or strip.
Warning: Avoid marking too hard; pencil marks should be light enough to erase later.
Why this matters: Proper placement ensures that your artwork is centered and visually appealing.
Time Estimate: 10-15 minutes.
Image Prompt: Show someone measuring and marking a wall with a pencil.
Step 2: Measure and Mark the Wall
Editor’s Choice

Level Hang Magnetic Ruler, Precisely measure the frame dimensions for Wa…
Command 15 Lb XL Heavyweight Wall Hook, Damage Free Hanging Wall Hook wi…
Step 3: Prepare the Wall Surface
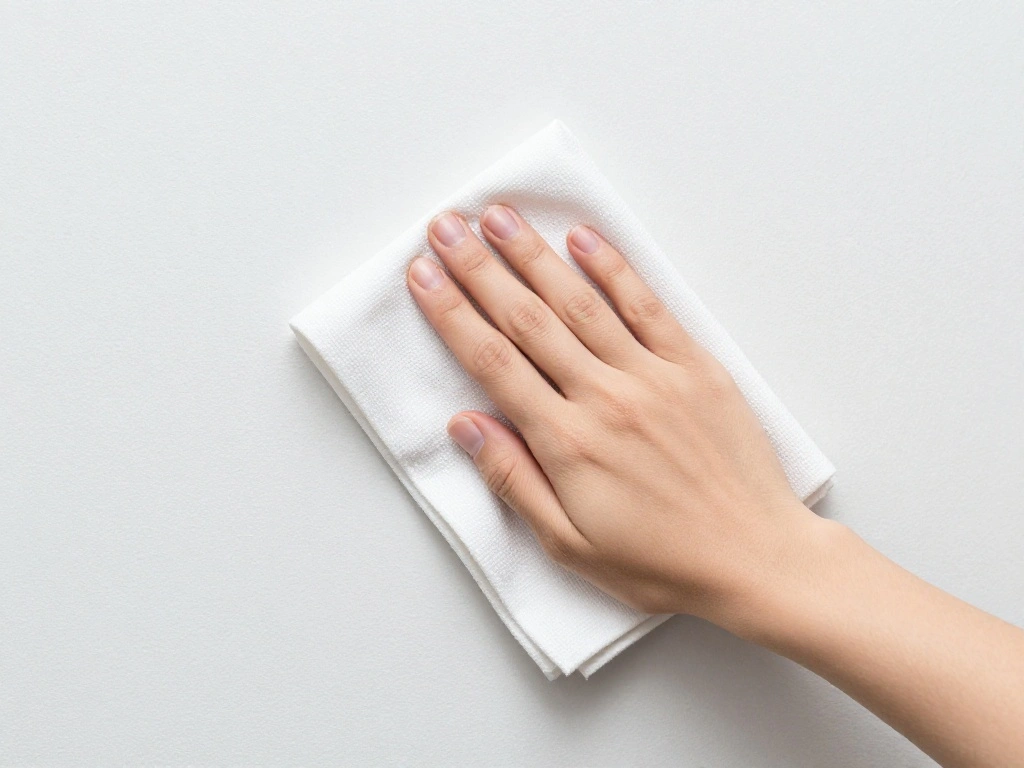
Preparation is crucial for ensuring that your adhesive hooks or strips adhere properly.
1. Use a clean cloth to wipe the area where you’ll attach the adhesive.
2. Make sure the surface is dry and free from dust.
3. Allow any cleaning products to dry completely before proceeding.
Pro Tip: If the wall is textured, consider using a smooth area for better adhesion.
Why this matters: A clean, dry surface allows for maximum adhesion, reducing the risk of your art falling.
Time Estimate: 5-10 minutes.
Image Prompt: Show a clean wall being wiped down with a cloth.
Step 3: Prepare the Wall Surface
Editor’s Choice

Command 20 lb XL 8 Pairs Heavyweight Picture Hanging Strips (16 Strips),…
Adhesive Wall Hooks for Hanging Heavy Duty 50 lbs Large Hooks for Walls …

Max Strip Painter’s Prep | 22 oz | Pre-Painting and Refinishing Surface …
Step 4: Attach Hooks or Strips
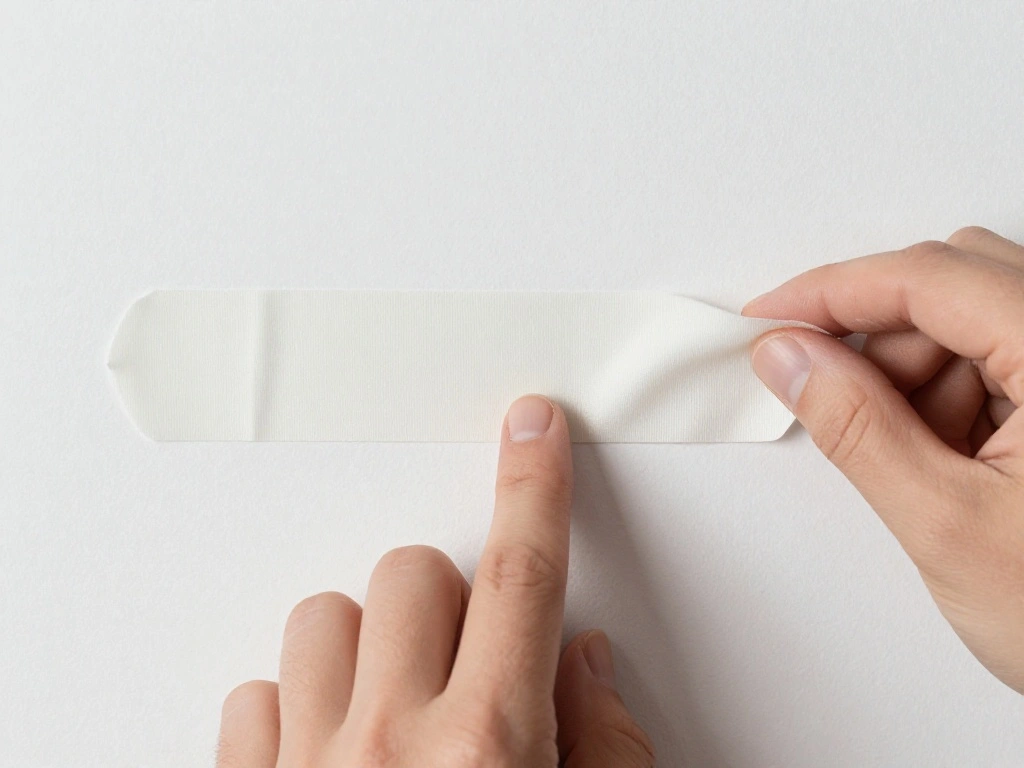
Now that your wall is prepped, it’s time to attach the hooks or strips.
1. Follow the manufacturer’s instructions for your specific product.
2. Apply the adhesive to the wall at the marked location, pressing firmly for the recommended time.
3. Wait for the adhesive to set as per the instructions; this may vary by product.
Warning: Do not hang the artwork until the adhesive has fully cured to prevent it from falling.
Why this matters: Correct application ensures that your art will stay securely in place.
Time Estimate: 10-15 minutes.
Image Prompt: Show someone applying adhesive strips to a wall.
Step 4: Attach Hooks or Strips
Editor’s Choice
Command 15 lb Large Picture Hanging Strips 14 Pairs (28 Strips), Damage-…
12 Pcs Picture Hangers without Nails, 20 Ibs Load Heavy Duty Self Pictur…

Gorilla Mounting Putty, Natural Tan Color, 168 Pre-Cut Squares (Pack of …
Step 5: Hang Your Artwork
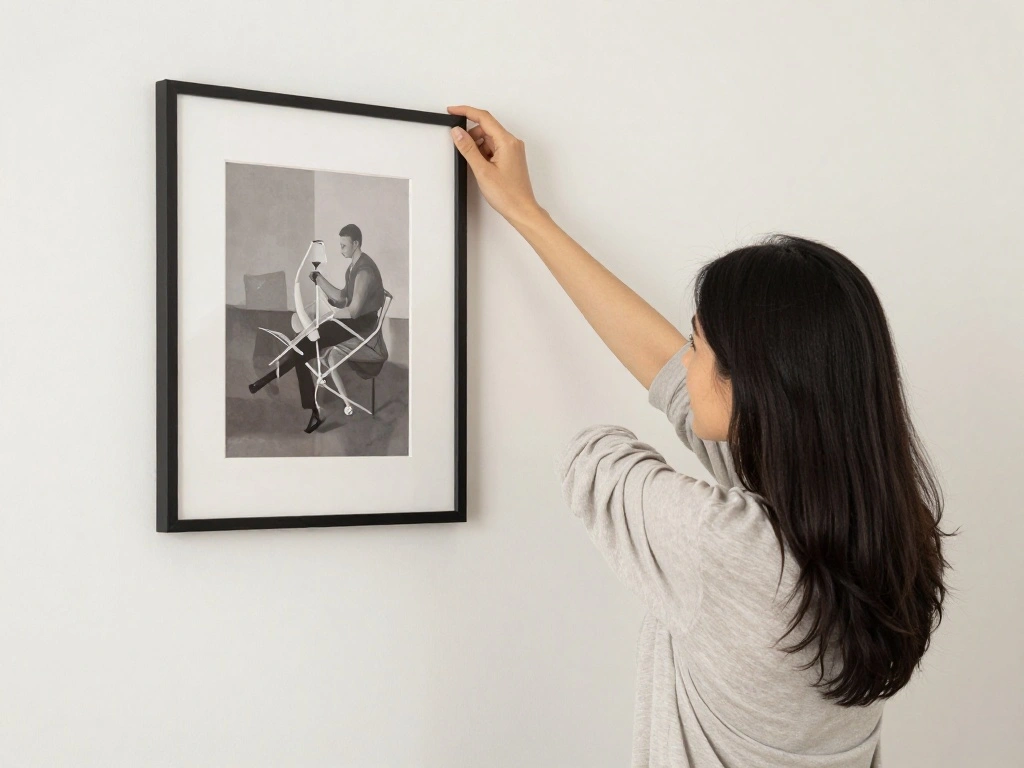
With the hooks or strips securely in place, you can now hang your artwork.
1. Align the top of your artwork with the hook or strip.
2. Gently press the artwork onto the hook or strip, ensuring it is secure.
3. Use a level to check that your art is straight.
Pro Tip: If hanging multiple pieces, consider a gallery arrangement for an eye-catching display.
Why this matters: Ensuring your art is level not only looks professional but also prevents it from becoming unbalanced over time.
Time Estimate: 5-10 minutes.
Image Prompt: Show someone hanging artwork on a wall.
Step 5: Hang Your Artwork
Editor’s Choice

Laser Level Line Tool, Multipurpose Laser Level Kit Standard Cross Line …
12 Pcs Picture Hangers without Nails, 20 Ibs Load Heavy Duty Self Pictur…

MOVELYST 60-Pairs(120 Strips) Large Picture Hanging Strips Heavy Duty, R…
Step 6: Adjust and Fine-Tune Placement

After hanging, take a step back to assess the overall look.
1. Adjust the position of your artwork as needed for an even look.
2. Use the level again to ensure it remains straight.
3. Make any minor adjustments to the surrounding decor for balance.
Warning: Avoid pulling on the artwork too hard, as this can dislodge the adhesive.
Why this matters: Fine-tuning ensures that your art enhances the space and creates visual harmony.
Time Estimate: 5-10 minutes.
Image Prompt: Show someone stepping back to look at the artwork on the wall.
Step 6: Adjust and Fine-Tune Placement
Editor’s Choice

Picture Hanging System with Wall Rails, Art Hanging Kit Including 4 x 24…
Command 15 Lb XL Heavyweight Wall Hook, Damage Free Hanging Wall Hook wi…
Command 15 lb Large Picture Hanging Strips 14 Pairs (28 Strips), Damage-…
Step 7: Enjoy Your Newly Decorated Space
Congratulations! You’ve successfully hung your art without drilling.
1. Take a moment to appreciate your work and the transformation of your space.
2. Consider adding more pieces to create a cohesive theme.
3. Regularly check the stability of your hung art, especially if you notice any shifts.
Pro Tip: Change your art seasonally to keep your space fresh and exciting.
Why this matters: Enjoying your art elevates your living environment, making it feel more like home.
Time Estimate: 5 minutes.
Image Prompt: Show someone admiring their newly hung artwork in a cozy setting.
Step 7: Enjoy Your Newly Decorated Space
Editor’s Choice
Command 15 Lb XL Heavyweight Wall Hook, Damage Free Hanging Wall Hook wi…

Uniclife 20 Pcs Adhesive Picture Hooks 20 lbs Max 2.2”Load No Drill Sc…
Pro Tips
- Weight Check: Always know the weight of your art before choosing adhesive products.
- Gallery Wall: Arrange smaller pieces together to create a stunning display.
- Seasonal Changes: Rotate art for fresh looks throughout the year.
- Wall Decor: Consider other wall decor like mirrors or shelves for variety.
- Test Adhesion: Before hanging, test a small piece of the adhesive to ensure it works with your wall type.
Pro Tips
Editor’s Choice
MOVELYST 60-Pairs(120 Strips) Large Picture Hanging Strips Heavy Duty, R…
Command 20 lb XL 8 Pairs Heavyweight Picture Hanging Strips (16 Strips),…

STAS Cliprail Pro Picture Hanging System Set – Covers 19.69 ft of Wall S…
Common Mistakes to Avoid
Warning: Using the wrong adhesive can lead to falling art.
Always check the weight limit of your adhesive hooks.
Warning: Not cleaning the wall can prevent proper adhesion.
Always clean the wall before applying adhesive.
Warning: Forgetting to allow adhesive to cure can result in art falling.
Always follow the manufacturer’s instructions regarding curing time.
Warning: Not measuring properly can result in uneven placement.
Always measure carefully before hanging.
Warning: Overloading adhesive hooks can cause damage.
Always check the weight limit before hanging art.
Common Mistakes to Avoid
Editor’s Choice
Command 15 lb Large Picture Hanging Strips 14 Pairs (28 Strips), Damage-…

Zep Home Pro Clean Eraser Wipes 50 count- R59112- Removes Scuffs, Handpr…
Command 15 Lb XL Heavyweight Wall Hook, Damage Free Hanging Wall Hook wi…
Troubleshooting Section
Problem: Art falls shortly after being hung.
Solution: Check the weight limit of the adhesive used and replace if necessary.
Problem: Adhesive strips don’t adhere well.
Solution: Clean the area thoroughly and try a different adhesive product.
Problem: Artwork is not aligned.
Solution: Use a level to adjust the alignment.
Problem: Wall damage from adhesive removal.
Solution: Use a hairdryer to gently heat the adhesive and peel off slowly.
Problem: Difficulty removing the artwork without damaging it.
Solution: Use a gentle twisting motion to release it from the adhesive.
Troubleshooting Section
Editor’s Choice
Command 20 lb XL 8 Pairs Heavyweight Picture Hanging Strips (16 Strips),…

Goo Gone Spray Adhesive Remover Gel 12 Oz with Scraper, Removes Glue, St…

3-in-1 Picture Hanging Tool, All-in-One Art Hanging Kit with Leveling, P…
Variations/Alternative Methods
Option 1: Velcro Strips: Great for lightweight art; easy to remove and reposition.
Option 2: Command Strips: Ideal for heavy art; available in various weight capacities.
Option 3: Picture Hanging Adhesive Putty: Works well for smaller pieces and is easily removable.
When to Use: Choose based on the weight of the art and how permanent you want the installation to be.
Pros and Cons: Velcro allows easy removal but may not hold heavy pieces; Command Strips provide strong support but require careful application.
Variations/Alternative Methods
Editor’s Choice

Command 4 lb Small Picture Hanging Strips 36 Pairs (72 Strips), Damage-F…
Gorilla Mounting Putty, Natural Tan Color, 168 Pre-Cut Squares (Pack of …

20 Sets 4 in.x 1 in. Hook and Loop Tape Sticky Back, Double-Sided Adhesi…
FAQs
What if I don’t have adhesive strips? You can use Velcro strips or a strong mounting tape as alternatives.
How long should I wait before hanging art? Wait the recommended time specified on the adhesive package for the best results.
Is it safe to hang heavy art? Yes, as long as you use the appropriate adhesive that can support the weight.
What if I want to change the art later? Most adhesive products allow for easy removal; check the instructions for guidance.
Can I reuse adhesive strips? Most are not reusable, so consider purchasing extra if you plan to rearrange frequently.
FAQs
Editor’s Choice

VELCRO Brand Heavy Duty Fasteners | 4×2 Inch Strips with Adhesive 8 Sets…

EZlifego Double Sided Tape Heavy Duty, Nano Double Sided Adhesive Tape, …
Command 20 lb XL 8 Pairs Heavyweight Picture Hanging Strips (16 Strips),…
Conclusion
You’ve successfully learned how to hang art heavier than 5 pounds in your rental without drilling!
Celebrate your newfound skills and the beautiful decorations you’ve added to your space. Consider exploring other DIY decor projects to enhance your living environment further.
Remember, the key to a stylish home is creativity and resourcefulness. Enjoy your art and the personal touch it brings to your rental!
Image Prompt: Show a beautifully decorated room with various art pieces displayed.