
Are you tired of traditional gallery walls that require constant rearranging every time you add a new piece? Creating a gallery wall that evolves over time can feel daunting, but it doesn’t have to be! With the right planning and strategy, you can design a stunning wall that allows for seamless additions without the hassle of rehanging everything.
In this guide, you will learn how to craft a gallery wall that not only looks great but also accommodates future artwork. By the end, you’ll have a personalized gallery wall that reflects your evolving taste and experiences.
This guide is designed for those with an intermediate skill level and will take an estimated 2-3 hours to complete. Get ready to transform your space with a beautiful gallery wall that grows alongside you!
TL;DR Summary
- Plan your gallery wall layout to maximize space.
- Use a flexible hanging system for easy changes.
- Incorporate diverse frame styles for visual interest.
- Regularly update your wall with new pieces without needing to rearrange everything.
TL;DR Summary
Editor’s Choice

Vittanly 15 Pack Picture Frames Collage Wall Decor for Mounting or Table…

6 Sets Adjustable Hanging Wire Kit, Stainless Steel Multipurpose Suspens…
Prerequisites/Materials Needed
- Frames: Various sizes (4-6 frames)
- Art Pieces: Prints, photos, or paintings (5-10 pieces)
- Hanging System: Picture hanging strips or a rail system (1 set)
- Measuring Tape: For accurate placements (1 piece)
- Level: To ensure frames hang straight (1 piece)
- Pencil: For marking wall (1 piece)
Prerequisites/Materials Needed
Editor’s Choice
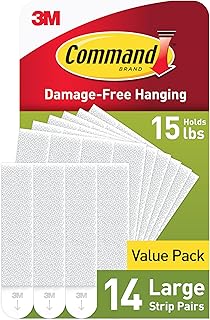
Command 15 lb Large Picture Hanging Strips 14 Pairs (28 Strips), Damage-…

Laser Measure Device, MiLESEEY 229ft Digital Laser Tape Measure with Upg…
Vittanly 15 Pack Picture Frames Collage Wall Decor for Mounting or Table…
Skill Level & Time Estimate
Skill Level: intermediate
Total time estimate: 2-3 hours. This includes planning, measuring, and hanging your pieces.
Skill Level & Time Estimate
Editor’s Choice
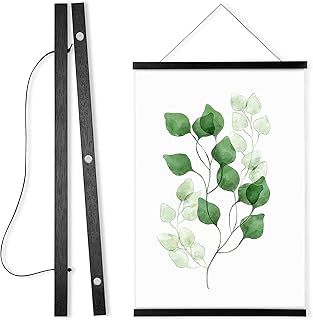
WITCOLOR Magnetic Poster Hanger Frame, 8×10 8×12 8×20 Black Poster Frame…

Command 15 lb Large Picture Hanging Strips 14 Pairs (28 Strips), Damage-…

Step 1: Choose Your Space

Identify the ideal wall for your gallery. Consider visibility and lighting to enhance your art pieces:
- Assess different walls in your home for adequate space.
- Check for natural light, as it can affect how your artwork is perceived.
- Ensure the wall isn’t cluttered with furniture or decorations that may distract from the gallery.
Pro Tip: Choose a wall that is often seen to maximize the impact of your gallery wall. Why this matters: The right space can elevate the feel of your room and make your artwork pop.
Time estimate: 15 minutes.
Step 1: Choose Your Space
Editor’s Choice

Picture Hanging Kit, 315pcs Hanging Hardware with Hooks, Wire, Nails, D …

Daletu 30 PCS Clear Sign Clips for Merchandise Display, Plastic Retail D…

Forever Friends Picture Photo Frame, Unique and Cute Picture Frame, Frie…
Step 2: Gather Your Art Pieces
Collect a variety of art pieces that reflect your style and interests:
- Choose a mix of photos, prints, and artwork to create a diverse look.
- Consider color schemes that will complement your room.
- Choose pieces that evoke emotion or tell a story.
Pro Tip: Lay out your art pieces on the floor to visualize how they’ll look together. Why this matters: Curating a thoughtful selection of pieces will enhance the overall aesthetic of your gallery.
Time estimate: 30 minutes.
Step 2: Gather Your Art Pieces
Editor’s Choice

KURUI 303Pcs Picture Hanging Kit, Picture Hangers Assorted Kit with Heav…

Venusmiles 15 Pack Picture Frames Collage Wall Decor, Gallery Frame Set …
Step 3: Plan Your Layout
Before hanging anything, plan your layout to ensure balance and harmony:
- Use painter’s tape to outline where frames will go on the wall.
- Experiment with different arrangements until you find a design that works.
- Consider the flow of the arrangement; it should feel cohesive and not cluttered.
Pro Tip: Take a photo of your layout for reference when hanging. Why this matters: Planning prevents unnecessary holes in the wall and saves time during installation.
Time estimate: 30 minutes.
Step 3: Plan Your Layout
Editor’s Choice

PREXISO Multi Surface Laser Level LED Light Vial, 30Ft Horizontal & Vert…
Command 15 lb Large Picture Hanging Strips 14 Pairs (28 Strips), Damage-…

Masking Tape,1″ Wide×55 Yards 6 Rolls,Medium-Adhesion Beige White Tape …
Step 4: Install a Hanging System
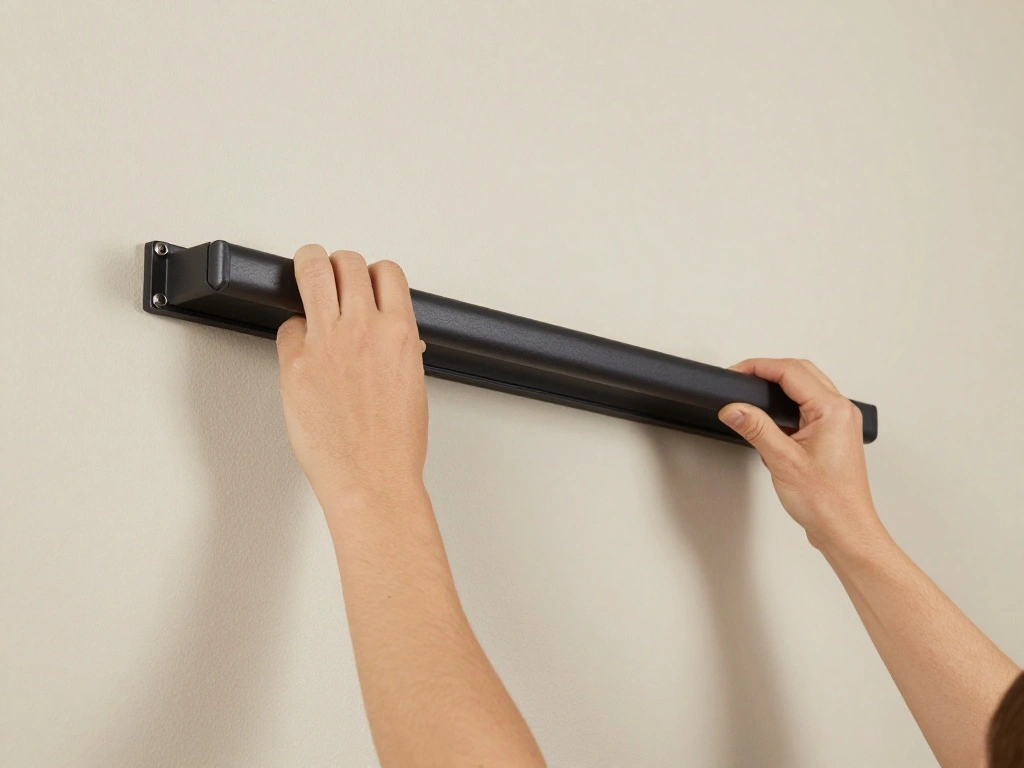
To make future changes easier, install a flexible hanging system:
- Select a rail system or picture hanging strips based on your wall type.
- Follow the manufacturer’s instructions to install the system securely.
- Ensure the system can support the weight of your frames.
Pro Tip: Choose a system that allows for easy repositioning of frames. Why this matters: A good system will save you from the hassle of rehanging frames every time you add or change artwork.
Time estimate: 30 minutes.
Step 4: Install a Hanging System
Editor’s Choice

50 Pack Small Sawtooth Picture Hangers – Steel Picture Hanging Solutions…

Sturdy Picture Rail Hanging System, 66 lb (30 kg) Max Load Capacity, Adj…
Command 15 lb Large Picture Hanging Strips 14 Pairs (28 Strips), Damage-…
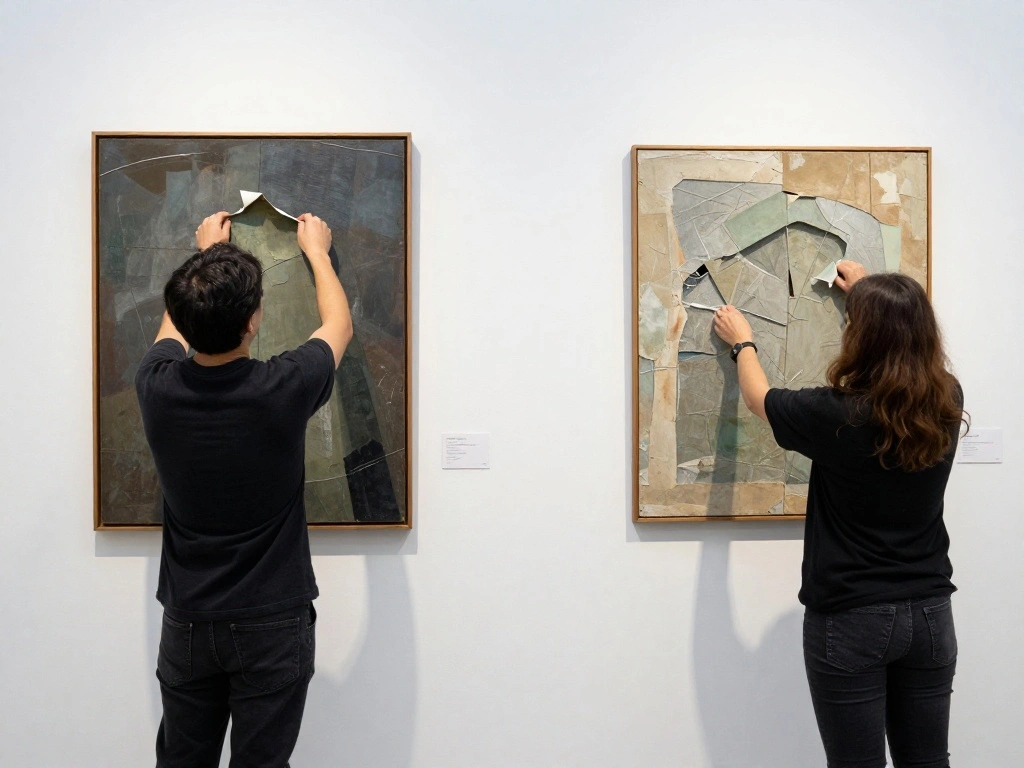
Step 5: Hang the Frames
Now, it’s time to hang your frames according to your planned layout:
- Start with the largest frame as a focal point and work outward.
- Use a level to ensure each frame is straight.
- Secure frames onto the hanging system. Adjust as necessary.
Warning: Avoid overcrowding frames too closely together; it can make the arrangement look cluttered. Why this matters: Proper placement ensures each piece is appreciated and contributes to the overall design.
Time estimate: 45 minutes.
Step 5: Hang the Frames
Editor’s Choice

upsimples 19 Pack Picture Frames Collage Wall Decor for Mounting or Tabl…

8Pcs Small Bubble Spirit Level Mini Square Levels Measuring Tools for Ba…
Command 15 lb Large Picture Hanging Strips 14 Pairs (28 Strips), Damage-…
Step 6: Add Finishing Touches
Complete your gallery wall with finishing touches that enhance its appeal:
- Consider adding decorative elements like shelves or plants between frames.
- Use lighting to highlight your favorite pieces; picture lights are great for this.
- Step back and make any adjustments to the layout if needed.
Pro Tip: Add a personal touch with small items like mementos or quotes. Why this matters: These elements can create a more inviting and personal atmosphere.
Time estimate: 30 minutes.
Step 6: Add Finishing Touches
Editor’s Choice

3Pack Picture Lights for Wall, RGB Color Changing Led Art Display Light …

BAYKA Pink Floating Shelves for Wall Set of 3, 15.7in Wood Wall Shelves …

Christian Religious Gifts for Women, Succulent Plant Pot, Cactus Flower …
Step 7: Plan for Future Additions

Set up a strategy for adding new pieces over time:
- Leave some space between frames for easy additions.
- Consider a seasonal rotation of artwork to keep things fresh.
- Document new pieces you want to add in a list, ensuring you have a plan.
Pro Tip: Use a digital note-taking app to keep track of future art pieces. Why this matters: Having a plan will keep your gallery wall dynamic and engaging without the stress of constant rearrangement.
Time estimate: 15 minutes.
Step 7: Plan for Future Additions
Editor’s Choice

Tensky Smart Watch for Women Android & iPhone, Alexa Built-in, 1.8″ Touc…

Acqooeakt Vintage Fashion Black and White Wall Art Feminist Women Poster…

ANERZA 16 PCS Framed Black Girl Wall Art Decor, African American Wall Pr…
Step 8: Regularly Refresh Your Gallery
To keep your gallery wall vibrant, refresh it regularly:
- Rotate pieces out for seasonal updates or based on your mood.
- Incorporate new artwork as you acquire it, following your plan.
- Evaluate your current pieces to see if any need to be retired or replaced.
Pro Tip: Make it a habit to refresh your gallery every few months. Why this matters: Regular updates keep your space feeling new and engaging.
Time estimate: 20 minutes.
Step 8: Regularly Refresh Your Gallery
Editor’s Choice

Peryiter 3 Pcs Modern Minimalist Wall Decor Abstract Metal Wall Art Meta…
ANERZA 16 PCS Framed Black Girl Wall Art Decor, African American Wall Pr…

Positive Decor for Home Office, Motivational Gifts for Women, It’s a Goo…
Step 9: Share Your Creation
Once your gallery wall is complete, don’t forget to share it:
- Take high-quality photos of your finished gallery wall.
- Share on social media or with friends and family to inspire others.
- Consider creating a blog post or video documenting the process.
Pro Tip: Engage with online communities that focus on home decor to gather feedback. Why this matters: Sharing can create connections and provide inspiration for others while celebrating your hard work.
Time estimate: 30 minutes.
Step 9: Share Your Creation
Editor’s Choice


Floating Framed Floral Shower Wall Art, Vintage Botanical Flower Canvas …
Vittanly 15 Pack Picture Frames Collage Wall Decor for Mounting or Table…
Step 10: Enjoy Your Gallery Wall
Finally, take the time to enjoy the beauty of your gallery wall:
- Invite friends over to showcase your work.
- Spend time reflecting on the stories behind your pieces.
- Use this space to inspire creativity in your daily life.
Pro Tip: Change your perspective by viewing your gallery from different angles. Why this matters: A gallery wall should be a source of joy and inspiration, enhancing your living space.
Time estimate: Ongoing.
Step 10: Enjoy Your Gallery Wall
Editor’s Choice

Hoikwo 3 Pack Butterfly Wall Shelves, White Pink Floating Book Shelves, …

Framed Black Girl Wall Art Set of 3, Fashion Inspirational Black Woman W…
KURUI 303Pcs Picture Hanging Kit, Picture Hangers Assorted Kit with Heav…
Pro Tips
- Color Palette: Stick to a cohesive color palette for a sophisticated look.
- Frame Styles: Mix different frame styles and textures for added interest.
- Gallery Height: Hang artwork at eye level for the best viewing experience.
- Theme Consistency: Consider a theme (e.g., travel, family) to unify the gallery.
- Seasonal Changes: Update a few pieces seasonally to keep the gallery feeling fresh.
Pro Tips
Editor’s Choice

Command Sawtooth Picture Hangers, 4 Frame Hangers and 6 Command Strips, …

AZSKY 2pc 36in Natural Wood Floating Shelves, Country Rustic Style Wall …

Creative Picture Frames 14″ x 24″ Newspaper Frame with Mat, Holds 11″ x …
Common Mistakes to Avoid
Warning: Hanging frames too high or low can make them less visually appealing. Always aim for eye level. Warning: Overcrowding your gallery can overwhelm viewers. Leave enough space between pieces. Warning: Ignoring the wall’s natural light can distort colors. Test how light affects your pieces before hanging.
Common Mistakes to Avoid
Editor’s Choice

Vittanly 20 Pack Picture Frames Collage Wall Decor, Multi Sizes Includin…


3-in-1 Picture Hanging Tool, All-in-One Art Hanging Kit with Leveling, P…
Troubleshooting Section
Problem: Frames are crooked.
Solution: Use a level to adjust frames after hanging them.
Problem: Wall looks cluttered.
Solution: Remove a few pieces and rearrange for better balance.
Problem: Artwork is faded.
Solution: Move pieces away from direct sunlight or replace with UV-protected glass.
Problem: Hanging system is weak.
Solution: Reinforce with additional hardware or switch to a sturdier system.
Problem: Unable to find new pieces that fit.
Solution: Explore local art fairs or online marketplaces for unique finds.
Troubleshooting Section
Editor’s Choice

2PCs Women’s Blue Light Blocking Glasses Anti-Round Face Eyewear Fashion…

Torpedo Level Magnetic, Firecore 9 Inch Shockproof Small Leveler Tool wi…

Command 20 lb XL 8 Pairs Heavyweight Picture Hanging Strips (16 Strips),…
Variations/Alternative Methods
Consider these alternatives for your gallery wall:
- Collage Frames: Use multi-opening frames that house several photos in one frame for a cohesive look.
- String Art Display: Hang pieces using string or wire for a more casual, flexible display.
- Magnetic Frames: Attach frames to magnetic surfaces for easy swapping.
Variations/Alternative Methods
Editor’s Choice

3 Pack Progressive Multifocus Reading Glasses for Men Women Blue Light B…

SimpleVibesXinPuwei String Art DIY Nautical Wall Art Unique Handmade Gif…

Cat Eye Magnet glasses 2 in 1 Polarized clip on Sunglasses for Women 54-…
FAQs
What if I don’t have enough wall space?
Consider using a smaller area or a vertical display to maximize space.
How long should I wait before changing pieces?
Refresh your gallery every few months or when you acquire new art.
Is it safe to use adhesive strips?
Yes, as long as you follow the weight limits specified by the manufacturer.
What if my frames don’t match?
Mixing frames can create a unique look; just ensure they share a common theme or color palette.
Can I hang art in a bathroom?
Yes, but choose moisture-resistant frames and avoid direct water exposure.
FAQs
Editor’s Choice

Fearless Tape – Double Sided for Clothing Body & Dresses (50 Strips) | C…
Framed Black Girl Wall Art Set of 3, Fashion Inspirational Black Woman W…

Vintage Gold Framed Ophelia Wall Art, Romantic Victorian Gothic Oil Pain…
Conclusion
Congratulations on creating your evolving gallery wall! You’ve transformed your space into a dynamic showcase of your memories and inspirations. Remember, the key to a successful gallery wall is to keep it fresh and reflective of your journey.
As you continue to collect new art pieces, revisit this guide to maintain the balance and beauty of your wall. Share your creation with friends and family to inspire them to embark on their own gallery wall journey!