Have you ever looked at your gallery wall and thought it felt stale or out of place with the changing seasons? You’re not alone! Many people feel the urge to refresh their spaces as the seasons change, but buying new frames can be expensive and unnecessary. What if you could give your gallery wall a seasonal update without spending money on new frames?
In this guide, you will learn how to creatively swap out artwork, use seasonal decorations, and rearrange elements to keep your gallery wall feeling fresh and inviting. By the end of this process, your wall will reflect the beauty of each new season, enhancing your home’s aesthetic.
Expect to discover practical tips for selecting and displaying art that aligns with the seasons, along with innovative ways to incorporate seasonal colors and themes. This guide is designed for beginners and should take about 2-3 hours to complete. Let’s dive in and transform your gallery wall into a seasonal masterpiece!
TL;DR Summary
- Refresh your gallery wall for each season without buying new frames.
- Learn how to swap artwork, incorporate seasonal decorations, and rearrange elements.
- Perfect for beginners and takes approximately 2-3 hours.
- Enjoy a vibrant and inviting space that reflects the beauty of every season.
TL;DR Summary
Editor’s Choice

Clean Girl Cozy Room Decor for Women, White Heart Shelf Heart Wall Grid …
Pink Fashion Black Woman Canvas Wall Art Set of 3 African American Women…

nuvagiki Interchangeable Seasonal Home Sign with 12 Icons, Farmhouse Woo…
Prerequisites/Materials Needed
- Artwork: 5-10 pieces (prints, photos, or original art)
- Seasonal decor items: (e.g., faux flowers, seasonal ornaments, or themed items)
- Hanging tools: nails, picture hooks, or adhesive strips
- Measuring tape
- Level tool
- Cleaning supplies: dust cloth or cleaning spray
Prerequisites/Materials Needed
Editor’s Choice

24Pcs Christmas Makeup Tools Ornaments Xmas Tree Wooden Ornaments Women …

6 Rose Pin Hooks Picture Hanging Nails Push Pin Thumb Tack Hangers Home …

Skill Level & Time Estimate
Skill Level: beginner
Total time estimate: 2-3 hours
Breakdown: 1 hour for planning, 1 hour for rearranging and decorating, and 30 minutes for final touches.
Skill Level & Time Estimate
Editor’s Choice


RoomMates RMK5340SCS Gallery Frames Peel and Stick Wall Decals

Command 20 lb XL 8 Pairs Heavyweight Picture Hanging Strips (16 Strips),…
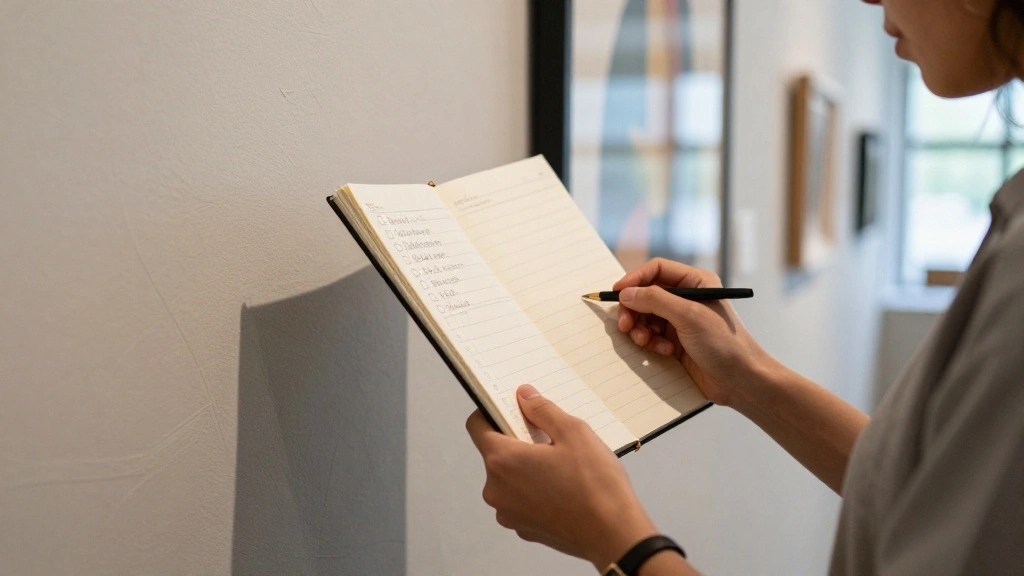
Step 1: Gather Your Art and Seasonal Decor
Begin by collecting all the artwork and seasonal decor items you want to include on your gallery wall. This step is crucial because it allows you to visualize the options available to you.
- Locate your existing artwork and seasonal decor. Make sure to have a variety of sizes and styles.
- Set aside your favorites that resonate with the current season. For example, if it’s fall, consider using warm tones or autumn-related images.
- Lay everything out on a flat surface to see how they complement each other.
Pro Tip: Use a color palette that aligns with the season for a cohesive look. Warning: Avoid overcrowding your wall with too many pieces; ensure there’s a balance.
Time estimate for this step: 30 minutes.
Step 1: Gather Your Art and Seasonal Decor
Editor’s Choice

Command 20 lb XL 8 Pairs Heavyweight Picture Hanging Strips (16 Strips),…
Framed Canvas Wall Art Beautiful Woman With Colorful Flowers, White Flow…

Stained Glass Window Hanging – Pink Phalaenopsis Orchid Green Leaves Sun…
Step 2: Clean Your Gallery Wall
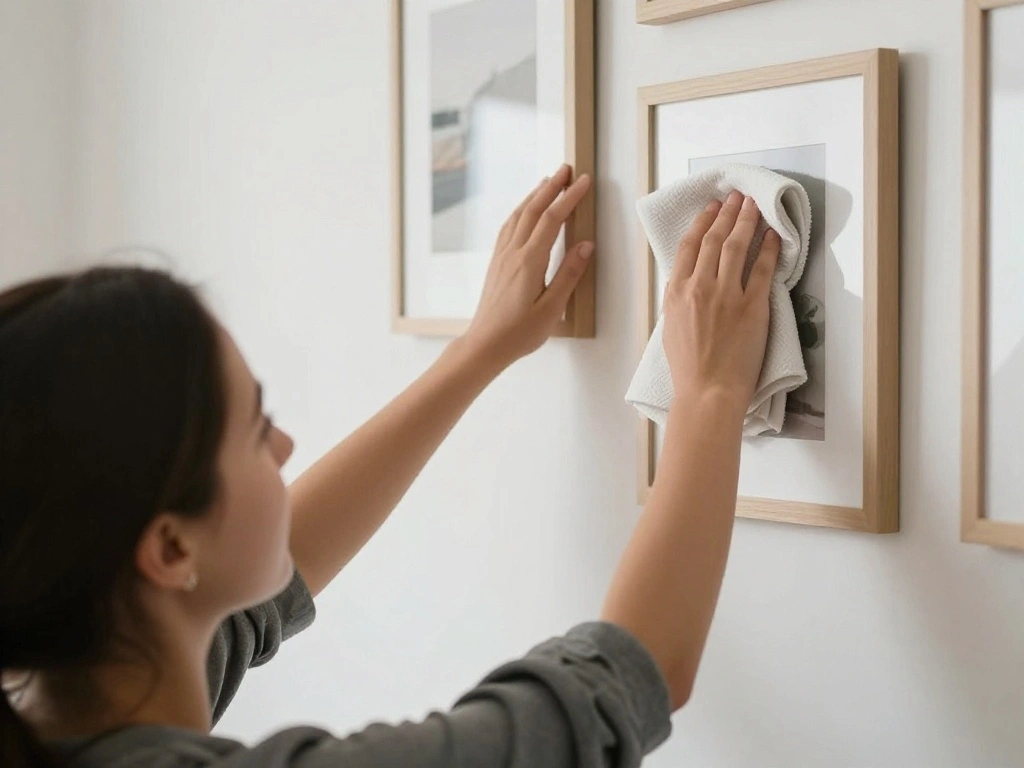
Before you start rearranging or adding new items, it’s important to clean your wall. This helps ensure that your new layout looks crisp and fresh.
- Use a dust cloth or cleaning spray to wipe down the area where your gallery wall is located.
- Remove any old nails or hanging hardware you no longer need.
- Check the wall for any scuffs or marks and clean them up.
Pro Tip: Taking a clean approach will highlight your artwork better. Warning: Be careful not to damage the paint or wallpaper while cleaning.
Time estimate for this step: 20 minutes.
Step 2: Clean Your Gallery Wall
Editor’s Choice
Summer’s Eve Simply Sensitive Feminine Wipes, Gentle pH-Balanced Micella…

Luna Daily Body Cleansing Spray | Hydrating pH-Balanced Feminine & Body …

Picture Hanging Kit with Level, Upgraded Picture Hanging Tool, 86Pcs Pic…
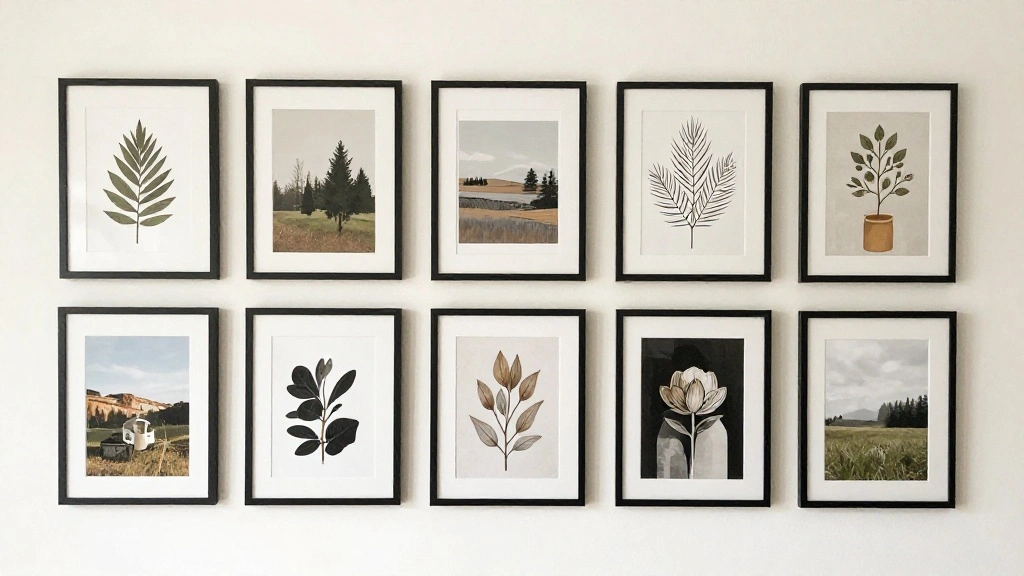
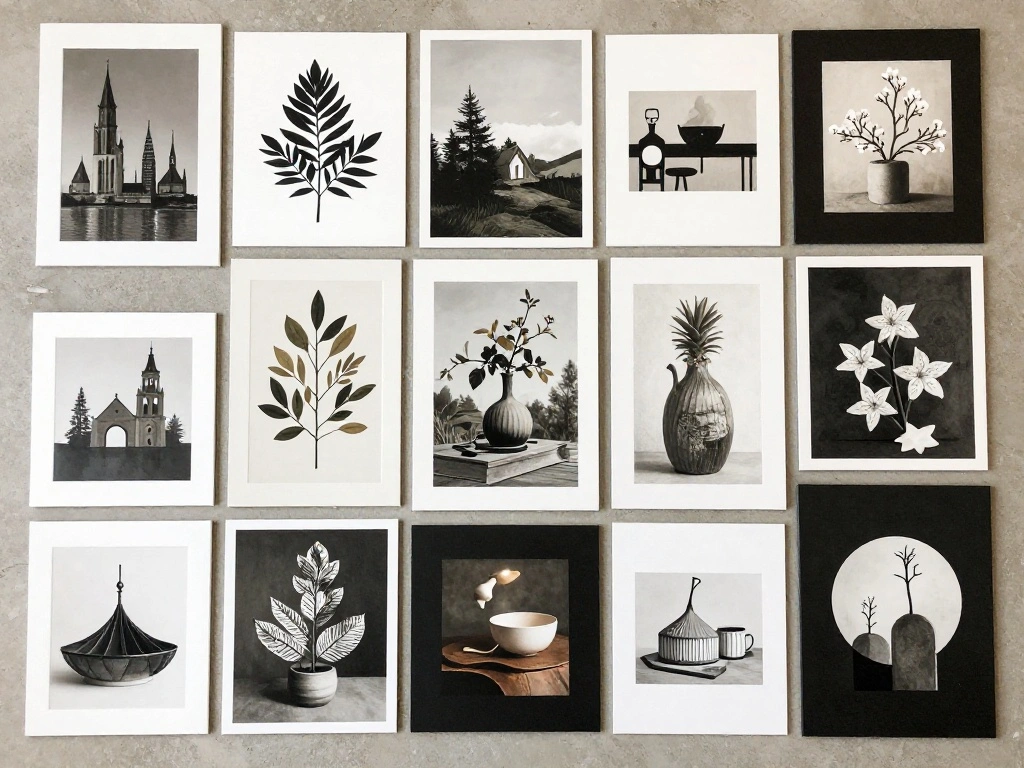
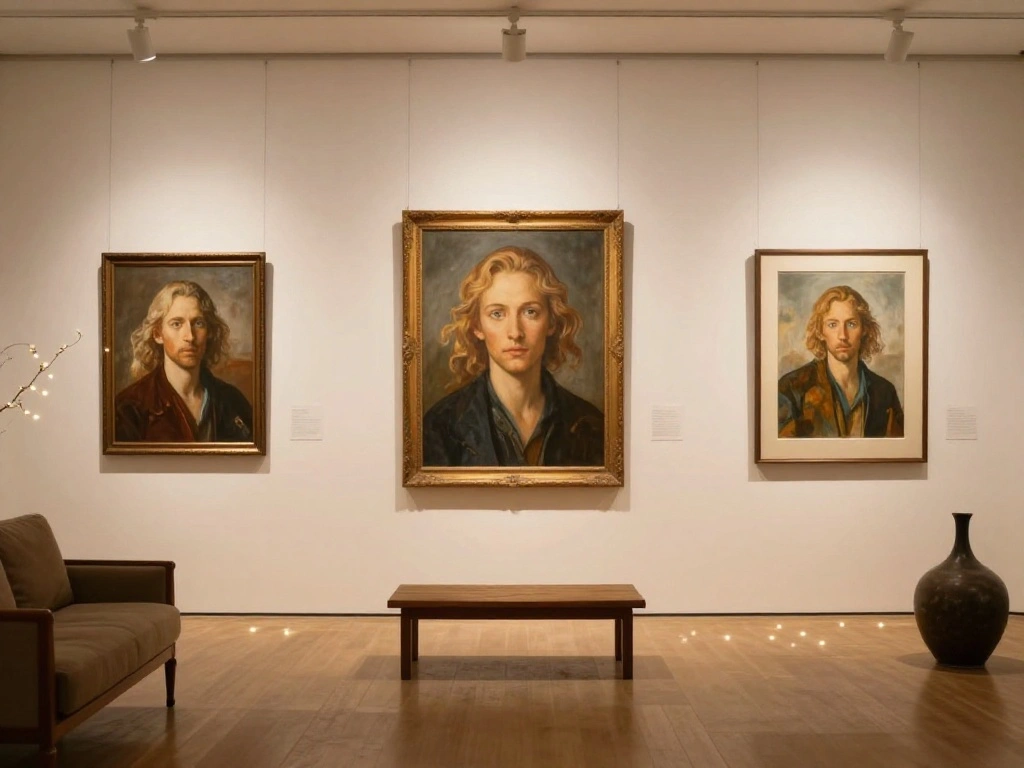
Step 3: Rearrange Existing Art
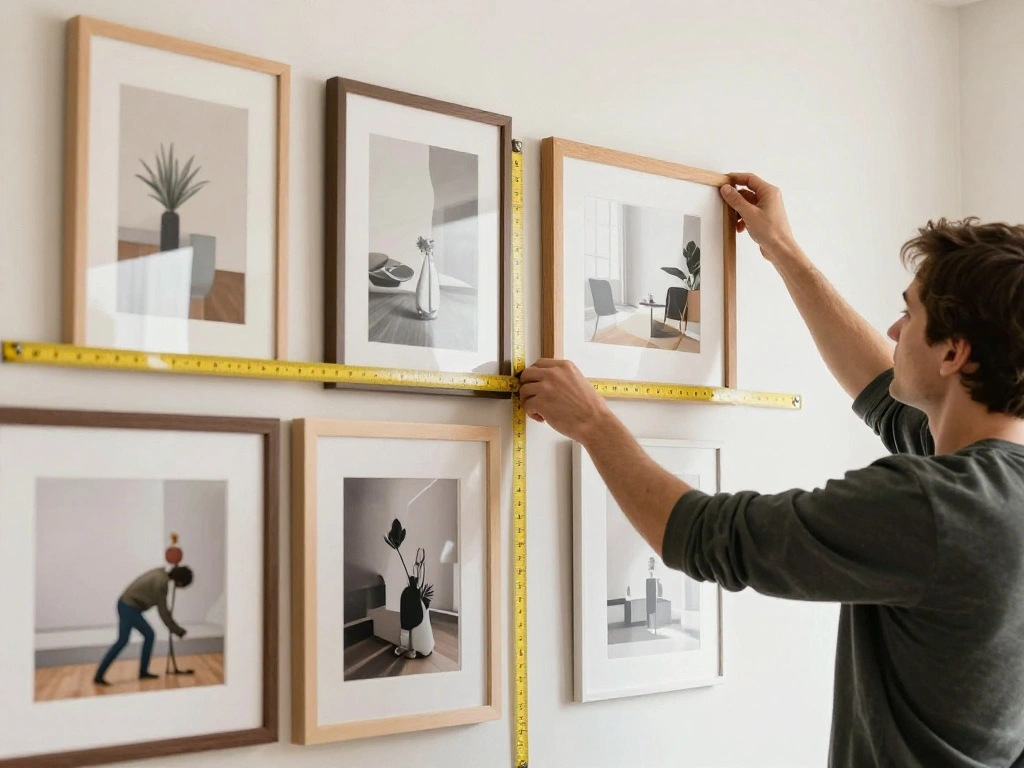
Rearranging your existing art can create a new visual dynamic without needing to buy anything new. This step is all about creativity!
- Start by removing all the current art pieces from the wall.
- Decide on a new layout. You can go for a linear arrangement, a grid pattern, or a more organic look.
- Use your measuring tape to space the pieces evenly and ensure they are level.
Pro Tip: Use painter’s tape to outline where each piece will go before hanging. Warning: Avoid placing items too close together; give them room to breathe.
Time estimate for this step: 30 minutes.
Step 3: Rearrange Existing Art
Editor’s Choice

Rainbow Aesthetic Masking Tape Tapes Stickers Scrapbooking Decoration Su…

ANERZA 16 PCS Black Girl Wall Art Decor, African American Gallery Wall P…

Tape Measure 25 Ft – Metal Retractable Tape Measure with Fractions, Easy…
Step 4: Incorporate Seasonal Decor
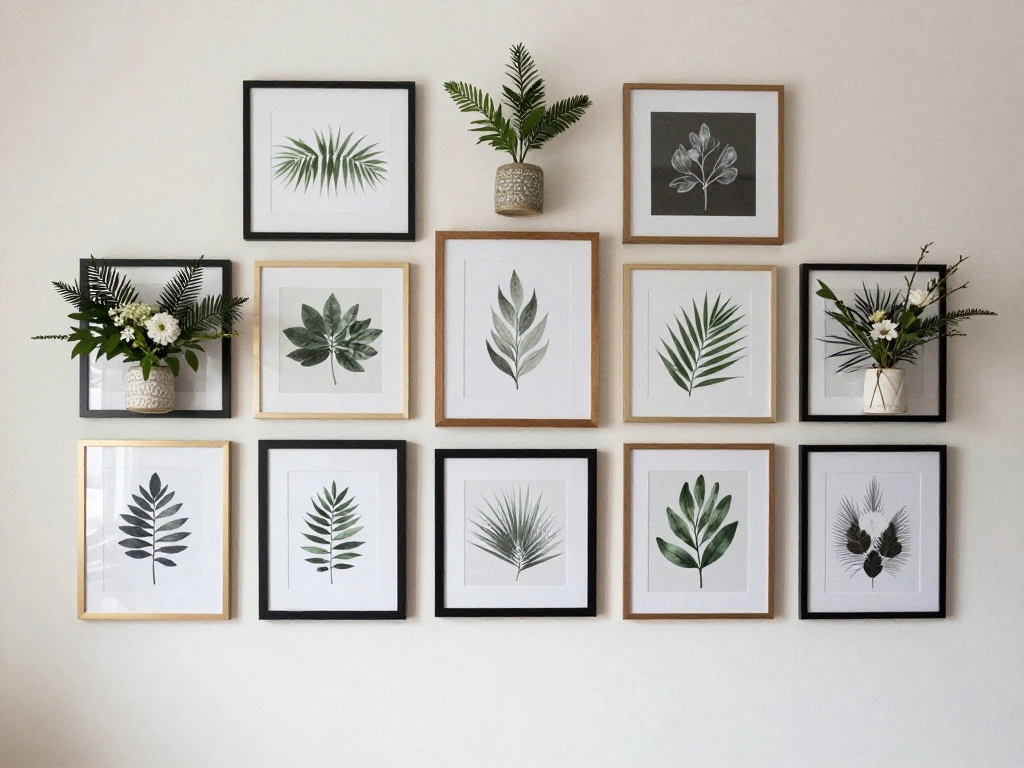
This is where the magic happens! Adding seasonal decor will transform your gallery wall and make it feel timely.
- Choose a few key seasonal decor items to integrate among your artwork.
- Consider using items like garlands, wreaths, or themed decorations that complement the artwork.
- Arrange the decor pieces around the art for a balanced look, ensuring they don’t overwhelm the artwork.
Pro Tip: Use seasonal colors to tie everything together. Warning: Avoid overdoing it; too many decorations can detract from the art.
Time estimate for this step: 30 minutes.
Step 4: Incorporate Seasonal Decor
Editor’s Choice

Pinkpum 20” Eucalyptus Wreath for Front Door, Porch, Window – Green Dec…

Bingcute 100 Feet Fishing Line Artificial Pearls String Beads Chain Garl…

SEHSUVC Black Girl Posters Wall Art Set of 9, Abstract African American …
Step 5: Finalize Placement and Hang Art
Now that everything is arranged, it’s time to hang your art and decor. This is the final step in transforming your gallery wall!
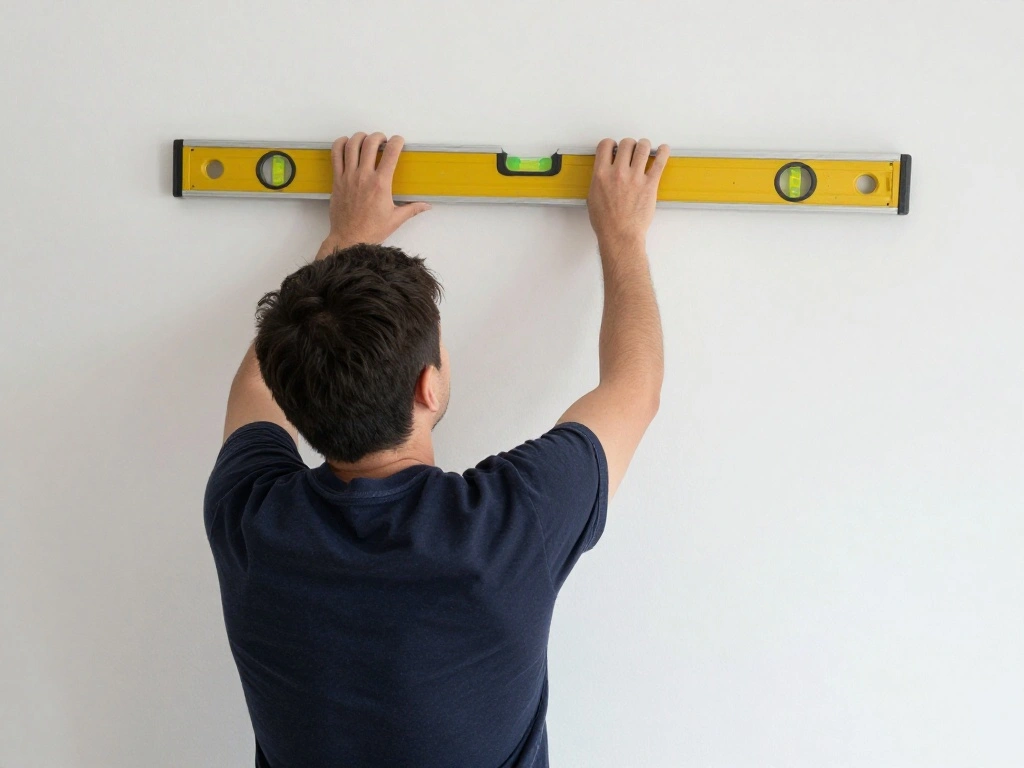
- Use your level tool to ensure everything hangs straight as you secure each piece to the wall.
- Start hanging the larger pieces first, followed by the smaller ones.
- Step back periodically to assess the overall look and make adjustments as necessary.
Pro Tip: Consider using adhesive strips for lightweight pieces to avoid damaging the wall. Warning: Always check the weight limits of your hanging hardware to prevent accidents.
Time estimate for this step: 45 minutes.
Step 5: Finalize Placement and Hang Art
Editor’s Choice

Rose Gold Party Decoration Rose Gold Star Circle Dot Hanging Garland Han…

Command 15 lb Large Picture Hanging Strips 14 Pairs (28 Strips), Damage-…
Step 6: Add Finishing Touches
Once everything is hung, it’s time to add final details that will enhance your gallery wall.
- Consider adding lighting options, such as picture lights or wall sconces, to highlight your artwork.
- Adjust the decor items for balance and visual appeal.
- Ensure there are no visible marks or debris on the wall or around the art pieces.
Pro Tip: Use dimmable lighting to create different moods for the space. Warning: Avoid cluttering the area with too much decor; keep it simple.
Time estimate for this step: 30 minutes.
Step 6: Add Finishing Touches
Editor’s Choice

Aurora Forest Night Light – LED Wall Sconce for Bedroom, Bathroom, Hallw…

Pevfah Crystal Black Ceiling Light, Modern Semi Flush Mount Ceiling Ligh…
Step 7: Step Back and Evaluate

After hanging everything and adding the finishing touches, it’s important to evaluate your work. This ensures you are satisfied with the outcome.
- Stand at a distance and look at your gallery wall as a whole.
- Identify any areas that might need adjustment, such as spacing or color balance.
- Make any small changes necessary to perfect the arrangement.
Pro Tip: Take a photo of the wall to see it from a different perspective. Warning: Don’t rush this step; giving your eyes a break can help with fresh perspective.
Time estimate for this step: 15 minutes.
Step 7: Step Back and Evaluate
Editor’s Choice

KURUI 700PCs Small Nails for Hanging Pictures & 8oz Small Hammer for Wom…

3Pcs Graffiti Thinker Statue Accents Reading Women Sculptures, Modern Ae…
Black Girl Bathroom Wall Art Set of 3, Fashion Boho Black Woman Canvas W…
Step 8: Enjoy Your Updated Gallery Wall
Now that you’ve completed your seasonal update, it’s time to enjoy the fruits of your labor!
- Invite friends or family over to show off your beautifully updated gallery wall.
- Take time to appreciate the changes you’ve made and how they reflect the season.
- Consider documenting the process for future reference or inspiration.
Pro Tip: Use social media to showcase your gallery wall and inspire others. Warning: Don’t neglect to change it up again for the next season; keep the excitement alive!
Time estimate for this step: 15 minutes.
Step 8: Enjoy Your Updated Gallery Wall
Editor’s Choice

Mini Photo Clips, 128 Pcs, 1.4 Inch Small Wooden Clothespins for Baby Cl…

65Pcs Birthday Decorations Happy Birthday Banner Pink Rose Gold Balloons…

Qykwz Black Women Floral Wall Art Prints, Elegant Modern African America…
Step 9: Maintain and Refresh Regularly
To keep your gallery wall looking fresh, establish a routine for maintaining and refreshing it.
- Set reminders every few months to evaluate the decor and artwork.
- Consider seasonal themes or holidays that can inspire new arrangements.
- Keep an eye out for new decor items that might fit your vision.
Pro Tip: Create a seasonal checklist to track what changes to make each time. Warning: Don’t let dust accumulate on your decor; regular cleaning will keep it looking its best.
Time estimate for this step: 10 minutes.
Step 9: Maintain and Refresh Regularly
Editor’s Choice

Be Kind to Your Mind Wall Art – Metal Signs Vintage Room Decor 12×8 In -…

42 Pcs Small Interchangeable Flower Basket Memorial Day Decor Holiday Se…

Geyoga 6 Pieces Vintage Hair Barrettes for Women Retro Flower French Pea…
Pro Tips
- Tip 1: Use Color Theory: Understand complementary and contrasting colors to create visually appealing arrangements.
- Tip 2: Scale Matters: Mix large pieces with smaller ones to create depth and interest.
- Tip 3: Rotate Art Seasonally: Keep your gallery wall dynamic by rotating art based on the time of year.
- Tip 4: DIY Decor: Create your own seasonal decor to personalize your space further.
- Tip 5: Use Personal Memories: Incorporate photos or mementos that tell a story, making your wall more meaningful.
Pro Tips
Editor’s Choice
BoFUN Wreath Craft Kit for Teens& Adults Women, DIY Wire Wreaths Making …
Qykwz Black Women Floral Wall Art Prints, Elegant Modern African America…

Makeup Bag Gifts for Artists Women, Art Lover Gift Thank You Gifts for P…
Common Mistakes to Avoid
Warning: Don’t overcrowd your wall. Too many pieces can make the wall feel chaotic. Focus on a few strong pieces instead.
Warning: Avoid hanging artwork too high. Make sure it’s at eye level for optimal viewing.
Warning: Don’t use mismatched frames unless it enhances your theme. A cohesive look is often more appealing.
Common Mistakes to Avoid
Editor’s Choice
Pink Fashion Black Woman Canvas Wall Art Set of 3 African American Women…

DASTOLL Stained Glass Window Hanging, Flying White Dove Sun Catchers Dia…

Forever Friends Picture Photo Frame, Unique and Cute Picture Frame, Frie…
Troubleshooting Section
Problem: Artwork looks unbalanced.
Solution: Rearrange the pieces, ensuring larger items anchor the layout.
Problem: Seasonal decor feels overwhelming.
Solution: Scale back and choose only a few key pieces.
Problem: Items fall off the wall.
Solution: Check the weight limits of your hanging hardware and adjust as needed.
Troubleshooting Section
Editor’s Choice
nuvagiki Interchangeable Seasonal Home Sign with 12 Icons, Farmhouse Woo…
ANERZA 16 PCS Black Girl Wall Art Decor, African American Gallery Wall P…

Family Picture Frame, Best Friend Picture Frame Gifts for Best Friend Wo…
Variations/Alternative Methods
Consider these alternative methods for updating your gallery wall:
- Photo Collage: Instead of framed art, create a collage of family photos for a personal touch.
- Seasonal Themes: Focus solely on seasonal themes with dedicated decorations for each season.
- Gallery Ledge: Use a ledge to easily swap out art and decor without the need for nails.
Variations/Alternative Methods
Editor’s Choice

RICHFOCUS Picture Ledge Shelf, 24 inch Floating Shelves Set of 2, Wood W…

Farmhouse Wall Decor for your Home – 12×16 Rustic Wood Frame with 14 Int…

printtoucan Collage Custom Canvas Print with Your Photos 12×16 – Perso…
FAQs
What if I don’t have enough art? Consider printing artwork or using fabric pieces to fill in gaps.
How long should I wait before refreshing my wall? Aim for every 3-4 months to keep it feeling fresh.
Is it safe to use adhesive strips on walls? Yes, as long as they are designed for your wall type, they can be safe and effective.
FAQs
Editor’s Choice

HAUS AND HUES Black Woman Wall Art – Set of 6 Black Girl Magic Prints,…

Poster Master Woman in Towel Canvas – Lady Getting Ready Print – Lipstic…

SummerBrite Picture Hanging Strips 40 Strips, Damage Free Removal, Wall …
Conclusion
Congratulations! You’ve successfully updated your gallery wall for the season. By taking on this project, you not only enhanced your space but also tapped into your creativity. Remember, this is a continuous journey; embrace the changes each season brings!
Next, consider exploring other areas of your home for small updates or changes. Whether it’s refreshing your living room or sprucing up your bedroom, there are endless possibilities for personalization. Keep inspiring yourself and those around you!