
Are you tired of staring at blank walls during video calls? A dull background can detract from your professionalism and creativity. With more people working from home, it’s essential to create an engaging workspace that reflects your personality. A bookshelf wall display not only enhances your background but also serves as a functional storage solution.
In this guide, you will learn how to build a stunning bookshelf wall display that enhances your home office aesthetics. You will explore design ideas, materials needed, and steps to create a bookshelf that showcases your favorite books, plants, and decor items.
This project is beginner friendly and can be completed in approximately 3-5 hours. Get ready to transform your workspace into a more inviting and inspiring environment!
TL;DR Summary
- Learn to build a beautiful bookshelf wall display for your home office.
- Step-by-step instructions with beginner-friendly guidance.
- Transform your workspace and enhance your video call background.
- Gather all materials before starting for a smooth process.
TL;DR Summary
Editor’s Choice

MaxGear Book Ends Tree Design Modern Bookends for Shelves, Non-Skid Book…

Heavy Duty Shelf Brackets 10 Inch, 6 Pack Floating Shelf Brackets, L Wal…
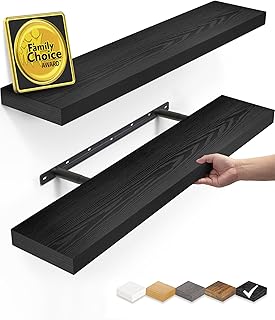
BAYKA Floating Shelves for Wall, 22.5 inches Black Wall Shelves for Bath…
Prerequisites/Materials Needed
- Wood Boards: 4 pieces (1×12 inches, 6 feet long) for shelves
- Wood Supports: 2 pieces (2×4 inches, 6 feet long) for framing
- Wood Screws: 1 box (1.5 inches long)
- Wood Glue: 1 bottle
- Sandpaper: 1 pack (medium grit)
- Paint or Stain: 1 can (color of your choice)
- Paintbrush: 1 (for applying paint or stain)
- Drill: 1 (with drill bits)
- Level: 1 (to ensure evenness)
- Measuring Tape: 1 (for accurate measurements)
Prerequisites/Materials Needed
Editor’s Choice

Mr. Pen- Wood Screws Assortment Kit, 152 pcs, Silver, Phillips Flat Head…

1/2″ x 5-1/2″ x 6′ Unfinished Solid Poplar Board | Real American Hardwoo…

100PCS 6 Inch PSA Sanding Discs 150 Grit Self-Adhesive Sandpaper Roll fo…
Skill Level & Time Estimate
Skill Level: beginner
Total time estimate: 3-5 hours
Step breakdown:
- Gather materials: 30 minutes
- Measure and cut wood: 1 hour
- Assemble the structure: 1 hour
- Paint or stain: 1 hour (includes drying time)
- Install and arrange: 1 hour
Skill Level & Time Estimate
Editor’s Choice

Giani Wood Look Paint Kit for Front & Interior Doors (English Oak)
Titebond 5003 II Premium Wood Glue, 8-Ounces(Pack of 2)

Wood Carving Kit Whittling Kit: Deluxe Wood Carving Tools Knife Set with…
Step 1: Choose Your Wall Location
Identify a suitable wall in your home office that can support the bookshelf. Consider factors like visibility during video calls and accessibility for reaching books.
- Look for a blank wall that you want to enhance.
- Ensure there are no obstructions like light switches or outlets.
- Check if the wall can support the weight of the books and display items.
Pro Tip: Avoid placing the bookshelf in direct sunlight to prevent fading of books and decor.
Why this matters: Choosing the right location sets the foundation for a successful display. A well-placed bookshelf can enhance the overall look of your workspace.
Time estimate: 15 minutes
Step 1: Choose Your Wall Location
Editor’s Choice

DUMOS 5 Tiers Bookshelf, Classical Modern Book Shelf, Tall Display Shelv…
Step 2: Measure and Plan Your Design
Before cutting wood, measure your wall and decide how tall and wide you want your bookshelf. Create a simple sketch to visualize the design.
- Use a measuring tape to find the width and height of the wall.
- Sketch a basic design including the number of shelves you want.
- Mark the measurements on the wall with a pencil.
Warning: Double-check your measurements to avoid cutting wood incorrectly.
Why this matters: Planning ensures your bookshelf fits perfectly in the space and meets your storage needs.
Time estimate: 20 minutes
Step 2: Measure and Plan Your Design
Editor’s Choice

Digital Caliper Measuring Tool, Stainless Steel Vernier Caliper Digital …

Nicpro Carpenter Pencil with Sharpener, Mechanical Pencils Set with 26 R…

Klein Tools 935FSQ Framing Square, 24-Inch x 16-Inch, L Shape Carpenter …
Step 3: Cut the Wood to Size
Using your measurements, cut the wood boards to the required lengths for the shelves and supports. Make sure to wear safety goggles during this process.
- Lay the wood boards on a flat surface.
- Use a saw to cut each board according to your measurements.
- Sand the edges of each cut board for a smooth finish.
Warning: Always follow safety protocols when using power tools.
Why this matters: Accurate cuts are essential for a stable and visually appealing bookshelf.
Time estimate: 30 minutes
Step 3: Cut the Wood to Size
Editor’s Choice

Clear Safety Glasses Bulk of 50, ANSI Z87.1 Eye Protection for Women Men…

RUITOOL Japanese Hand Saw 6 Inch Double Edge Sided Pull Saw Ryoba SK5 Fl…
Step 4: Assemble the Bookshelf Frame

Now it’s time to assemble the frame of your bookshelf. This structure will hold the shelves in place and ensure stability.
- Lay the wood supports vertically against the wall.
- Attach the horizontal shelves at your desired heights using wood screws.
- Ensure everything is level before tightening the screws.
Pro Tip: Use a level to check that each shelf is perfectly horizontal.
Why this matters: A sturdy frame is crucial for holding books and decor items without sagging.
Time estimate: 1 hour
Step 4: Assemble the Bookshelf Frame
Editor’s Choice

Motovera Self Leveling Laser Level 100ft, Green Cross Line with Tripod, …
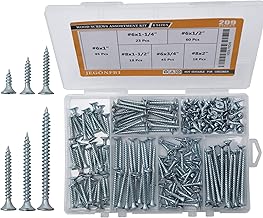
JEGONFRI High Hardness Wood Screws Assortment Kit, 209 pcs, Phillips Dri…
Step 5: Secure the Bookshelf to the Wall
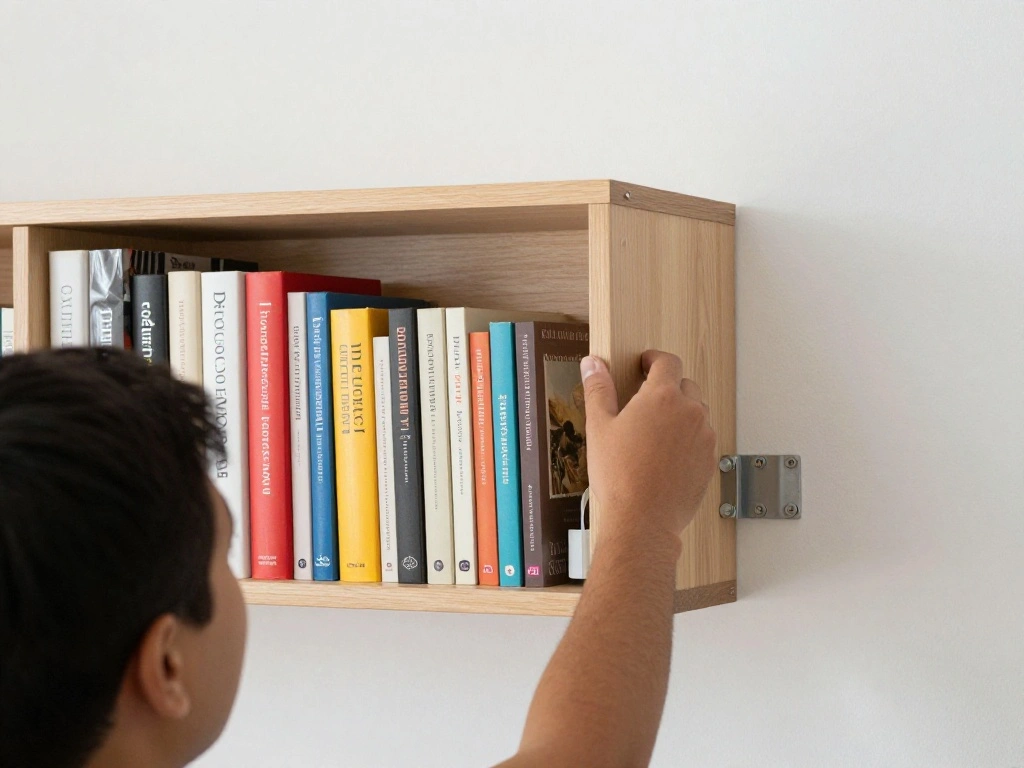
To prevent tipping, it’s essential to secure your bookshelf to the wall. Use brackets or screws for this purpose.
- Choose brackets that match the width of your bookshelf.
- Attach one bracket to the wall and the corresponding shelf.
- Repeat for the other shelves and ensure they are firmly secured.
Warning: Failure to secure the bookshelf could lead to accidents, especially if children or pets are around.
Why this matters: Securing your bookshelf adds safety and stability, keeping it upright and preventing accidents.
Time estimate: 30 minutes
Step 5: Secure the Bookshelf to the Wall
Editor’s Choice

NEODROP 4-Pack 12 Inch Heavy Duty Shelf Brackets, Large Wall Bracket for…

Booda Brand Furniture Anchors (10 Pack) for Baby Proofing, Furniture Str…

Ougourim Furniture Anchors (10 Packs) Anti Tip Furniture Anchors for Bab…
Step 6: Paint or Stain the Bookshelf

Once the assembly is complete, it’s time to give your bookshelf a fresh look. Choose a color that complements your office decor.
- Apply wood primer if necessary.
- Use a paintbrush to apply paint or stain evenly.
- Allow the first coat to dry before applying a second coat for full coverage.
Pro Tip: Use a foam roller for a smoother finish.
Why this matters: A well-finished bookshelf enhances the overall aesthetics of your workspace and protects the wood.
Time estimate: 1 hour (plus drying time)
Step 6: Paint or Stain the Bookshelf
Editor’s Choice

Paint Brushes Set of 24 Pieces Wooden Handles Brushes with Canvas Brush …

Rust-Oleum 334019 Painter’s Touch 2X Ultra Cover Primer Spray, 12 oz, Fl…

Mister Rui 4 Inch Foam Paint Roller Kit, 8 Pack – Mini Roller Set with 4…
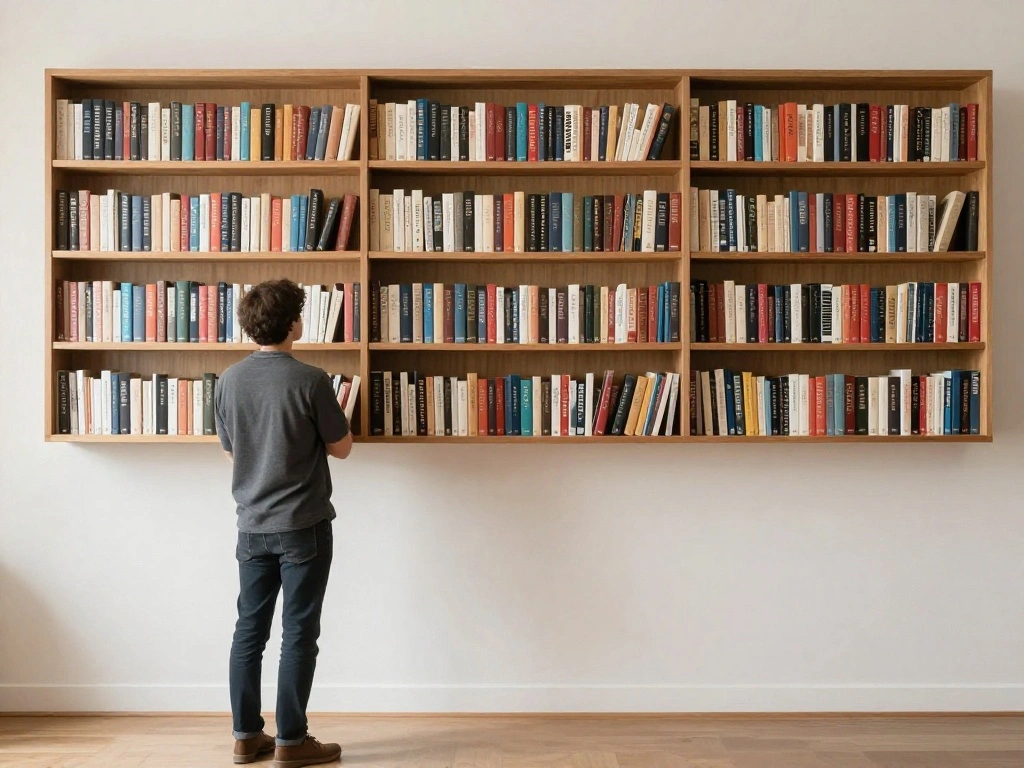
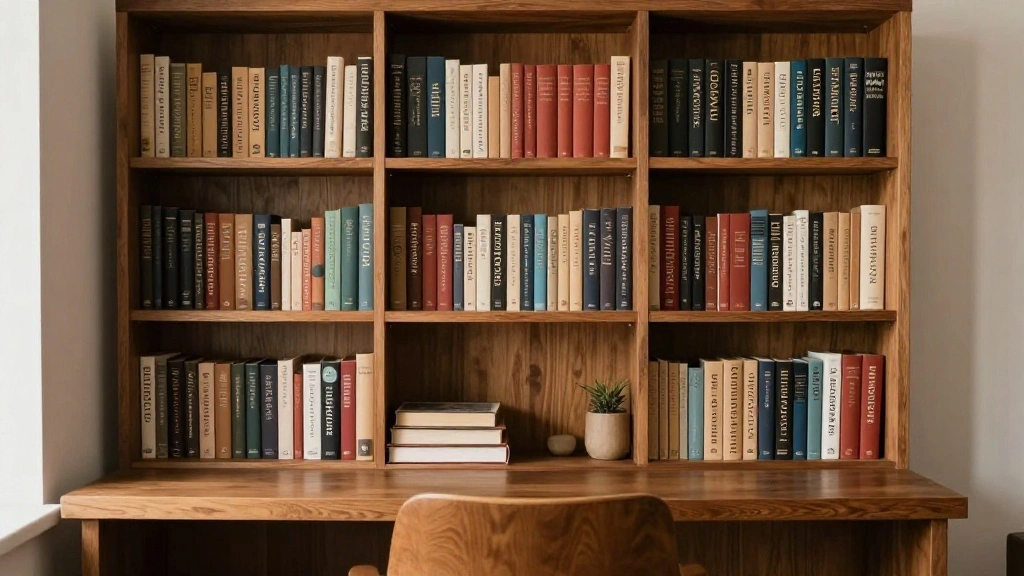
Step 7: Arrange Your Books and Decor

Now comes the fun part! Arrange your books, plants, and decorative items on the shelves. Create an inviting and visually appealing display.
- Start with larger books or items at the bottom.
- Mix in plants or decorative objects for variety.
- Leave some space for future additions.
Pro Tip: Use books both vertically and horizontally to create visual interest.
Why this matters: A well-arranged bookshelf not only makes your home office look good but also reflects your personality.
Time estimate: 30 minutes
Step 7: Arrange Your Books and Decor
Editor’s Choice

3 Pack Small Potted Fake Plants Artificial Eucalyptus Realistic Bonsai P…

BAYKA Floating Shelves for Wall, Wall Mounted Rustic Wood Shelves for Ba…
Step 8: Add Lighting to Your Display

Enhance the bookshelf by adding lighting elements. This can create a warm ambiance and highlight your favorite items.
- Decide on the type of lighting: LED strips, fairy lights, or small lamps.
- Install the lights along the shelves or incorporate them as accents.
- Make sure the lights are safely connected to a power source.
Pro Tip: Use warm white lights for a cozy atmosphere.
Why this matters: Proper lighting can dramatically elevate the visual appeal of your bookshelf display.
Time estimate: 30 minutes
Step 8: Add Lighting to Your Display
Editor’s Choice

HitLights LED Strip Lights, Small LED Light Strips Dimmable, RGB 5050 Co…

LEPOWER Desk Lamp, 800LM LED for Home Office, 12W Reading for Desk, Eye-…
Step 9: Finalize and Style Your Office Space
Take a step back and look at your completed bookshelf and office space. Make any additional changes to improve the overall look.
- Adjust the placement of items if needed.
- Add a comfortable chair or desk accessories to complete the look.
- Consider adding a rug or artwork to enhance the space.
Pro Tip: Keep your workspace clutter-free to maintain a professional appearance.
Why this matters: A well-styled office not only looks good but also boosts productivity and creativity.
Time estimate: 30 minutes
Step 9: Finalize and Style Your Office Space
Editor’s Choice

yumcake Teamwork Metal Wall Art, Office Motivational Wall Decor, Inspira…
Step 10: Maintain Your Bookshelf Display

To keep your bookshelf looking great, regular maintenance is essential. Dust and reorganize as needed to keep it fresh.
- Dust the shelves and items regularly to prevent buildup.
- Rearrange decor items periodically for a refreshed look.
- Check for any loose screws or brackets and tighten them.
Pro Tip: Schedule maintenance tasks monthly to keep your bookshelf in top shape.
Why this matters: Regular upkeep ensures your bookshelf remains a functional and attractive part of your home office.
Time estimate: 15 minutes per month
Step 10: Maintain Your Bookshelf Display
Editor’s Choice

Decorative Bookends Chess Bookends, Black Book Ends Heavy Book Supports,…
Pro Tips
- Choose Versatile Decor: Select decor items that can easily be changed with seasons or trends.
- Mix Textures: Combine different materials like wood, metal, and glass for visual interest.
- Use Bookends: Invest in stylish bookends to keep your books organized and add flair.
- Incorporate Personal Touches: Display personal items like photos or souvenirs to make the space uniquely yours.
- Consider Functionality: Use some shelves for functional items like office supplies.
Pro Tips
Editor’s Choice

Der Rose 1Pcs Fake Plants Hanging Artificial Potted Faux Eucalyptus Plan…
Common Mistakes to Avoid
Warning: Do not overcrowd the shelves. This can make the display look cluttered and uninviting. Keep it neat and organized.
Warning: Avoid using low-quality materials. Poor-quality wood can warp or break over time, compromising the bookshelf’s safety.
Warning: Do not ignore wall studs. Failing to anchor your bookshelf properly can lead to tipping and accidents.
Common Mistakes to Avoid
Editor’s Choice

Furniture Anchors for Baby Proofing, Anti Tip Furniture Wall Anchors to …

Psilvam Chaise Lounges, Lounge Chairs with Adjustable Backrest, Supports…
Troubleshooting Section
Problem: The bookshelf wobbles.
Solution: Ensure all screws are tightened and check that it’s secured to the wall properly.
Problem: Books or items keep falling off.
Solution: Adjust the arrangement and make sure items are placed securely.
Problem: Paint is uneven.
Solution: Sand down rough patches and apply an additional coat of paint.
Troubleshooting Section
Editor’s Choice
BAGAIL Non-Adhesive Shelf Liner, Thick Strong Grip Drawer Liners for Kit…

KURUI Drywall Anchors and Screws Assortment Kit 270PCS, 135 Plastic Dry …

Slobproof Refillable Touch-Up Paint Pen, Mess-Free, Reusable Wall Paint …
Variations/Alternative Methods
1. Floating Shelves: A sleek alternative that provides a modern look without the bulk of a traditional bookshelf. Perfect for small spaces.
2. Corner Shelves: Utilize corner spaces for a unique display that maximizes storage without taking up too much room.
3. DIY Pallet Shelves: Use wooden pallets to create a rustic bookshelf. This is a budget-friendly option that adds character.
Variations/Alternative Methods
Editor’s Choice

Ultrawall Wall Mount Wood Organizer and Lumber Storage Metal Rack with 3…
BAYKA Floating Shelves for Wall, Wall Mounted Rustic Wood Shelves for Ba…

Homode Corner Shelf Wall Mount, Set of 4 Floating Corner Shelves with Co…
FAQs
What if I don’t have enough wall space? Consider using vertical space with tall bookshelves or floating shelves.
How long should I wait to put books on the shelves after painting? Allow at least 24 hours for the paint to cure before placing items.
Is it safe to mount a bookshelf myself? Yes, as long as you follow proper instructions and secure it to wall studs.
FAQs
Editor’s Choice

BAMEOS Floating Shelves, 31W x 8D Wall Mounted Display Shelves with Invi…

Zinc Self-Drilling Drywall Anchors with Screws Kit, 25 Heavy Duty Metal …

FACBOTALL 82″ Tall Bookshelf, 7-Tier Open Shelves Bookcase, Freestanding…
Conclusion
Congratulations on creating your very own bookshelf wall display! You’ve not only improved your home office’s aesthetics but also created a functional space that reflects your style. Remember to maintain it and make adjustments as needed, ensuring it remains a source of inspiration.
As you enjoy your new setup, consider exploring other home office enhancements like desk organizers or artwork that complements your bookshelf. Your workspace can be a true reflection of your personality and creativity!