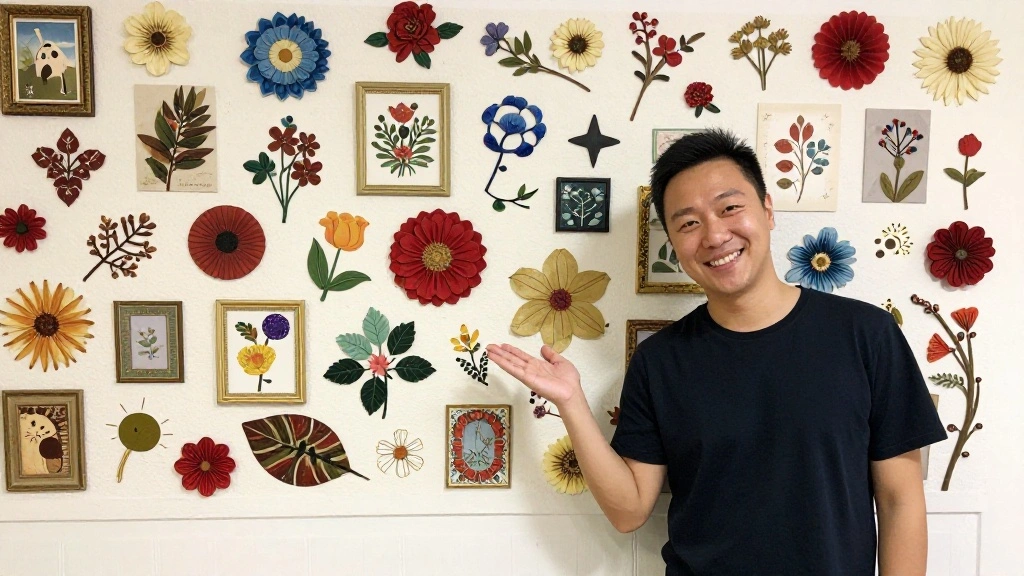
Have you ever faced the daunting task of selecting the right artwork for a large wall? It can be overwhelming, especially when the wrong choice can make a space feel imbalanced or uninspired. Art is a vital element in home decor, and finding the perfect fit is essential to creating a harmonious environment.
In this guide, you will learn how to select the right size art for your large wall, ensuring that your space feels both inviting and stylish. By understanding the visual formula for art placement, you will elevate your interior design skills and enhance the ambiance of your home.
This guide will walk you through specific steps to measure, choose, and hang your art, tailored for beginners. Skill Level: beginner
Time Estimate: 2-3 hours
Ready to transform your wall into a stunning focal point? Let’s dive in!
TL;DR Summary
- Measure your wall size to determine the appropriate art dimensions.
- Consider the visual formula to ensure balanced art placement.
- Choose artwork that complements your room’s color scheme and style.
- Follow the step-by-step instructions for hanging your art securely.
TL;DR Summary
Editor’s Choice

STAS Cliprail Picture Hanging System Set – Covers 9.84 ft of Wall Space …

GDMINLO Soft Tape Measure Double Scale Body Sewing Flexible Tailor Craft…

Creating Your Picture Book Dummy: A Layout Guide for 32, 40, & 48 Page P…
Prerequisites/Materials Needed
- Measuring tape (1)
- Graph paper or design software
- Ruler (1)
- Level (1)
- Artworks (3-5 pieces)
- Hammer (1)
- Nails or picture hangers (as needed)
- Pencil (1)
Prerequisites/Materials Needed
Editor’s Choice

CRAFTSMAN 25-Ft Tape Measure with Fraction Markings, Retractable, Self-L…

24 Sheets 6″x6″ Pink Spring Scrapbook Paper – Single-Sided Pattern Decor…
Skill Level & Time Estimate
Skill Level: beginner
Total time estimate: 2-3 hours
Breakdown:
– Measuring and planning: 30 minutes
– Selecting artwork: 1 hour
– Hanging art: 1-2 hours
Skill Level & Time Estimate
Editor’s Choice
CRAFTSMAN 25-Ft Tape Measure with Fraction Markings, Retractable, Self-L…

GalleryOne Clearline Picture Hanging System Set- Covers 9.75 ft of Wall …

Torpedo Level Magnetic, Firecore 9 Inch Shockproof Small Leveler Tool wi…
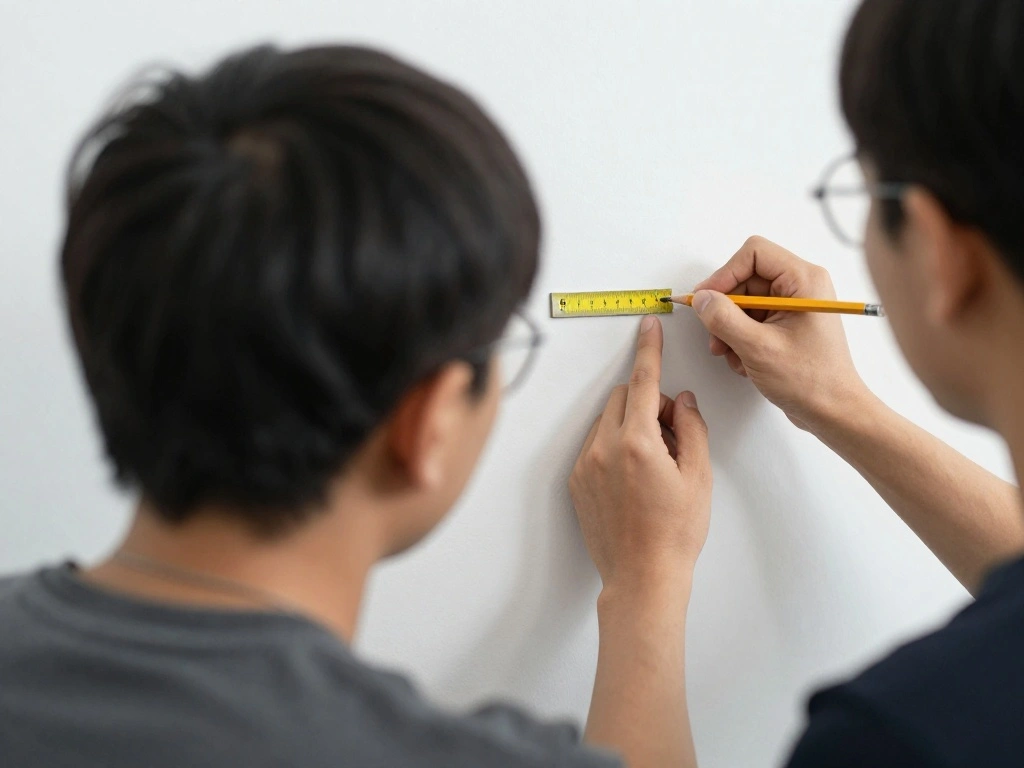
Step 1: Measure Your Wall
Start by accurately measuring your wall dimensions. This step is crucial to determine how much space you have for your artwork. Follow these sub-steps:
- Use a measuring tape to measure the width and height of your wall.
- Write down these measurements for reference.
- Consider the area where you want to place the artwork, like above furniture or on an empty wall.
Why this matters: Knowing your wall size helps you visualize the scale of the art needed. Warning: Double-check measurements to avoid errors.
Time estimate: 30 minutes
Step 1: Measure Your Wall
Editor’s Choice

Digital Caliper, Sangabery 0-6 inches Caliper with Large LCD Screen, Aut…

Picture Hanging Kit, Upgraded Picture Hanging Tool with Level, Hang Sawt…
Step 2: Determine Art Size Using the Visual Formula
Next, apply the visual formula to find the right art size. The general rule is that art should occupy about 60-75% of the wall space. Follow these sub-steps:
- Calculate the total wall area in square feet.
- Multiply this number by 0.6 to 0.75 to find the ideal artwork size range.
- Keep in mind the height from the floor; center the art around eye level.
Why this matters: This formula ensures that your art doesn’t overwhelm the space or feel too small. Pro Tip: Use larger pieces for bigger walls and smaller pieces for more intimate spaces.
Time estimate: 30 minutes
Step 2: Determine Art Size Using the Visual For…
Editor’s Choice

Ring Size Chart Accurate Sizing Guide Poster (3) Canvas Painting Wall Ar…
Digital Caliper, Sangabery 0-6 inches Caliper with Large LCD Screen, Aut…
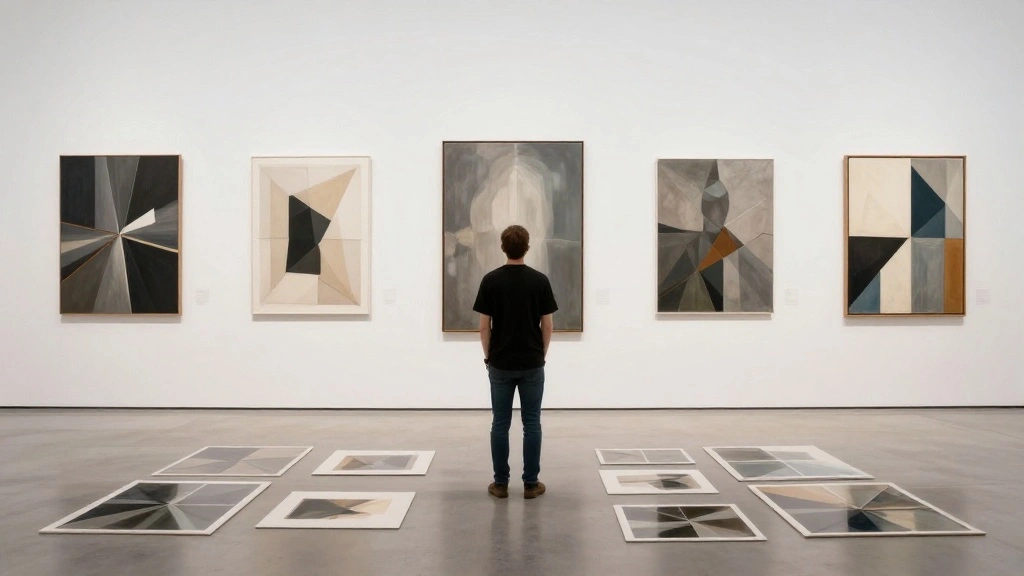
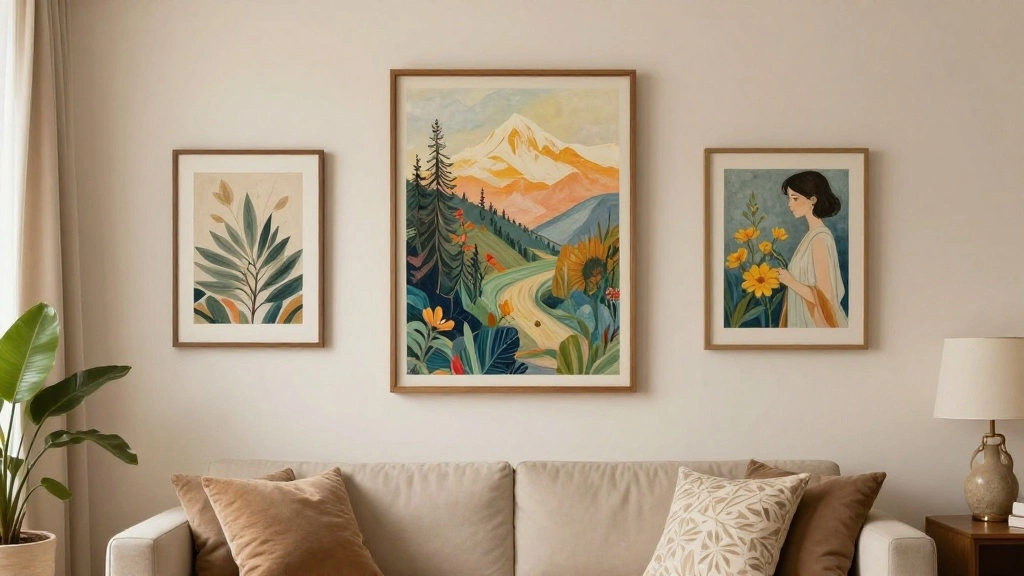
Step 3: Choose Your Artwork
Now it’s time to select your artwork. Aim for pieces that resonate with you and fit your decor style. Follow these sub-steps:
- Consider your room’s color scheme and choose art that complements it.
- Decide on the style of art (modern, classic, abstract, etc.).
- Select 3-5 pieces that fit within the size range determined in the previous step.
Why this matters: The right artwork enhances your room’s aesthetic and creates a cohesive look. Warning: Avoid choosing art that clashes with existing decor.
Time estimate: 1 hour
Step 3: Choose Your Artwork
Editor’s Choice

Framed William Morris Gallery Wall Art Set of 5, Vintage Colorful Botani…

Nezyo 10 Pieces Color Paint Wheel Chart for Artist Kids Paint Mixing Lea…

upsimples 11×14 Picture Frame Set of 5, Display Pictures 8×10 with Mat o…
Step 4: Plan Your Layout
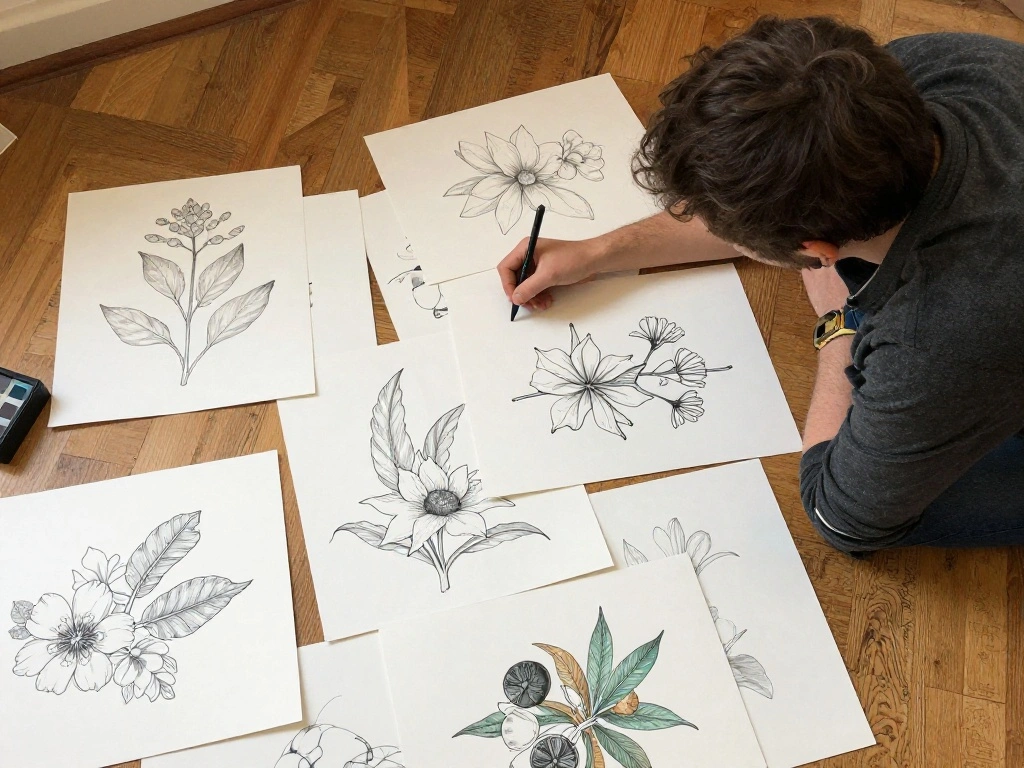
Before hanging your art, plan the layout for an appealing arrangement. Follow these sub-steps:
- Lay out your selected pieces on the floor to visualize their arrangement.
- Experiment with spacing; a common rule is to leave 2-5 inches between pieces.
- Use graph paper to sketch your layout, marking the dimensions of each piece.
Why this matters: Planning helps you avoid unnecessary holes in the wall. Pro Tip: Take a photo of your arrangement for reference while hanging.
Time estimate: 30 minutes
Step 4: Plan Your Layout
Editor’s Choice

Large Graph Paper Pad 11 x 17, Grid Paper, 4×4 Graph Ruled, Blueprint Qu…

Spec Ops Tools Tape Measure for Measuring & Layout, 1 1/8″ Double-Sided …

Hygloss Art Board with Hang Tabs – Great for Artwork, Arts & Crafts Supp…
Step 5: Prepare the Wall
Before hanging, ensure your wall is clean and ready. Follow these sub-steps:
- Wipe down the wall with a damp cloth to remove dust.
- Check for any holes or imperfections; patch them if necessary.
- Use a level to ensure your art will hang straight.
Why this matters: A clean, prepared wall guarantees a better presentation for your artwork. Warning: Don’t skip this step; it affects the overall look.
Time estimate: 15 minutes
Step 5: Prepare the Wall
Editor’s Choice

Motovera Self Leveling Laser Level 100ft, Green Cross Line with Tripod, …

Drywall Repair Kit Drywall Hole Repair Patch Kits Wall Spackle Repair Pa…

USANOOKS Microfiber Cleaning Cloth Grey – 12 Pcs (12.5″x12.5″) – High Pe…
Step 6: Mark the Hanging Points
Mark where each piece of art will hang. Follow these sub-steps:
- Use a pencil to mark the top center of each piece based on your planned layout.
- Measure down from that point to where the hanging hardware will be.
- Make additional marks on the wall for nails or hooks.
Why this matters: Accurate marks will help you hang the art precisely. Pro Tip: Use painter’s tape to visualize the outline of larger pieces.
Time estimate: 20 minutes
Step 6: Mark the Hanging Points
Editor’s Choice
CRAFTSMAN 25-Ft Tape Measure with Fraction Markings, Retractable, Self-L…

4 Rolls Premium Painters Tape, Blue Tape, Masking Tape, Paint Tape for M…

KURUI 303Pcs Picture Hanging Kit, Picture Hangers Assorted Kit with Heav…
Step 7: Hang Your Art

It’s time to hang your artwork! Follow these sub-steps:
- Use a hammer to gently tap nails into your marked points.
- For heavier pieces, use picture hangers or wall anchors for support.
- Hang each piece, ensuring it aligns with your marks and is level.
Why this matters: Proper hanging prevents damage and ensures your art is displayed beautifully. Warning: Don’t overload nails with too much weight.
Time estimate: 30 minutes
Step 7: Hang Your Art
Editor’s Choice

184 Pieces Picture Hanging Kit, 20lb, 30lb, and 50lb Picture Hangers, Me…
Step 8: Make Final Adjustments

After hanging, step back and assess your work. Follow these sub-steps:
- Check each piece to ensure they are straight and at the right height.
- Adjust any pieces that require repositioning.
- Consider adding additional decor elements like shelves or lighting for enhancement.
Why this matters: Final adjustments ensure that your art looks its best and enhances the overall space. Pro Tip: Take photos to compare before and after adjustments.
Time estimate: 15 minutes
Step 8: Make Final Adjustments
Editor’s Choice

BAYKA Floating Shelves for Wall, Wall Mounted Rustic Wood Shelves for Ba…
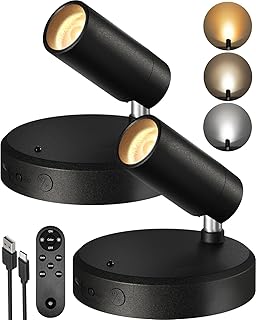
EZVALO Spotlights Indoor with Remote, 5500mAh Rechargeable Picture Light…

Command 15 lb Large Picture Hanging Strips 14 Pairs (28 Strips), Damage-…
Step 9: Enjoy Your New Space
Finally, step back and appreciate your newly adorned wall! Follow these sub-steps:
- Invite friends or family to view your work.
- Take time to enjoy the transformation of your space.
- Consider sharing your accomplishment on social media.
Why this matters: Enjoying your work reinforces your efforts and inspires future projects. Warning: Don’t forget to celebrate your efforts!
Time estimate: 10 minutes
Step 9: Enjoy Your New Space
Editor’s Choice

upsimples 19 Pack Picture Frames Collage Wall Decor for Mounting or Tabl…
Pro Tips
- Consider Lighting: Use wall sconces or spotlights to highlight your artwork.
- Mix Styles: Don’t be afraid to mix different styles or mediums for an eclectic look.
- Seasonal Changes: Rotate your art seasonally to keep your decor fresh and exciting.
- Use Templates: Cut out paper templates of your art pieces to practice layout on the wall before hanging.
- Stay Balanced: Balance colors and sizes throughout the arrangement to create visual harmony.
Pro Tips
Editor’s Choice

2PCS Adjustable Picture Hanging Wire Kit,Heavy Duty Mirror, Art Frame Ha…

Shelving Solution Wall Sconce 14.4 x 3.5 Inch, with Tea Light Candle Hol…
Common Mistakes to Avoid
Warning: Avoid these common pitfalls:
- Choosing art that is too small for your wall can make the space feel empty.
- Hanging art too high or too low disrupts the visual flow of the room.
- Not considering color harmony can lead to clashing decor.
To fix these mistakes, reassess your measurements, consult the visual formula, and adjust as necessary.
Common Mistakes to Avoid
Editor’s Choice
Digital Caliper, Sangabery 0-6 inches Caliper with Large LCD Screen, Aut…
KURUI 303Pcs Picture Hanging Kit, Picture Hangers Assorted Kit with Heav…

JimKing Creative Color Wheel, Paint Mixing Learning Guide, Art Class Tea…
Troubleshooting Section
Problem: Artwork looks too small on the wall.
Solution: Re-evaluate your art size using the visual formula.
Problem: Art is hung unevenly.
Solution: Use a level to realign pieces.
Problem: Artwork clashes with decor.
Solution: Consider a different color palette or style.
Troubleshooting Section
Editor’s Choice
Motovera Self Leveling Laser Level 100ft, Green Cross Line with Tripod, …

Mcbazel 3 Pieces Artist Color Mixing Guides Wheel, Paint Mixing Learning…

Variations/Alternative Methods
Consider these options for displaying art:
- Gallery Wall: Create a collage of different pieces. Best for eclectic spaces.
- Framed Mirrors: Use mirrors as art to create the illusion of more space.
- Floating Shelves: Display art on shelves for easy rotation and flexibility.
Choose based on your personal style and spatial needs.
Variations/Alternative Methods
Editor’s Choice

BAYKA Floating Shelves Set of 2, 22.5 inches Farmhouse Rustic Wood Wall …

16 PCS Framed Eclectic Wall Art Decor, Modern Maximalist Home Gallery Wa…

Sweetcrispy 24″x36″ Arched Black Bathroom Mirrors for Wall, Bathroom Mir…
FAQs
What if I don’t have large art pieces? Consider creating a gallery wall with smaller pieces arranged creatively.
How long should I wait before hanging art after painting? Wait at least a week for the paint to cure before hanging anything.
Is it safe to use adhesive hooks for heavy art? No, always use nails or anchors for heavy pieces to ensure safety.
FAQs
Editor’s Choice

8×10 Picture Frame Gold – Picture Frames for Wall Hanging And Tabletop …
CrimsonMark 120Pcs #8 Self Drilling Drywall Anchors and Screws kit #8 x …
Conclusion
Congratulations! You’ve successfully chosen and hung art for your large wall. Your space now reflects your style and personality.
Consider exploring other areas of your home to enhance further, or experiment with seasonal decor changes. Keep creating beautiful spaces!
Remember, art is a journey — enjoy every step!