
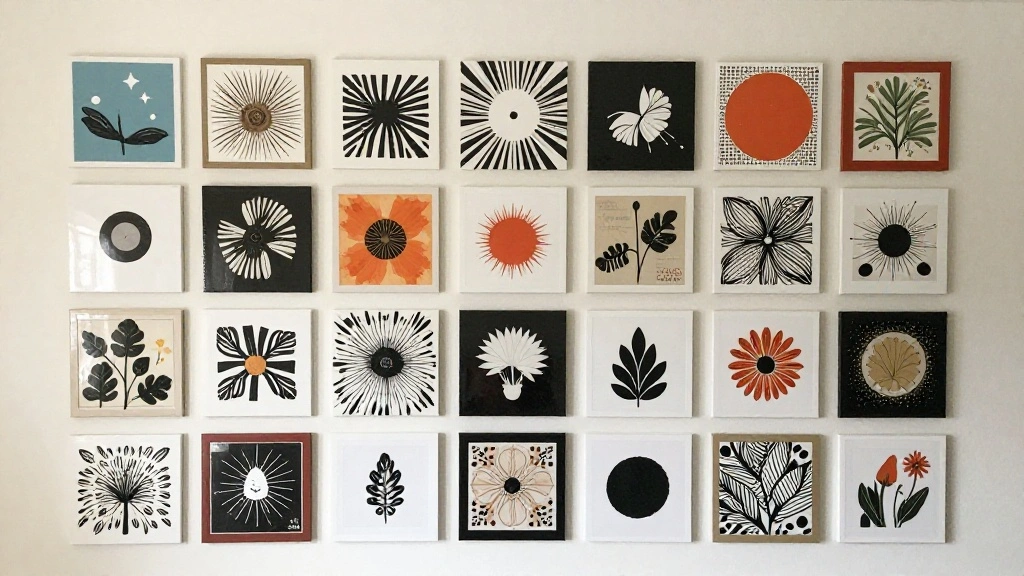
Are you tired of seeing bare walls in your home? Or worse, have you experienced the frustration of artwork falling down due to inadequate hanging methods? Building a gallery wall not only adds character to your space but also allows you to showcase your personal style. Using Command Strips can be a game changer as they provide a damage-free solution to hanging pictures. This guide will walk you through the entire process of creating a gallery wall that will not fall down, giving you tips on how to arrange your artwork and securely attach it using Command Strips. Level: Beginner
Time Estimate: 1-2 hours
By the end of this guide, you will know exactly how to select the right Command Strips, measure your wall space, arrange your artwork, and hang each piece securely to ensure your gallery wall stays intact. Time Estimate: 1-2 hours.
Get ready to transform your walls into a stunning display that reflects your unique taste!
TL;DR Summary
- Choose the right Command Strips for your artwork.
- Measure and plan your gallery wall layout before hanging.
- Securely attach your artwork using Command Strips.
- Enjoy your beautifully arranged gallery wall without worrying about falls!
TL;DR Summary
Editor’s Choice

15 lb Large Picture Hanging Strips 14 Pairs (28 Strips), Damage-Free Han…

Go Hang It! Pro, All-in-One Picture Hanging Kit – Picture Leveling and H…

CRAFTSMAN 25-Ft Tape Measure with Fraction Markings, Retractable, Self-L…
Prerequisites/Materials Needed
- Command Strips: Choose strips based on the weight of your artwork.
- Artwork: Various pieces you want to display.
- Measuring Tape: For accurate measurements.
- Pencil: For marking the wall.
- Level: To ensure your artwork is straight.
- Step Ladder (if necessary): For reaching higher areas.
Prerequisites/Materials Needed
Editor’s Choice

Motovera Self Leveling Laser Level 100ft, Green Cross Line with Tripod, …
15 lb Large Picture Hanging Strips 14 Pairs (28 Strips), Damage-Free Han…
Skill Level & Time Estimate
Skill Level: Beginner.
You can create a stylish gallery wall without any prior experience!
Total Time Estimate: Approximately 1-2 hours, including planning, measuring, and hanging your artwork.
Skill Level & Time Estimate
Editor’s Choice

Torpedo Level Magnetic, Firecore 9 Inch Shockproof Small Leveler Tool wi…

Komelon F12 12-Foot Stick and Measure Flat Tape Measure
15 lb Large Picture Hanging Strips 14 Pairs (28 Strips), Damage-Free Han…
Step 1: Select Your Artwork
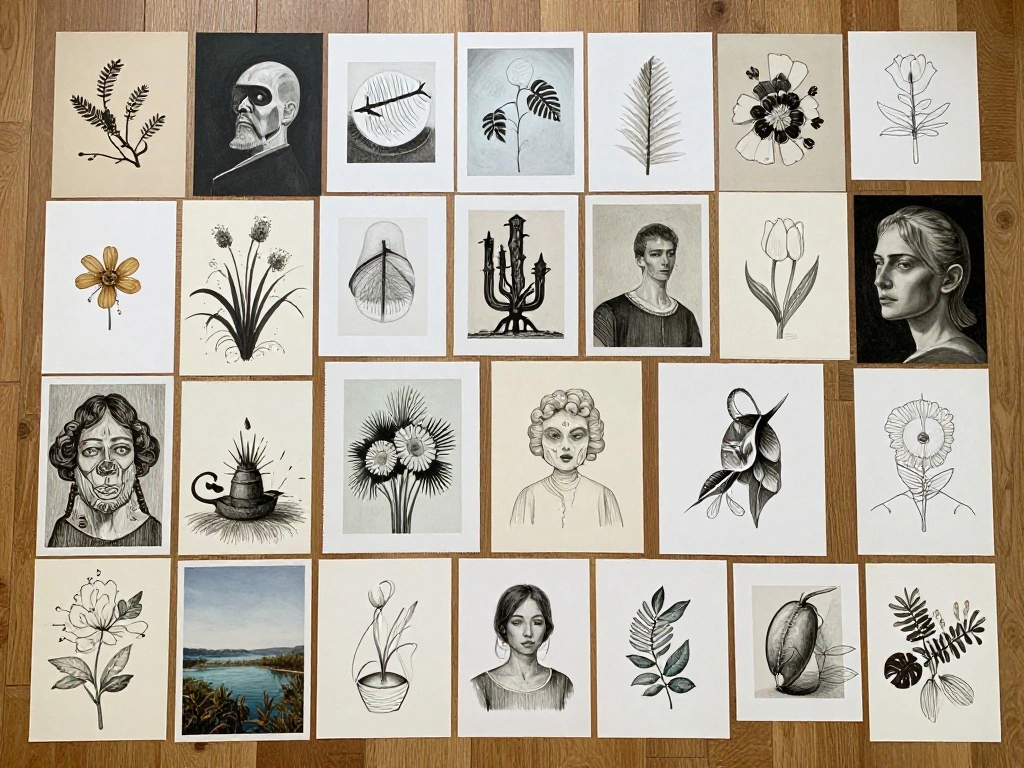
Begin by choosing the artwork you want to display on your gallery wall. Consider a mix of different sizes, shapes, and styles to create visual interest. Pro Tip: If you have a theme or color palette in mind, stick to it to create a cohesive look.
1. Gather all your artwork.
2. Lay it out on the floor to visualize how it will look together.
3. Adjust the arrangement until you are satisfied with the layout.
This step is crucial as it lays the foundation for your gallery wall.
Time estimate: 15-30 minutes.
Step 1: Select Your Artwork
Editor’s Choice
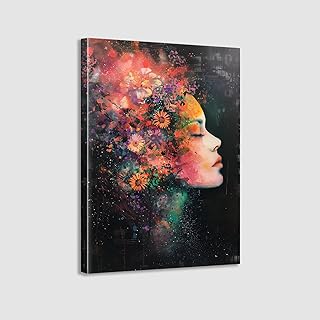
Framed Canvas Wall Art Beautiful Woman With Colorful Flowers, White Flow…

Command 20 lb XL 8 Pairs Heavyweight Picture Hanging Strips (16 Strips),…
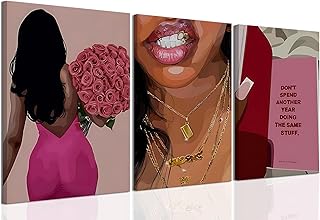
Pink Fashion Black Woman Canvas Wall Art Set of 3 African American Women…
Step 2: Measure Your Wall Space
Once you have your artwork selected, measure the wall space where you plan to create the gallery wall. This helps in determining how much space you have and how to arrange your pieces effectively.
1. Use a measuring tape to find the width and height of the wall area.
2. Mark the outline lightly with a pencil to visualize the dimensions.
3. Consider leaving some space between artworks for a balanced look.
Knowing the dimensions of your wall is essential for a well-proportioned gallery wall.
Time estimate: 10-15 minutes.
Step 2: Measure Your Wall Space
Editor’s Choice

Faber-Castell Graphite Sketch Pencil Set – 6 Graphite Pencils (2H, HB, B…
CRAFTSMAN 25-Ft Tape Measure with Fraction Markings, Retractable, Self-L…
15 lb Large Picture Hanging Strips 14 Pairs (28 Strips), Damage-Free Han…
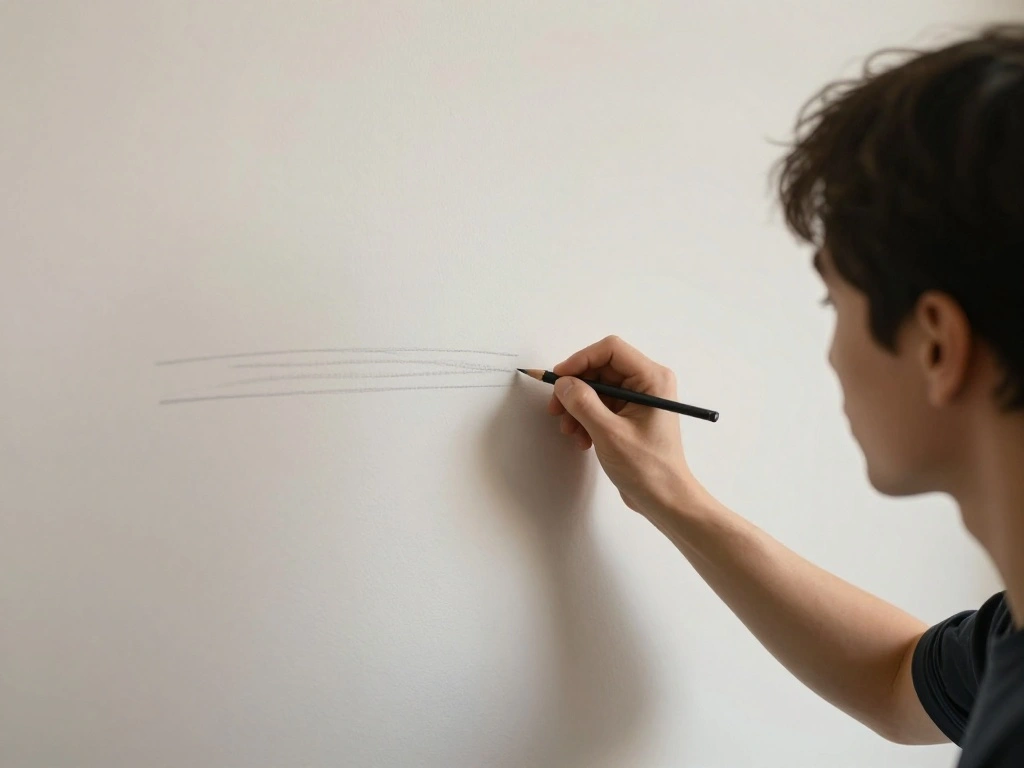
Step 3: Plan Your Layout on Paper
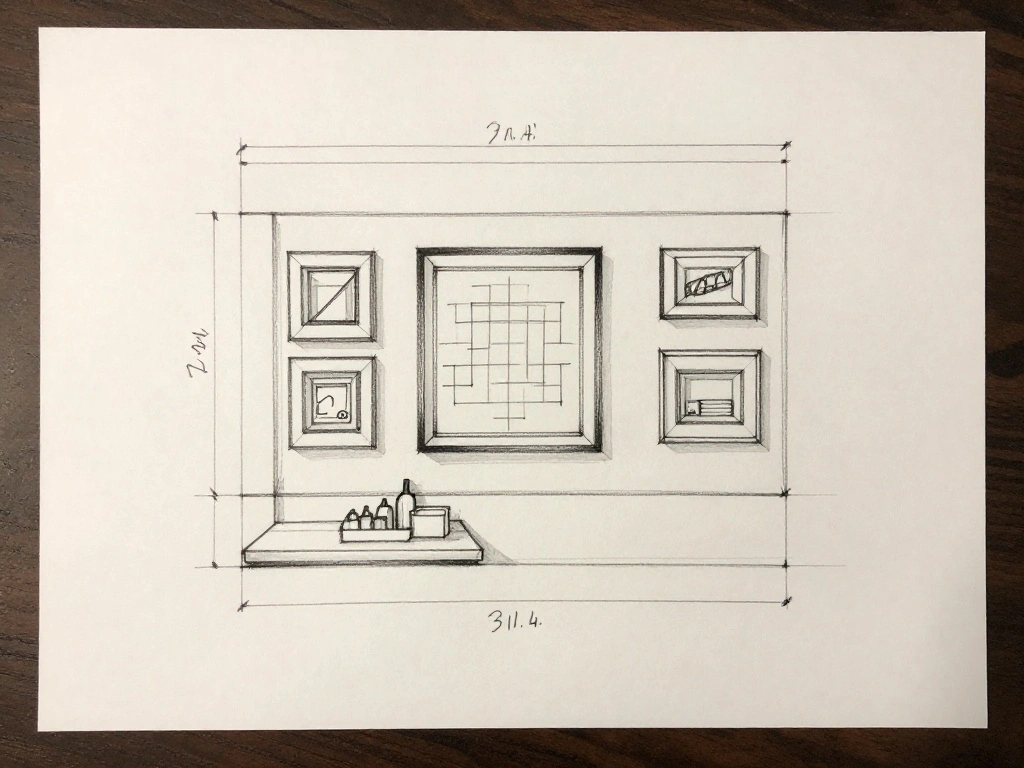
Before attaching anything to the wall, sketch your layout on paper to finalize the arrangement. This step helps you visualize how the pieces will fit together.
1. Draw a rough outline of your wall dimensions.
2. Place each piece of artwork in your sketch to find the best arrangement.
3. Note sizes and positions for reference.
Planning the layout prevents you from making unnecessary holes or markings on the wall and ensures a harmonious arrangement.
Time estimate: 20-30 minutes.
Step 3: Plan Your Layout on Paper
Editor’s Choice

Strathmore (411-9 400 Series Layout Bond Pad,White , 9″x12″, 50 Sheets
Torpedo Level Magnetic, Firecore 9 Inch Shockproof Small Leveler Tool wi…
Step 4: Prepare the Command Strips
Next, you need to prepare your Command Strips according to the weight and size of each artwork. This ensures a secure hold once hung.
1. Check the weight of your artwork and select the appropriate Command Strips (light, medium, or heavy duty).
2. Clean the back of each artwork with rubbing alcohol to ensure a strong bond.
3. Attach the Command Strips to the back of the artwork, pressing firmly.
Proper preparation of the Command Strips is key to preventing any falls in the future.
Time estimate: 10-15 minutes.
Step 4: Prepare the Command Strips
Editor’s Choice
15 lb Large Picture Hanging Strips 14 Pairs (28 Strips), Damage-Free Han…

Goo Gone Clean Up Wipes Adhesive Remover – 24 Count – Removes Adhesive R…
Step 5: Mark the Wall for Placement
After preparing the strips, it’s time to mark where each piece of artwork will go on the wall. This helps you place them accurately.
1. Use your pencil to mark the top corners of each piece of artwork based on your paper layout.
2. Double-check with a level to ensure your markings are straight.
3. Consider starting with the center piece and work your way outwards.
Marking the wall helps you avoid misalignment during placement, ensuring everything looks neat.
Time estimate: 15-20 minutes.
Step 5: Mark the Wall for Placement
Editor’s Choice
15 lb Large Picture Hanging Strips 14 Pairs (28 Strips), Damage-Free Han…
Torpedo Level Magnetic, Firecore 9 Inch Shockproof Small Leveler Tool wi…

Wooden Jumbo Pencil for Prop Gifts Decor 14 Inch Funny Big Novelty Penci…
Step 6: Hang Your First Piece
Now that you have everything marked, it’s time to hang your first piece of artwork. This will set the tone for the rest of your gallery wall.
1. Align the Command Strips on the back of the artwork with the markings on the wall.
2. Press firmly for about 30 seconds to ensure proper adhesion.
3. Use a level to check that it’s straight.
Hanging the first piece correctly is vital as it serves as the anchor for the rest of your gallery wall.
Time estimate: 10-15 minutes.
Step 6: Hang Your First Piece
Editor’s Choice

15 lb Large Picture Hanging Strips 14 Pairs (28 Strips), Damage-Free Han…

4Pcs Magnetic High Precision Small Bubble Level 52x20x15mm Three Line Ho…
Step 7: Continue Hanging Remaining Pieces
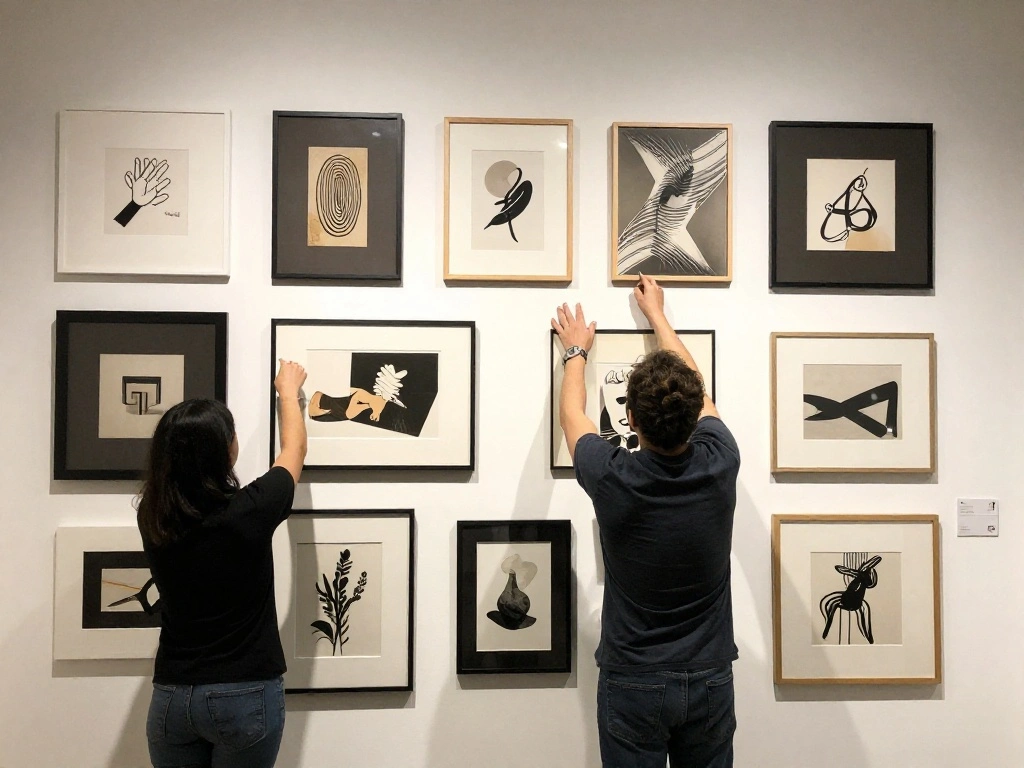
With the first piece hung, continue to add the remaining artwork according to your planned layout.
1. Repeat the process of aligning, pressing, and leveling for each piece.
2. Take your time and step back occasionally to ensure the arrangement looks good.
3. Adjust as needed based on your vision.
This step is where your gallery wall truly comes to life, so enjoy the process!
Time estimate: 30-45 minutes.
Step 7: Continue Hanging Remaining Pieces
Editor’s Choice

15 lb Large Picture Hanging Strips 14 Pairs (28 Strips), Damage-Free Han…
Pink Fashion Black Woman Canvas Wall Art Set of 3 African American Women…
Step 8: Final Adjustments and Checks
Once all pieces are hung, do a final review of the entire gallery wall. This is your chance to make any adjustments.
1. Step back and look at the wall from different angles.
2. Use a level to ensure everything is straight and aligned.
3. Make minor adjustments if anything looks off.
Taking the time to check your work ensures that your gallery wall looks polished and professional.
Time estimate: 15-20 minutes.
Step 8: Final Adjustments and Checks
Editor’s Choice
Command 20 lb XL 8 Pairs Heavyweight Picture Hanging Strips (16 Strips),…
Pink Inspirational Wall Art for Office Women Motivational Quotes Phrases…
Step 9: Enjoy Your New Gallery Wall!
Congratulations! You have now created a beautiful gallery wall that brings personality and style to your space.
Take a moment to appreciate your hard work.
1. Make sure to clean up any leftover materials.
2. Consider adding decorative elements like plants or shelves to enhance the display.
3. Share your new gallery wall with friends or on social media!
Enjoying your new gallery wall is the best part of the process, and it’s a great conversation starter.
Time estimate: 10-15 minutes.
Step 9: Enjoy Your New Gallery Wall!
Editor’s Choice
Command 15 lb Large Picture Hanging Strips 14 Pairs (28 Strips), Damage-…

Hoikwo 3 Pack Butterfly Wall Shelves, White Gold Floating Book Shelves, …

Crochet Purple Lily Flower – Happy Birthday Gifts for Women, Friends, Co…
Pro Tips
- Color Coordination: Match your artwork to your room’s color scheme for a unified look.
- Vary Frame Styles: Mix different frame styles and colors for added interest.
- Start from the Center: Begin hanging from the center and work outwards for balanced symmetry.
- Use Command Strips for Different Surfaces: Ensure you choose the right type of Command Strip for your wall surface (e.g., painted, wallpaper).
- Consider Lighting: Place your gallery wall near natural light or consider adding spotlights to enhance visibility.
Pro Tips
Editor’s Choice

LUCKYLIFE Picture Frames Collage Wall Decor 10-Pack, Gallery Wall Frame …
15 lb Large Picture Hanging Strips 14 Pairs (28 Strips), Damage-Free Han…
Torpedo Level Magnetic, Firecore 9 Inch Shockproof Small Leveler Tool wi…
Common Mistakes to Avoid
Warning: Don’t hang artwork too high. This can make the space feel uninviting. Aim for eye level.
Warning: Avoid using heavy artwork with light Command Strips. Always check the weight limit!
Warning: Don’t rush the layout planning. Take your time to find the right arrangement that feels good.
Warning: Avoid placing artwork too close together. Leave some space for a balanced look.
Common Mistakes to Avoid
Editor’s Choice

FINGERINSPIRE 6Pcs Elegant Woman Painting Stencils with Brush 11.7×8.3in…

Picture Hanging Kit, 315pcs Hanging Hardware with Hooks, Wire, Nails, D …
Troubleshooting Section
Problem: Artwork falls off the wall.
Solution: Check the weight of the artwork against the Command Strips used. Replace with stronger strips if necessary.
Problem: Uneven hanging.
Solution: Use a level to adjust pieces after hanging.
Problem: Wall damage from Command Strips.
Solution: Follow the removal instructions carefully to avoid damage when taking down artwork.
Problem: Difficulty in aligning artworks.
Solution: Use painter’s tape to outline where each piece will go before sticking.
Troubleshooting Section
Editor’s Choice
15 lb Large Picture Hanging Strips 14 Pairs (28 Strips), Damage-Free Han…

KURUI 303Pcs Picture Hanging Kit, Picture Hangers Assorted Kit with Heav…
Variations/Alternative Methods
1. Gallery Ledge: Instead of hanging, use a shelf to create a gallery ledge that allows for easy rearrangement of artwork.
2. Magnetic Paint: Use magnetic paint for easy hanging with magnets. This can be useful for changing displays regularly.
3. Wire and Clips: Hang a wire or string and use clips for a more casual, flexible display option.
Variations/Alternative Methods
Editor’s Choice

Art Display for Kids Artwork – 10ft Alloy Steel Wire with 48 Clips | Wil…

Magnetic Paint & Primer (Water Based) – Standard Yield 32oz, MISTD-1530

Dreamland Picture Ledge Shelf for Wall, Floating Shelves Set of 2, 48 In…
FAQs
What if I don’t have enough Command Strips? Purchase additional strips based on the weight of your artwork.
How long should I wait before hanging heavier pieces? Allow the adhesive to set for at least an hour before hanging anything heavy.
Is it safe to use Command Strips on wallpaper? Yes, but always test a small section first to ensure it doesn’t damage the wallpaper.
What if my wall is textured? Use Command Strips designed for textured surfaces or consider alternatives like hooks.
FAQs
Editor’s Choice
15 lb Large Picture Hanging Strips 14 Pairs (28 Strips), Damage-Free Han…
20 lb XL 8 Pairs Heavyweight Picture Hanging Strips (16 Strips), Damage-…

Made in U.S.A. 3 x 9 Durable ABS Plastic with Strong Adhesive Strips, Si…
Conclusion

You’ve successfully created a stunning gallery wall that showcases your personality and style! This project not only beautifies your space but also allows you to express creativity and make your home feel more inviting.
Now that you’ve mastered the art of the gallery wall, consider exploring other decorating projects or adding personal touches to your space. Share your new wall with friends and family or consider creating seasonal displays. Enjoy the new ambiance in your home!