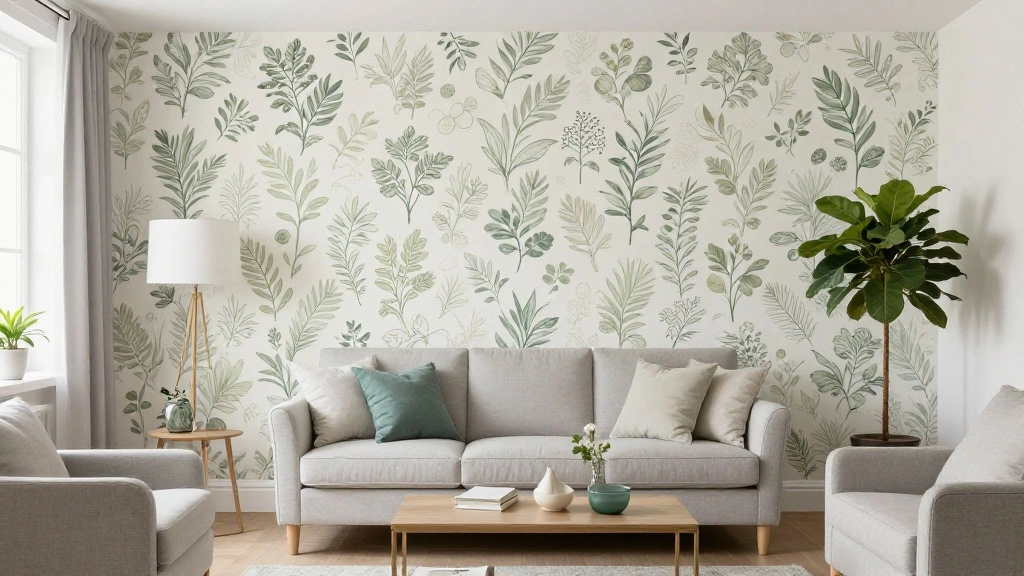
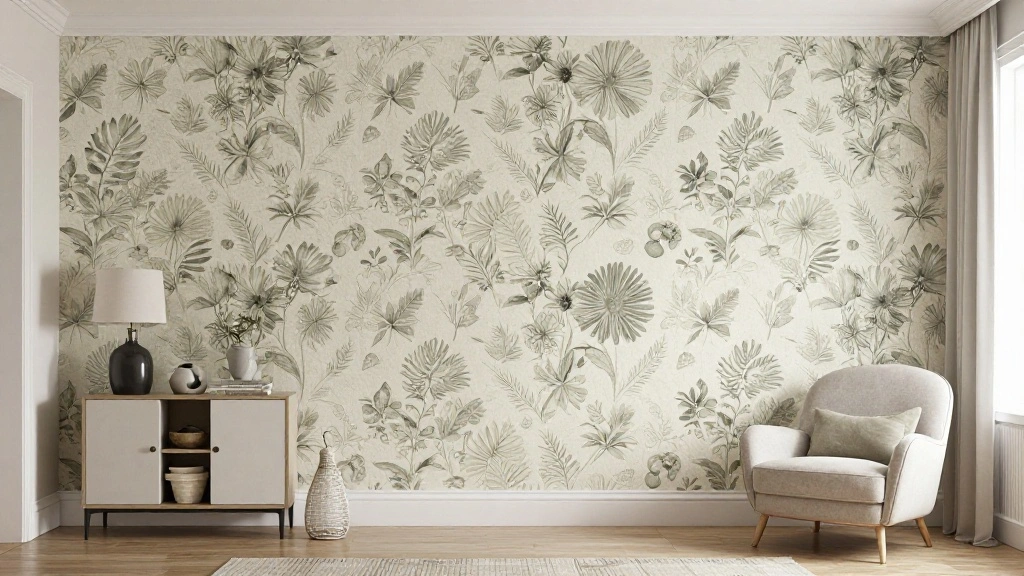
Is your living room feeling dull or outdated? A quick and effective way to transform your space is by adding an accent wall with peel-and-stick wallpaper. This simple DIY project can elevate your home’s aesthetic without the mess and hassle of traditional wallpapering.
In this guide, you’ll learn how to install peel-and-stick wallpaper to create a stunning accent wall in just a few hours. By the end, you’ll have a fresh, stylish focal point that reflects your personality and enhances your living room.
This is a beginner level project that requires no specialized skills, making it accessible to anyone. Expect to spend approximately 2-3 hours to complete the installation, depending on your space. We’ll guide you through every step, ensuring that you achieve a professional-looking result!
TL;DR Summary
- Gather all materials and tools needed for installation.
- Prepare the wall surface for adhesion.
- Measure and cut the wallpaper to fit your wall.
- Apply the wallpaper carefully to avoid bubbles and misalignment.
TL;DR Summary
Editor’s Choice

Roman’s E-Z Hang Peel & Stick Wallpaper Helper, Clear, Non-Staining, 3…

EHDIS Wallpaper Smoothing Tool Kit Wallpaper Smoothing Brush Large Wallp…

DIYSELF 30 Pack Box Cutter Retractable, 18mm Box Knife, Utility Knife Re…
Prerequisites/Materials Needed
- Materials:
- Peel-and-stick wallpaper (1 roll or more, depending on wall size)
- Wallpaper smoothing tool (1)
- Utility knife (1)
- Measuring tape (1)
- Level (1)
- Optional:
- Scissors (1)
- Pencil (1)
- Cleaning solution (1 bottle)
Recommended Products
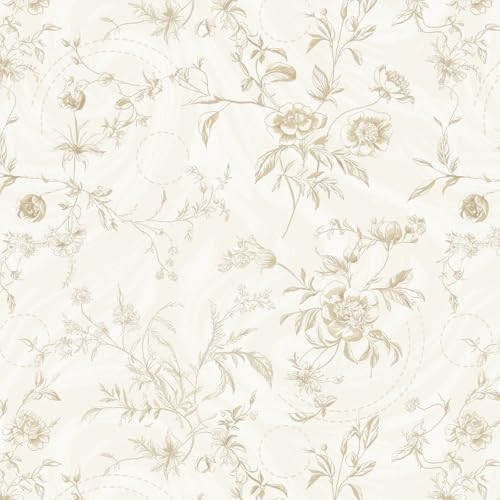
Design: Inspired by French gardens, exuding elegance and romance, a soft beige background features light brown floral branches and leaves in a scattered, natural arrangement. Delicate brushstrokes form varied floral patterns, while the harmonious color scheme captures the romantic essence of a French garden, bringing warmth and an inviting atmosphere into your home
Self Adhesive and removable: Peel off the back liner and stick to any dry, flat surface. PVC material, smooth surface, easy to clean. When pasting, you can use a hair dryer to preheat in advance to enhance the stickiness. If there are bubbles during the pasting process, you can use a needle shaped object to puncture the bubbles and gently smooth them out with a scraper

【SIZE&MATERIAL】17.3In X118.In=14.16sq.ft.Floral wallpaper,upgrading and thickening. Adopt vinyl and the latest removable glue,wallpaper sticks to any smooth, flat ,clean surface,No residue after removal.
Prerequisites/Materials Needed
Editor’s Choice
EHDIS Wallpaper Smoothing Tool Kit Wallpaper Smoothing Brush Large Wallp…

Safiyya 118″x17.7″ Peel and Stick Wallpaper White Contact Paper Waterpoo…

WORKPRO Premium Utility Knife, Retractable All Metal Heavy Duty Box Cutt…
Skill Level & Time Estimate
Skill Level: beginner
Total time estimate: 2-3 hours
Here’s a breakdown of the time by major steps:
- Preparation: 30 minutes
- Measuring & Cutting: 30 minutes
- Applying Wallpaper: 1-2 hours
Recommended Products

【Set of basic tools】: Package includes craft art knife with 5 replaceable blades, red smoother, blue smoother with soft felt, measuring tape

Make wallpaper installation a breeze with our wallpaper tool kit! This comprehensive kit includes must-have tools you need for a smooth and easy wallpapering experience.
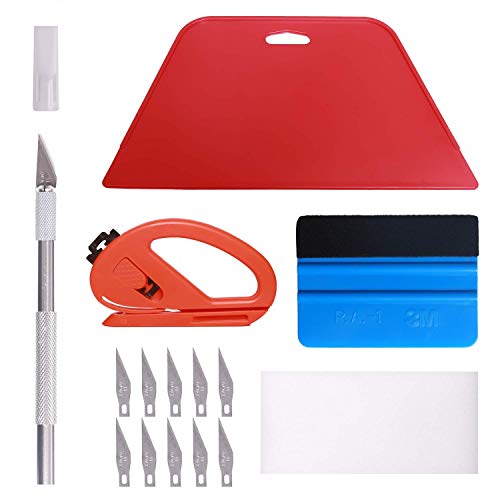
【Versatile Wallpaper Smoothing Tool Kit】This multi-function tool kit is including craft art knife with 10 replaceable blades, red and blue squeegee, vinyl cutter and sponge, which is perfect for wallpaper application, wallpaper trimming ceiling, self adhesive wallpaper, contact paper, countertop paint, ship-lap wallpaper, etc.
Skill Level & Time Estimate
Editor’s Choice
Safiyya 118″x17.7″ Peel and Stick Wallpaper White Contact Paper Waterpoo…

ROMAN’s Wallpaper Smoothing Tool for Home Improvement, Wallpaper Smoot…

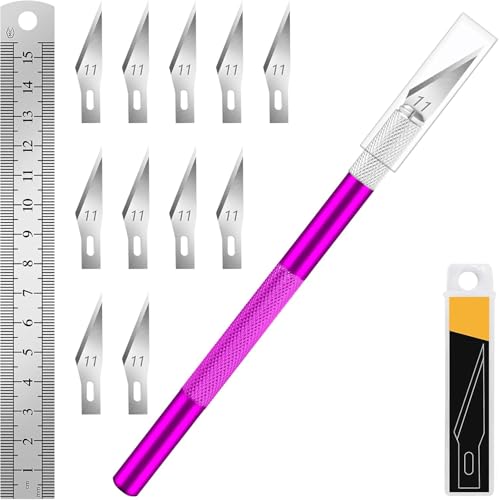
DIYSELF 16-Piece Exacto Knife Set, Craft Knife & Hobby Knife Kit, Precis…
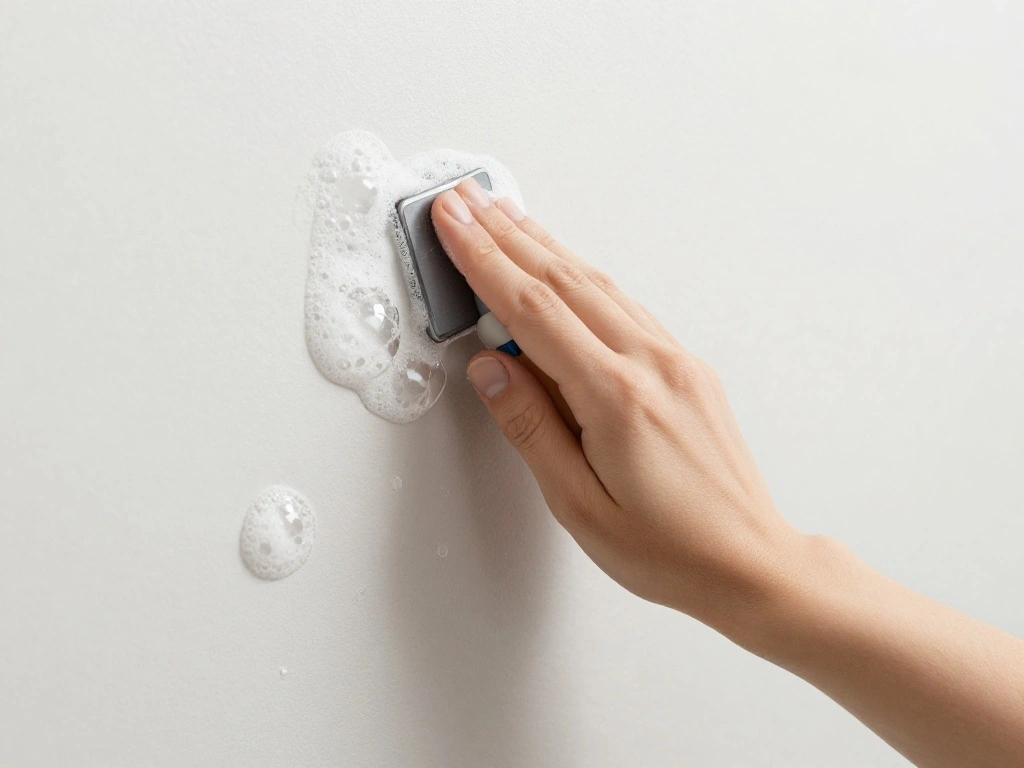
Step 1: Prepare the Wall Surface

Before you begin, it’s essential to prepare your wall surface. This step ensures that the peel-and-stick wallpaper adheres properly and lasts longer.
- Clear the area by removing furniture or covering it with drop cloths.
- Clean the wall with a mild cleaning solution to remove any dirt, dust, or grease.
- Dry the wall completely before proceeding.
Pro Tip: If your wall has any holes or imperfections, patch them up with spackle and sand them smooth.
Why this matters: A clean, smooth wall surface allows the wallpaper to adhere properly, preventing peeling or bubbling in the future.
Estimated time: 30 minutes.
Step 1: Prepare the Wall Surface
Editor’s Choice

Bates Choice – Drywall Repair Kit, 16pcs, Dry Wall Patch Kits, Wall Repa…

7x5ft Happy Birthday Backdrop Pink Floral Rose Gold Balloon Background B…

Zep ZUFWC18 Foaming Wall Cleaner, 18 oz, Clear
Step 2: Measure and Mark the Wall
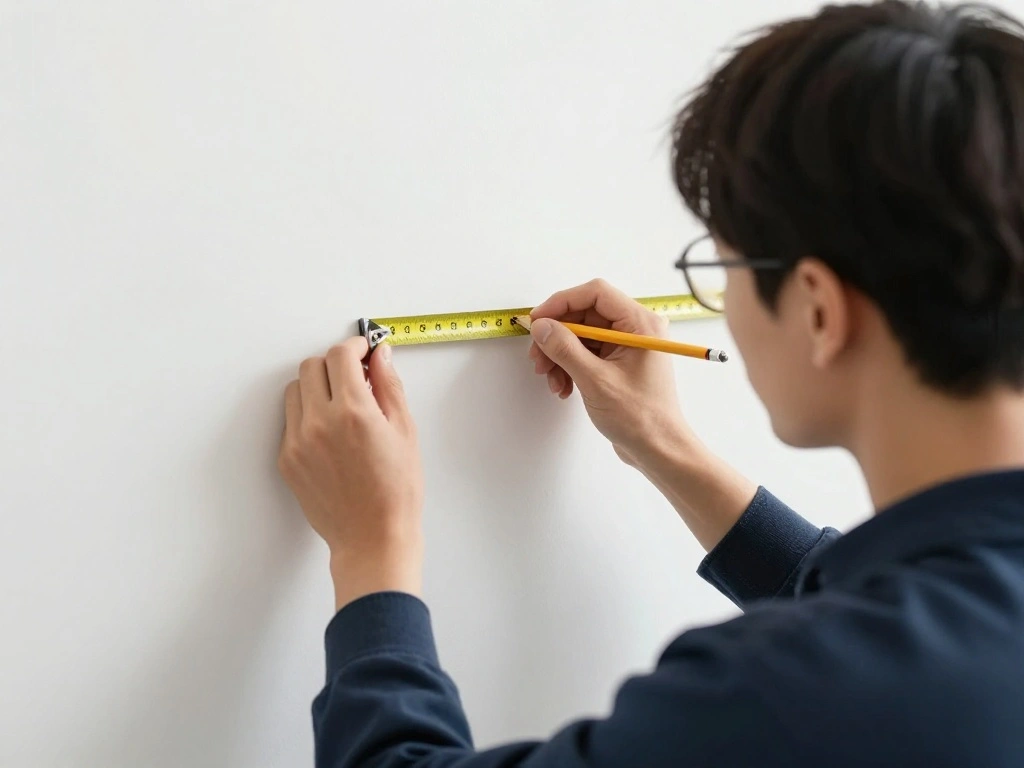
Accurate measurements are crucial for a professional finish. Take your time with this step to ensure everything aligns perfectly.
- Use a measuring tape to determine the height and width of your wall.
- Mark the starting point on the wall using a pencil; typically, this is at a corner or the center of the wall.
- Use a level to draw a vertical line down from your starting point; this will serve as your guide.
Warning: Double-check your measurements before cutting the wallpaper to avoid waste.
Why this matters: Accurate measurements help prevent mistakes during installation and ensure your design looks intentional and polished.
Estimated time: 30 minutes.
Recommended Products

VESATILE WALLPAPER APPLICATION TOOL KIT: A basic tool kit help you on all types of wallpaper application, trimming ceiling, woodwork or baseboard projects, vinyl wrap, window tint or glass film installation, makes the installation process much easier for you.

Lightweight & Durable: The shell of the small-size box cutters retractable is made of thickened ABS, so it is light but not flimsy. And it is comfortable to hold and easy to carry. It is very suitable for families, offices and schools.

Heavy-Duty Utility Knife : Aluminum alloy design with rust-free powder-coat makes the box cutter durable and lightweight (3.2 oz), passing the 1.5m drop test. SK5 razor blades through 1922 °F heat treatment are up to 64 HRC. For long-lasting, extremely durable cuts and slices on boxes, plastic packaging, and straps
Step 2: Measure and Mark the Wall
Editor’s Choice

CRAFTSMAN 25-Ft Tape Measure with Fraction Markings, Retractable, Self-L…

IRWIN Tools STRAIT-LINE Chalk Line, Classic Reel, Blue, 100ft (IWHT48441BC)

Torpedo Level Magnetic, Firecore 9 Inch Shockproof Small Leveler Tool wi…
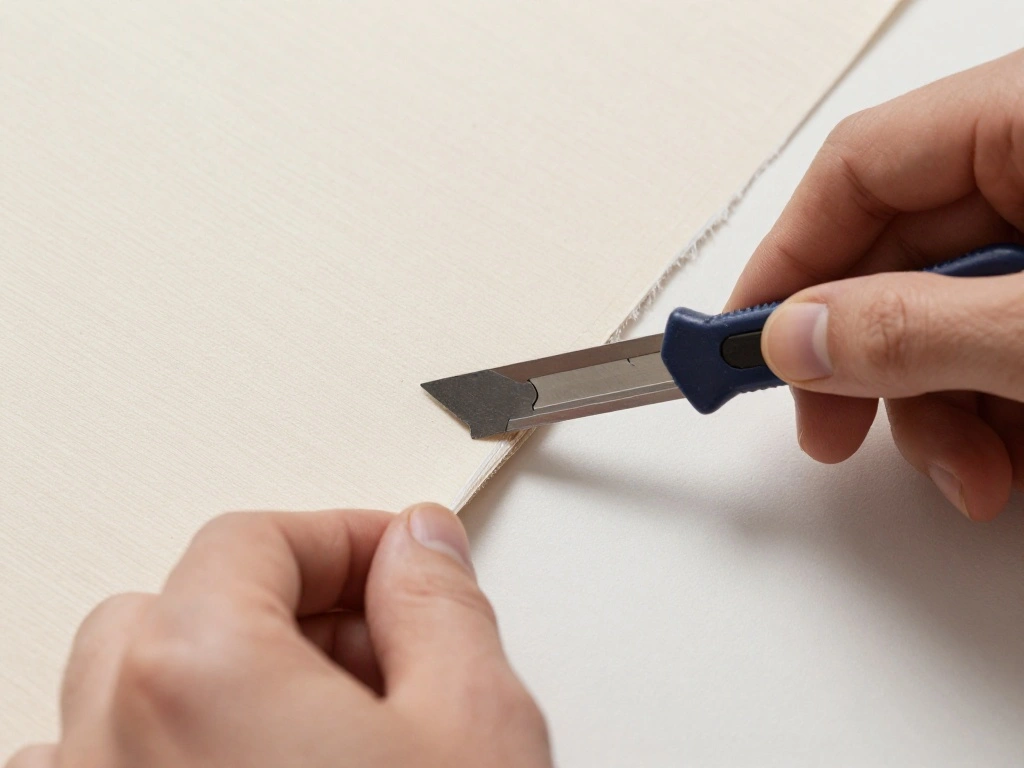
Step 3: Cut the Wallpaper
Now that your wall is prepared and marked, it’s time to cut the wallpaper to the appropriate size.
- Unroll the wallpaper and lay it flat on a clean surface.
- Use your measuring tape to measure the length needed for the wall and cut the wallpaper with a utility knife or scissors.
- Repeat this process for each section of wallpaper needed.
Pro Tip: It’s helpful to cut multiple panels at once if your wall requires several pieces.
Why this matters: Cutting wallpaper accurately ensures a seamless look and reduces installation time.
Estimated time: 30 minutes.
Step 3: Cut the Wallpaper
Editor’s Choice

anezus Self Healing Sewing Mat, 12inch x 18inch Rotary Cutting Mat Doubl…
WORKPRO Premium Utility Knife, Retractable All Metal Heavy Duty Box Cutt…
CRAFTSMAN 25-Ft Tape Measure with Fraction Markings, Retractable, Self-L…
Step 4: Apply the Wallpaper
With your wallpaper cut to size, it’s time to apply it to the wall.
- Peel back a small section of the backing from the top of the wallpaper.
- Align it with your marked vertical line and press it against the wall.
- Slowly peel the backing away while smoothing the wallpaper down with a wallpaper smoothing tool to avoid air bubbles.
Warning: Take your time during this step; rushing can lead to misalignment and bubbles.
Why this matters: Proper application ensures a flat, smooth finish that enhances the wall’s appearance.
Estimated time: 1-2 hours.
Step 5: Trim Excess Wallpaper
Once the wallpaper is applied, you may have excess material at the edges that needs trimming.
- Use a utility knife to carefully trim the top and bottom edges of the wallpaper along the baseboard and ceiling.
- Be gentle to avoid cutting into the wall beneath.
- Inspect the edges to ensure they are smooth and even.
Pro Tip: Use a straight edge as a guide for a cleaner cut.
Why this matters: Neat trimming gives your accent wall a finished, professional look.
Estimated time: 30 minutes.
Step 5: Trim Excess Wallpaper
Editor’s Choice

Edward Tools Paint Trim Guard – 12” Stainless Steel Paint Edger Blade …

XW Linoleum Flooring and Roofing Knife with Stainless Steel Hook Blade f…
Step 6: Smooth Out Bubbles and Wrinkles
After trimming, you might notice some air bubbles or wrinkles in the wallpaper. It’s important to address these for the best finish.
- Use the wallpaper smoothing tool to gently push out any bubbles, starting from the center and moving towards the edges.
- If a bubble persists, you can carefully lift the wallpaper to release the air and reapply.
- For wrinkles, use a light heat source like a hair dryer to soften the material, then smooth it out.
Warning: Do not overheat the wallpaper, as it can damage the adhesive.
Why this matters: A smooth surface enhances the beauty of the wallpaper and makes it look professionally installed.
Estimated time: 30 minutes.
Step 6: Smooth Out Bubbles and Wrinkles
Editor’s Choice

Art3d Smoothing Tool Kit for Applying Peel and Stick Wallpaper, Vinyl Ba…

INFINITI PRO CONAIR SmoothWrap Hair Dryer, Blow Dryer with Diffuser and …
Step 7: Enjoy Your New Accent Wall
Congratulations! You’ve successfully installed your peel-and-stick wallpaper. Now it’s time to enjoy your new accent wall.
- Step back and admire your work from different angles to ensure everything looks perfect.
- Rearrange your furniture to highlight your new design.
- Consider adding decor that complements the wallpaper to complete the look.
Pro Tip: Take pictures of your finished wall to share with friends or on social media!
Why this matters: Enjoying your space fosters a sense of accomplishment and personal pride.
Estimated time: 15 minutes.
Recommended Products

Precision Cutting: Ultra-sharp 30-degree snap-off blade delivers clean, accurate cuts, ideal for detailed arts and crafts, DIY projects, and professional tasks.

Standard duty rust resistant stainless steel snap off blade knife with stainless steel blade
Great for Beginners & Everyday Use: A practical exacto knife set for beginners, professionals, and DIYers, and a handy addition to any craft toolkit. Includes 1× craft knife, 10× replacement blades, and 1× 6-inch (15cm) steel ruler for added convenience
Step 7: Enjoy Your New Accent Wall
Editor’s Choice

Floating Framed Floral Shower Wall Art, Vintage Botanical Flower Canvas …

Parma77 Feng Shui Natural Rose Pink Quartz Crystal Money Tree, Healing C…

Littlefa Pillowcases 18×18 Decorative Pillows Covers with Motivational Q…
Pro Tips
- Choose Quality Wallpaper: Invest in good-quality peel-and-stick wallpaper to ensure durability and ease of application.
- Test a Small Area: Before full application, test a small piece of wallpaper on your wall to check for adhesion.
- Work in Pairs: Having someone help can make the installation process smoother and more enjoyable.
- Consider Lighting: Observe how your wallpaper looks in different lighting conditions before finalizing your choice.
- Store Leftover Wallpaper: Keep any leftover wallpaper for future touch-ups or repairs.
Pro Tips
Editor’s Choice
Art3d Smoothing Tool Kit for Applying Peel and Stick Wallpaper, Vinyl Ba…

AULIGET 100 Piece Black Slate Peel and Stick Backsplash Wall Tiles, 3″ x…

JETMORE 16 Pcs Exacto Knife Set, 3 Craft Knife and 13 SK5 Steel Blades, …
Common Mistakes to Avoid
Warning: Avoid these common mistakes to ensure a successful installation:
- Skipping wall preparation: Failing to clean or repair the wall can lead to poor adhesion.
- Not measuring accurately: Incorrect measurements can cause wallpaper to be too short or misaligned.
- Rushing the application: Taking your time helps to prevent air bubbles and misalignment.
Common Mistakes to Avoid
Editor’s Choice

2 Pack Self-Adhesive Measuring Tape, 78 Inch/200cm Steel Peel & Stick Ta…
Art3d Smoothing Tool Kit for Applying Peel and Stick Wallpaper, Vinyl Ba…

Drywall Repair Kit with 12″x12″ Dry Wall Repair Panel, 33-in-One Drywall…
Troubleshooting Section
Problem: Wallpaper is bubbling.
Solution: Use a smoothing tool to push air bubbles towards the edges. If needed, lift the wallpaper and reapply.
Problem: Wallpaper is peeling off.
Solution: Ensure the wall is clean and dry. Reapply with firm pressure, and consider using adhesive if necessary.
Problem: Wallpaper won’t stick.
Solution: Check for dirt or dust on the wall. Clean and dry the wall, then try applying again.
Problem: Misalignment during application.
Solution: Carefully lift the wallpaper and realign it, smoothing out any bubbles afterward.
Variations/Alternative Methods
Consider these alternative methods for installing wallpaper:
- Traditional Wallpaper: Requires paste and tools but offers more design options.
- Temporary Wallpaper: Good for renters but may have limited designs.
- Paintable Wallpaper: Allows you to customize your color but requires an extra step of painting after installation.
Variations/Alternative Methods
Editor’s Choice

WP Chomp World’s Best Wallpaper Stripper: and Sticky Paste Remover, Ci…

Laatse Pink Floral Contact Paper 17.5″ x 118″ Peel and Stick Wallpaper V…
Art3d Smoothing Tool Kit for Applying Peel and Stick Wallpaper, Vinyl Ba…
FAQs
- What if I don’t have a level? You can use a straight edge or a ruler to ensure your line is straight.
- How long should I wait before cleaning the wallpaper? Wait at least 24 hours after installation for the adhesive to set before cleaning.
- Is it safe to use peel-and-stick wallpaper in a bathroom? Yes, but make sure to choose a water-resistant type for best results.
- What if my wallpaper gets damaged? You can replace just the damaged section without needing to redo the entire wall.
- How can I remove wallpaper later? Most peel-and-stick wallpapers are designed to be easily removable by peeling them off from the corner.
FAQs
Editor’s Choice
Art3d Smoothing Tool Kit for Applying Peel and Stick Wallpaper, Vinyl Ba…
Torpedo Level Magnetic, Firecore 9 Inch Shockproof Small Leveler Tool wi…

CiCiwind Peel and Stick Wallpaper Wood Contact Paper White Shiplap Wall …
Conclusion

You’ve completed your peel-and-stick wallpaper installation! Your living room now has a stunning accent wall that reflects your style. Take a moment to celebrate your accomplishment!
Now that you’ve transformed your space, consider other DIY projects to enhance your home further. Perhaps paint your furniture or add some decorative elements that tie in with your new wallpaper. Every small change contributes to a beautiful living environment.
Enjoy your refreshed living room and inspire others with your creativity!