Are you tired of the same old wall art taking up space in your home? Seasonal changes can inspire fresh decor, but replacing wall art often feels like a daunting task.
Fortunately, there’s a quick and easy solution! By using picture ledges, you can swap out seasonal wall art in just minutes, transforming your space effortlessly.
In this guide, you’ll learn how to select, arrange, and display seasonal art on picture ledges, allowing you to keep your home feeling vibrant and refreshed without the hassle of nails and heavy lifting.
This process is designed for beginners and can be completed in approximately 30 minutes. Get ready to embrace the changing seasons with style!
Image Prompt: A beautifully decorated room with seasonal wall art displayed on picture ledges, showcasing a cozy and inviting atmosphere.
TL;DR Summary
- Use picture ledges to easily swap seasonal wall art.
- Gather materials and prepare your space.
- Follow simple steps to arrange and display artwork effectively.
- Enjoy a fresh look in your home with minimal effort!
Recommended Products

CREATE A BEAUTIFUL & ORGANIZED WALL DISPLAY: Transform empty walls into stylish storage and decor space with these natural wood floating picture ledge shelves. Perfect for displaying kids books, framed photos, vinyl records, small plants, artwork, and farmhouse home decor in nurseries, bedrooms, living rooms, or playrooms.

Wild Winter Style: A striking bison scene in snow brings a rugged, traditional feel to the room - printed on stretched canvas with crisp detail and a clean finished look.
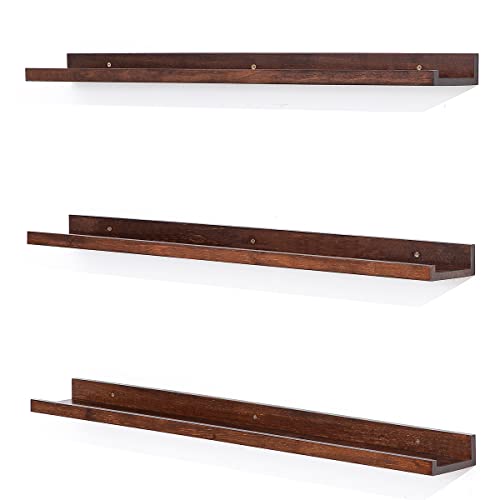
【3 Pcs Floating Shelves In Same Size】A set of 3 floating shelves will offer enough space to reorganize your favorite items.The length, width and height of the shelf are the same, 36*4.5*2 inch. You can place them in any position to handle and place clutter.
TL;DR Summary
Editor’s Choice

KURUI 700PCs Small Nails for Hanging Pictures & 8oz Small Hammer for Wom…
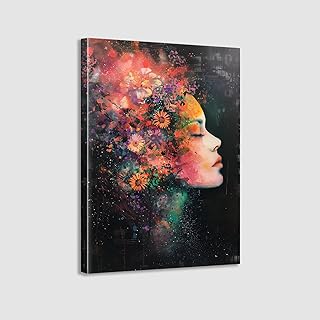
Framed Canvas Wall Art Beautiful Woman With Colorful Flowers, White Flow…

Industrial Abstract Cast Iron Art Sculpture Couple – Man Lifting Woman f…
Prerequisites/Materials Needed
- Picture Ledges: 1-3 depending on your wall space.
- Seasonal Wall Art: Choose 3-5 pieces for each season.
- Level: To ensure your ledges are straight.
- Measuring Tape: For precise placement.
- Pencil: To mark wall for ledge placement.
Prerequisites/Materials Needed
Editor’s Choice
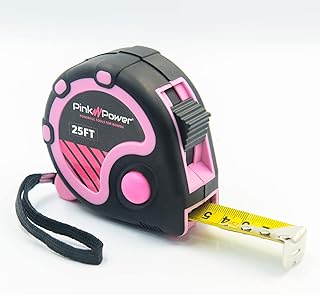
Pink Power 25ft Pink Tape Measure – Measuring Tape for Women’s Tool Kit …

Skill Level & Time Estimate
Skill Level: beginner
Total Time Estimate: 30 minutes
The process can be broken down as follows:
– Gathering materials: 5 minutes
– Measuring and marking: 10 minutes
– Installing picture ledges: 10 minutes
– Arranging your wall art: 5 minutes
Skill Level & Time Estimate
Editor’s Choice

Command Poster Hanging Strips, Small, White, Indoor Use, 64-Strips, Deco…
Step 1: Gather Your Seasonal Art
Start by selecting the seasonal wall art you wish to display. This can include prints, framed photos, or decorative items that reflect the current season.
- Choose 3-5 pieces that complement each other in style and color.
- Consider the size of your wall and picture ledges to ensure a balanced look.
Pro Tip: Mix different textures and materials for a more dynamic display!
Why this matters: Having a cohesive selection makes it easier to create an aesthetically pleasing arrangement on your ledges.
Time estimate: 5 minutes.
Image Prompt: A selection of seasonal wall art pieces laid out on a table, showcasing different styles and sizes.
Step 1: Gather Your Seasonal Art
Editor’s Choice

GRAPMKTG Home Decor Pulp Reading Women Thinker Statue Aesthetic Sculptur…

RipGrip Minimalist Wall Art – Set of 4 Woman Silhouette Line Drawings, R…
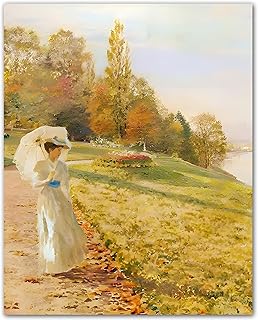
ZUKIY Woman by the Autumn Lake – 8×10 Unframed Autumn Lakeside Wall Art …
Step 2: Measure and Mark the Wall
Before you install your picture ledges, take accurate measurements to ensure they are placed correctly.
- Use a measuring tape to determine the desired height for your picture ledges. Typically, they should be around eye level.
- Mark the spots where you will install your ledges with a pencil.
Warning: Double-check your measurements to avoid unnecessary holes in the wall!
Why this matters: Proper placement ensures your artwork is displayed attractively and is easy to view.
Time estimate: 10 minutes.
Image Prompt: A person measuring a wall with a tape measure, marking spots with a pencil for picture ledge installation.
Step 3: Install the Picture Ledges
With your marks in place, it’s time to install the picture ledges.
- Using a level, align the picture ledge with your pencil marks.
- Secure the ledge to the wall using appropriate hardware, following the manufacturer’s instructions.
Pro Tip: If installing on drywall, use wall anchors for better support!
Why this matters: Proper installation ensures that your ledges can hold the weight of your art safely.
Time estimate: 10 minutes.
Image Prompt: A person using a level to install a picture ledge on the wall, with tools and hardware visible.
Step 3: Install the Picture Ledges
Editor’s Choice

KURUI Metal Self Drilling Drywall Anchors, 116PCs Shatter-Resistant Wall…

RipGrip Minimalist Wall Art – Set of 4 Woman Silhouette Line Drawings, R…
Step 4: Arrange Your Wall Art
Now comes the fun part: arranging your seasonal wall art on the picture ledges!
- Start by placing the largest piece at the center of the ledge.
- Layer smaller pieces around it, experimenting with different configurations until it feels balanced.
Pro Tip: Use stands or mini easels for a varied height display!
Why this matters: A well-arranged display draws the eye and creates a dynamic visual interest in your space.
Time estimate: 5 minutes.
Image Prompt: An assortment of seasonal wall art arranged on picture ledges, showcasing a vibrant and attractive display.
Step 4: Arrange Your Wall Art
Editor’s Choice
Industrial Abstract Cast Iron Art Sculpture Couple – Man Lifting Woman f…

Eden View Home Scripture Wall Art Interchangeable Seasonal Sign 15×10. B…

4 Pack Easel Display Stand Mini Wood Display Easels for Painting Artist …
Step 5: Step Back and Assess
After arranging your art, take a moment to step back and assess the overall look.
- Look for any pieces that seem out of place or need adjustment.
- Make minor tweaks as needed to achieve a balanced arrangement.
Pro Tip: Take a photo of your arrangement to remember how it looked before you make any changes!
Why this matters: A critical eye helps ensure that your display is visually appealing.
Time estimate: 5 minutes.
Image Prompt: A person stepping back to view their arrangement of wall art on picture ledges, with a thoughtful expression.
Step 5: Step Back and Assess
Editor’s Choice

CAMBOFOTO 74″ Aluminum Camera Tripod – Heavy‐Duty Professional Tri…

KURUI 303Pcs Picture Hanging Kit, Picture Hangers Assorted Kit with Heav…

Boswillon Floating Shelves Wall Mounted Set of 2, Modern Black Wall Shel…
Step 6: Enjoy Your New Decor
Now that your seasonal wall art is displayed, take a moment to enjoy your freshly decorated space!
- Invite friends or family to admire your work.
- Consider adding seasonal decor elements, like plants or candles, to enhance the overall ambiance.
Pro Tip: Change it up each season to keep your space feeling fresh and inviting!
Why this matters: Enjoying your hard work helps you appreciate the transformation in your home.
Time estimate: 5 minutes.
Image Prompt: A cozy living room with seasonal wall art on picture ledges, people enjoying the space.
Step 6: Enjoy Your New Decor
Editor’s Choice

VIONAMI Luxury Scented Candle Gift – Queen of The Night Rare Flower Fr…

4Pcs Pink Pillow Covers, Fashion Woman Watercolor Perfume High Heels Lip…

nuvagiki Interchangeable Seasonal Home Sign with 12 Icons, Farmhouse Woo…
Step 7: Plan for Future Swaps
Now that you’ve successfully swapped your wall art, consider how you will manage future changes.
- Store seasonal art in a dedicated location to keep it organized.
- Plan ahead for the next seasonal change to keep the process smooth.
Pro Tip: Create a seasonal calendar to remind yourself when to swap your decor!
Why this matters: Planning ahead makes future swaps easier and more enjoyable.
Time estimate: 5 minutes.
Image Prompt: A person organizing seasonal art in a storage box, with a calendar in view.
Step 7: Plan for Future Swaps
Editor’s Choice

2026 Seasonal Women’s Planner: Weekly Layouts Inspired by the Beauty o…

Sunflower Gifts for Women, Sunflower Decor Wall Shelf with Lifelike Flow…
Framed Canvas Wall Art Beautiful Woman With Colorful Flowers, White Flow…
Pro Tips
- Tip Name: Keep a seasonal rotation schedule to make swapping art a habit.
- Tip Name: Use themed decorations to complement your wall art.
- Tip Name: Incorporate personal photos for a unique touch.
- Tip Name: Mix framed and unframed art for visual variety.
- Tip Name: Consider lighting; use spotlights to highlight key pieces.
Pro Tips
Editor’s Choice

Family Picture Frame, Best Friend Picture Frame Gifts for Best Friend Wo…

DONFENTHY 3 Pieces Inspirational Pink Floral Wall Decor Wooden Hanging W…

HONWELL Track Lighting LED Spotlights with 3 Rotatable Lights Heads, Und…
Common Mistakes to Avoid
Warning: Placing artwork too high can make it hard to appreciate.
Ensure items are at eye level for optimal viewing.
Warning: Overcrowding the ledges can create visual chaos.
Leave some space between items for a cleaner look.
Warning: Forgetting to secure the ledges properly can lead to accidents.
Always follow installation instructions to ensure safety.
Warning: Ignoring wall decor style can lead to clashes in design.
Match your art with the overall room aesthetic for harmony.
Common Mistakes to Avoid
Editor’s Choice

PREXISO Multi Surface Laser Level LED Light Vial, 30Ft Horizontal & Vert…
KURUI 303Pcs Picture Hanging Kit, Picture Hangers Assorted Kit with Heav…

Dreamland Picture Ledge Shelf for Wall, Floating Shelves Set of 2, 36 In…
Troubleshooting Section
Problem: Art keeps falling off the ledges.
Solution: Make sure your picture ledges are installed securely and consider using art clips for added support.
Problem: The arrangement looks cluttered.
Solution: Remove one or two pieces to create more space and balance.
Problem: Art doesn’t match the room.
Solution: Select pieces that complement your furniture or wall colors.
Problem: Ledges are not level.
Solution: Recheck your measurements and adjust accordingly using the level.
Problem: Seasonal art feels outdated.
Solution: Refresh your collection regularly to keep it feeling modern and inviting.
Troubleshooting Section
Editor’s Choice

Tai Chi Workout Chart Poster, Gentle Tai Chi Exercises for Women and Beg…

Tandefio Gift Card Tree Holder Clip, 8 Branch Multiple Money Family Phot…
Variations/Alternative Methods
- Hanging Art: Instead of ledges, consider hanging art directly on the wall for a more permanent display.
- Gallery Wall: Create a gallery wall with various sizes of frames for an eclectic look.
- Magnetic Strips: Use magnetic strips for easy art swapping if you prefer non-permanent solutions.
Variations/Alternative Methods
Editor’s Choice

Framed Black Girl Wall Art Set of 3, Fashion Inspirational Black Woman W…

Hoikwo 3 Pack Butterfly Wall Shelves, White Pink Floating Book Shelves, …

CHUNNIAO A+B Paired Magnetic Strips 1x3x0.08,16 Pairs,Adhesive Magnets f…
FAQs
- What if I don’t have enough wall space? Consider using smaller picture ledges or rearranging furniture to create a dedicated art wall.
- How long should I wait before swapping art? A good rule of thumb is to change it with the seasons or every few months.
- Is it safe to install ledges myself? Yes, as long as you follow the instructions and use the right tools.
- What if my art is too heavy for the ledges? Ensure your ledges can support the weight by checking the specifications, and use wall anchors if needed.
- Can I mix different art styles? Absolutely! Mixing styles can create a unique and personalized look.
FAQs
Editor’s Choice

PHS – Professional Picture Hanging Hooks with Nails – Heavy Duty 50 lbs …

JMENGSSFL Vintage Black Women Reading Oval Wall Art Decor, African Ameri…
Industrial Abstract Cast Iron Art Sculpture Couple – Man Lifting Woman f…
Conclusion
Congratulations on successfully swapping your seasonal wall art! You’ve transformed your space with minimal effort and now have a beautiful display to enjoy.
As you continue to change your decor with the seasons, remember to explore new themes and styles that inspire you. Consider sharing your creations with friends or on social media for some extra motivation!
Keep this guide handy for future swaps and enjoy the flexibility and creativity that picture ledges offer. Happy decorating!
Image Prompt: A beautifully designed living room featuring seasonal wall art on picture ledges, radiating warmth and style.