
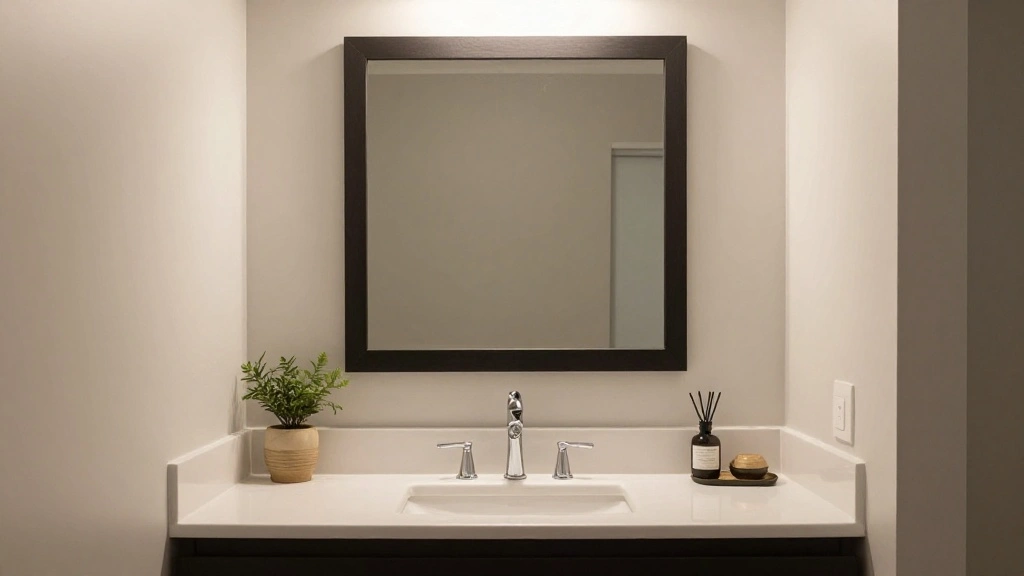
Many homeowners struggle with how to create a cohesive look in their bathroom, particularly when it comes to styling around a mirror. The mirror often serves as the focal point, but without proper styling, the space can feel disjointed or underwhelming. This guide helps you transform your bathroom walls into a stylish backdrop for your mirror, enhancing the overall aesthetic and functionality of the space.
By the end of this guide, you will learn how to effectively style your bathroom walls around a mirror, including tips on color schemes, complementary decor, and layout strategies. The steps outlined will help you create a harmonious look that elevates your bathroom’s style and makes it feel more inviting.
This project is classified as intermediate in difficulty and will take about 2-3 hours to complete. If you’re ready to elevate your bathroom’s design, let’s dive in!
TL;DR Summary
- Choose a mirror that serves as an anchor piece.
- Select a color palette that complements your mirror.
- Add wall art and accessories to enhance the overall look.
- Consider lighting to highlight your styled mirror.
TL;DR Summary
Editor’s Choice

20 Well Watercolor Paint Tray Palette Pallet Acrylic Painting Mixing Pla…

Tide and Tales 3D Botanical Floral Wall Art (Framed Set of 2) Ready-to-H…

Bathroom Light Fixtures, 3-Light Brushed Gold Vanity Lights for Bathroom…
Prerequisites/Materials Needed
- Mirror: Choose a size that fits your space.
- Paint: 1-2 gallons of your chosen color.
- Wall Art: 2-3 pieces (framed prints, shelves, etc.).
- Lighting Fixtures: Wall sconces or pendant lights.
- Decor Items: Plants, candles, or decorative trays.
- Tools: Paintbrush, painter’s tape, hammer, level, measuring tape.
Prerequisites/Materials Needed
Editor’s Choice

Pevfah Crystal Black Ceiling Light, Modern Semi Flush Mount Ceiling Ligh…

Inspirational Wall Art for Bedroom, Motivational Office Wall Art Decor, …

Face Planter Pot with Heart Hands, Resin Head Planter for Indoor Plants,…
Skill Level & Time Estimate
Skill Level: intermediate
Total time estimate: 2-3 hours
Skill Level & Time Estimate
Editor’s Choice

Ruomeng Wall Mirror Rectangle Decorative Mirror 12″ x 16″ for Entryway, …

BAYKA Bathroom Floating Shelves for Wall Set of 3 – Rustic Brown Farmhou…
Step 1: Choose Your Mirror
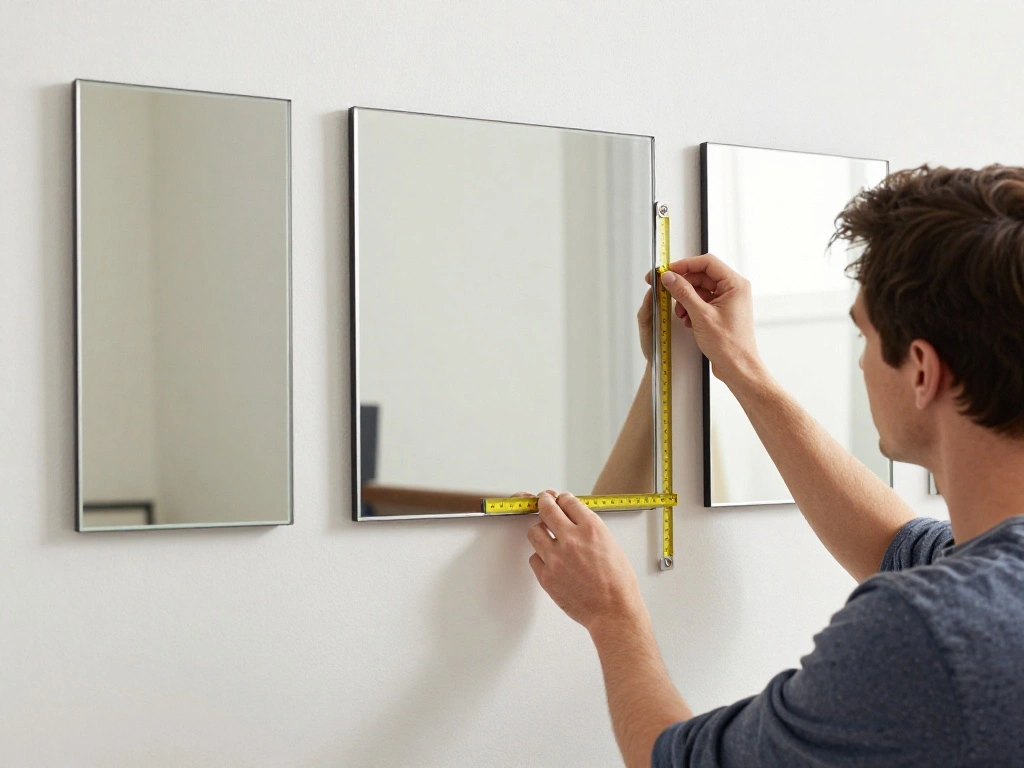
To begin, select a mirror that will serve as the focal point of your bathroom. Follow these steps:
- Measure the wall space above your sink or vanity.
- Consider the size and shape of the mirror; round mirrors soften lines, while rectangular mirrors can add structure.
- Choose a mirror frame color and style that complements your bathroom design.
Pro Tip: A larger mirror can make a small bathroom feel bigger by reflecting light and creating depth.
Completing this step will take approximately 30 minutes.
Step 1: Choose Your Mirror
Editor’s Choice

VooBang Large Black Round Bathroom Mirror, 48 inch Circle Wall Mounted H…

Bathroom Mirror for Wall, 30×22 Inch Rectangle Mirror, Matte Black Metal…
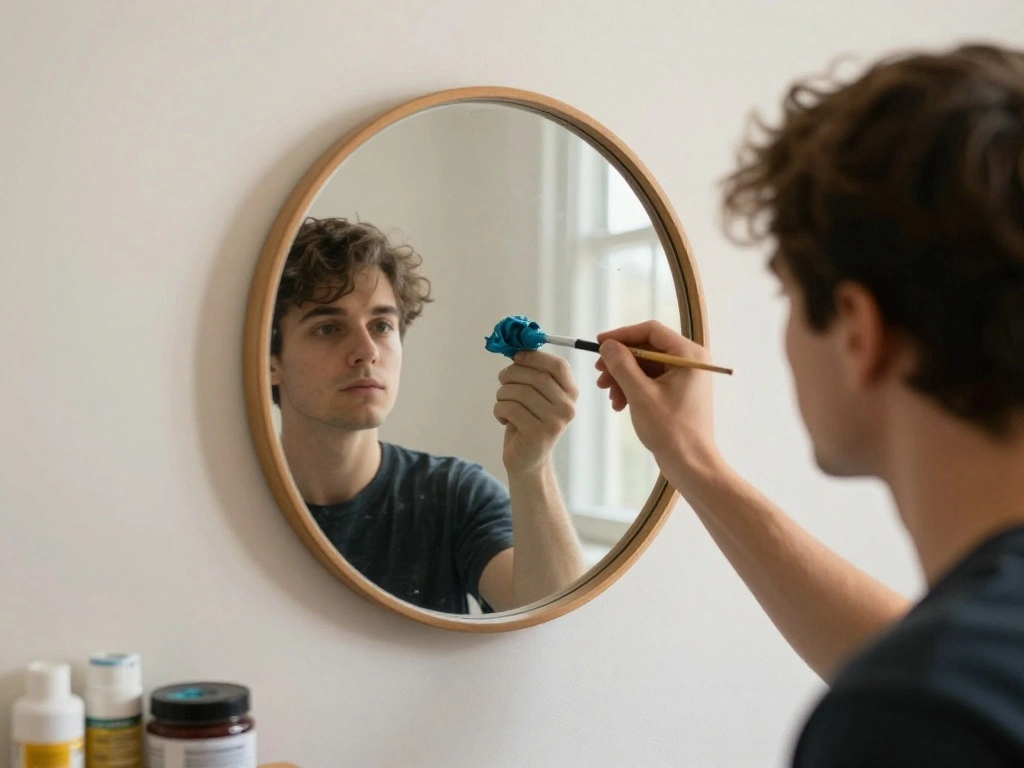
Step 2: Select a Color Palette

Once you have your mirror, the next step is to select a color palette that enhances its beauty. Here’s how to do it:
- Identify the main color of your mirror frame.
- Choose 2-3 additional colors that complement the mirror and your existing bathroom decor.
- Consider neutral tones for walls and bolder colors for accents.
Warning: Avoid using too many colors, as this can make the space feel chaotic. Stick to a cohesive palette.
This step will take approximately 45 minutes.
Step 2: Select a Color Palette
Editor’s Choice

Pink Bathroom Wall Art Floral Toilet Paper Canvas Print Pink Watercolor …

Color Me Beautiful: Discover Your Natural Beauty Through the Colors That…

Cindeer 4 Pcs Metal Wall Art Decor Minimalist Abstract Woman Wall Art Li…
Step 3: Prepare the Walls

Before applying any paint or decor, it’s essential to prepare the walls. Follow these steps:
- Clean the walls to remove dust and grime.
- Patch any holes or imperfections.
- Apply painter’s tape around the edges of the mirror area.
Pro Tip: Use a primer if you are making a significant color change, as this will help the paint adhere better.
Preparing the walls should take about 30 minutes.
Step 3: Prepare the Walls
Editor’s Choice

Drywall Repair Kit Drywall Hole Repair Patch Kits Wall Spackle Repair Pa…

4 Rolls Premium Painters Tape, Blue Tape, Masking Tape, Paint Tape for M…

Zinsser 02244 Bulls Eye Water-Base Primer and Sealer, Quart, White
Step 4: Paint the Walls
Now it’s time to paint the walls to match your selected palette. Here’s how:
- Start by cutting in around the edges of the mirror with a brush.
- Use a roller to apply paint to the larger wall areas.
- Allow the paint to dry completely before removing the tape.
Warning: Make sure to ventilate the area well while painting to avoid inhaling fumes.
This step usually takes about 1-2 hours depending on drying time.
Step 4: Paint the Walls
Editor’s Choice
4 Rolls Premium Painters Tape, Blue Tape, Masking Tape, Paint Tape for M…

162 Pcs Paint Brushes Bulk, Round Flat Tip Acrylic Paint Brushes Set for…

Pro Grade – Paint Roller Covers – 1/2 X 9 Inch Microfiber 5 Pack
Step 5: Add Lighting Fixtures

Lighting can dramatically alter the look of your mirror and bathroom. To install lighting:
- Choose fixtures that match your mirror style.
- Determine the best height for lighting, typically above or on either side of the mirror.
- Install the lighting according to the manufacturer’s instructions.
Pro Tip: Opt for soft white bulbs to create a warm atmosphere in your bathroom.
Expect to spend about 1 hour on this step.
Step 5: Add Lighting Fixtures
Editor’s Choice

Light Fixture Mounting Brackets, Adjustable Mounting Plates for 4″ J-Box…
Kalium Wall Sconces Set of Two, Modern Vanity Lights with Double Clear G…

DEGNJU A19 LED Light Bulbs, 60 Watt Equivalent LED Bulbs, Soft White 270…
Step 6: Incorporate Wall Art
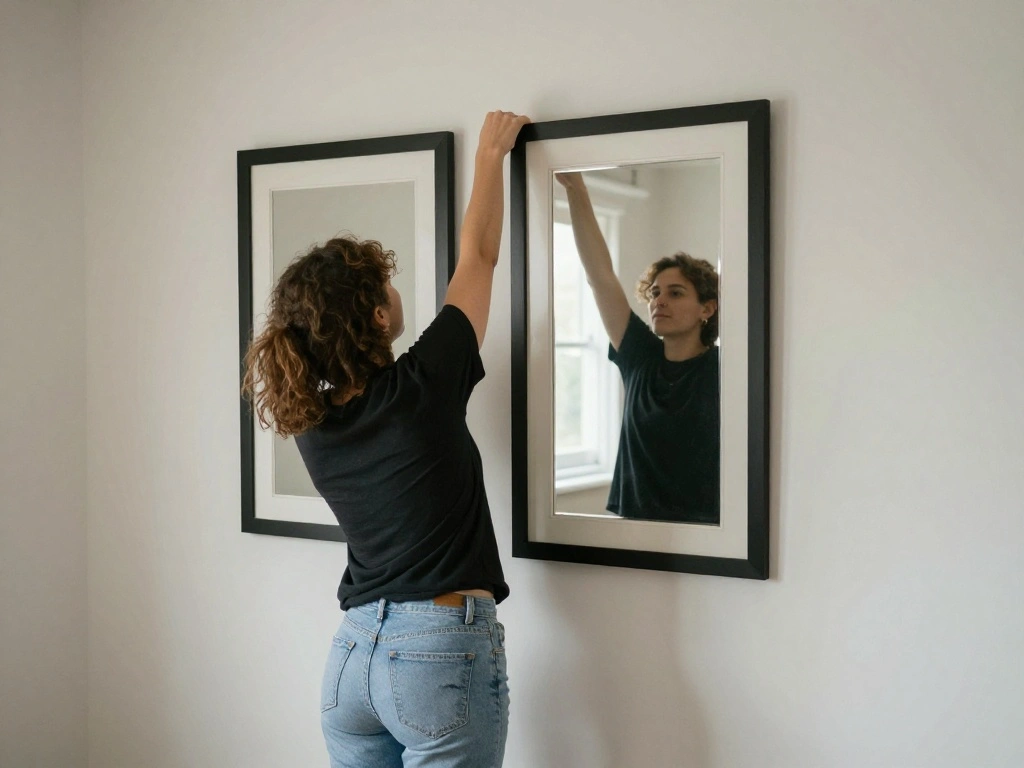
Wall art adds personality and interest. To style with wall art:
- Decide on the type of art—framed prints, shelves with decorative items, or a combination.
- Measure and plan the layout on the wall before hanging.
- Securely hang the art using the proper hardware.
Warning: Make sure to use appropriate anchors if hanging art on drywall to prevent damage.
This step should take around 30 minutes.
Step 6: Incorporate Wall Art
Editor’s Choice

HesenDot Framed Claude Monet Wall Art 3 Piece,12x16in High Framed Design…

KURUI 303Pcs Picture Hanging Kit, Picture Hangers Assorted Kit with Heav…

BAYKA Floating Shelves for Wall, Wall Mounted Rustic Wood Shelves for Ba…
Step 7: Add Decorative Accessories
Finally, complete the look with decorative accessories. Here’s how:
- Select a few decor items like plants, candles, or decorative trays.
- Arrange them thoughtfully on shelves or countertops for a balanced look.
- Step back and adjust as needed to achieve harmony.
Pro Tip: Use varying heights and textures to create visual interest.
Plan for about 30 minutes to finalize your accessories.
Step 7: Add Decorative Accessories
Editor’s Choice

AOOVOO Lavender Scented Candles for Women – Aromatherapy Candle with Cry…

CCINPPY Ceramic Jewelry Tray Trinket Dish, Decorative Cloud Vanity Key T…

Cute Body Shaped Planter Fun Resin Plant Pots Indoor with Drainage Hole …
Pro Tips
- Layer Textures: Use different materials like wood, metal, and glass for a rich look.
- Use a Statement Piece: Incorporate one bold accessory that draws attention.
- Keep It Clean: Regularly declutter to maintain the fresh look of your styled space.
- Consider Scale: Choose decor items that are proportional to the mirror size and wall space.
- Reflective Surfaces: Use mirrors and shiny materials to amplify light in the bathroom.
Pro Tips
Editor’s Choice

OIQArtOIQ Framed Canvas Wall Art,Vintage Decor,Landscape Nature Country …

Art3dwallpanels 33 Pack 3D Wall Panel Diamond for Interior Wall Décor, …
BAYKA Bathroom Floating Shelves for Wall Set of 3 – Rustic Brown Farmhou…
Common Mistakes to Avoid
Warning: Don’t overcrowd the space with too many decorations; it can look cluttered. Instead, choose fewer, impactful pieces.
Warning: Avoid using overly bright or clashing colors that can create a jarring effect. Stick to your chosen palette for a cohesive look.
Warning: Skipping the wall preparation can lead to an uneven paint job. Always clean and patch before painting.
Warning: Hanging art too high or low can throw off the visual balance. Aim for eye-level placement for the best effect.
Common Mistakes to Avoid
Editor’s Choice

AtterrirArt Framed Funny Bathroom Wall Art, Toilet Paper Picture Paintin…

DWIL Tile Paint, Tub and Tile Refinishing Kit with Tools, Water-based Ba…

BONCART 8.6oz Drywall Patch Repair Kit – Professional All-in-1 Tool Set …
Troubleshooting Section
Problem: The mirror looks out of place.
Solution: Reassess the color palette and decor choices to ensure they complement the mirror.
Problem: Walls look uneven after painting.
Solution: Use a roller for even application and consider a second coat if necessary.
Problem: Lighting is too harsh.
Solution: Change to a softer bulb or add a dimmer switch for adjustable lighting.
Problem: Accessories seem cluttered.
Solution: Remove one or two items to create balance.
Problem: Wall art placement feels off.
Solution: Measure and adjust the height for better alignment with the mirror.
Troubleshooting Section
Editor’s Choice

Linkind A19 LED Light Bulbs Dimmable, 60W Equivalent, Energy Efficient 9…

Lutron Ariadni/Toggler LED+ Dimmer Light Switch for Dimmable LED, Haloge…

Bates- Paint Roller Kit, 19 pcs, Roller Set with Microfiber Sleeves & Fr…
Variations/Alternative Methods
1. Gallery Wall: Create a gallery wall instead of one large piece of art for a dynamic look. This works well in larger bathrooms.
2. Floating Shelves: Install floating shelves for a modern aesthetic while providing space for decor. This is particularly useful in smaller bathrooms where counter space is limited.
3. Accent Wallpaper: Consider adding wallpaper behind the mirror for added texture and interest. This can create a bold statement in the bathroom.
FAQs
What if I don’t have enough wall space for art?
Consider using smaller decorative items or a single statement piece to avoid overcrowding.
How long should I let the paint dry before removing the tape?
It’s best to wait at least 24 hours for optimal results before removing painter’s tape.
Is it safe to use real plants in a bathroom?
Yes, as long as they get enough light and the bathroom is well-ventilated to prevent mold.
What if my mirror is too heavy?
Use appropriate wall anchors and ensure it’s securely mounted to avoid accidents.
Can I style around a frameless mirror?
Absolutely! Use wall decor and lighting to enhance the area around it.
Conclusion
Congratulations! You’ve successfully styled your bathroom walls around your mirror, creating a cohesive and inviting space. Take a moment to appreciate your hard work and the transformation you’ve achieved. Now that you have completed this project, consider exploring other areas of your home that may benefit from a similar refresh. Explore additional decor ideas or even tackle a new room entirely!
Remember, styling is an ongoing process. Don’t hesitate to update your decor and accessories seasonally to keep your space feeling fresh and vibrant. Enjoy your beautifully styled bathroom!