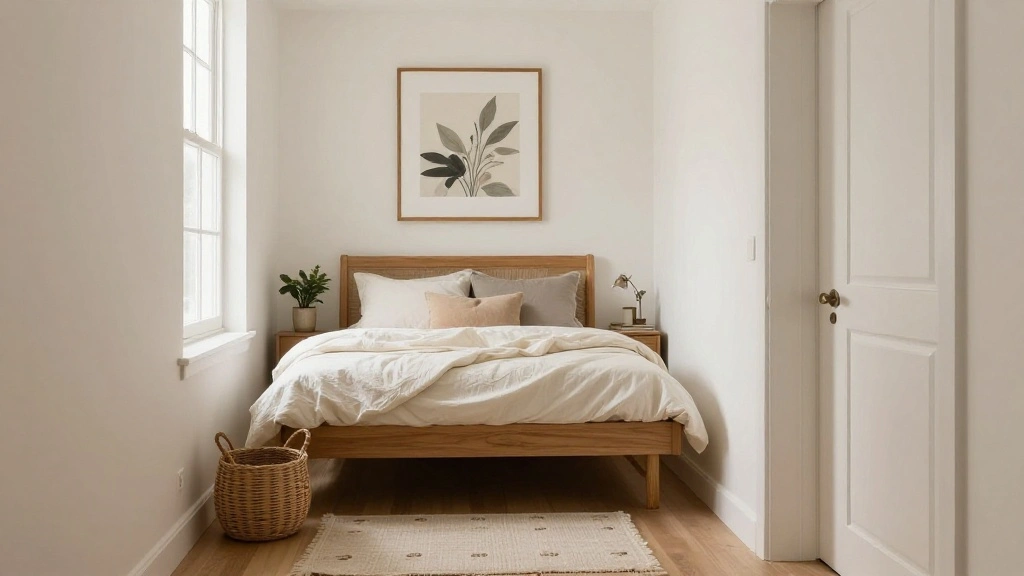
Bathrooms can be a challenging environment for art due to the high levels of humidity. Without proper precautions, moisture can warp, fade, and otherwise damage your favorite pieces. This guide addresses the urgency of protecting your art while allowing you to express your style in one of the most personal spaces in your home.
By following this guide, you will learn how to hang art in your bathroom safely, ensuring your pieces remain vibrant and intact. You will discover the materials you need, the best types of art to use, and how to prepare your space for installation.
This guide is designed for beginners and can be completed in about 1-2 hours. You will gain skills that not only enhance your bathroom’s decor but also protect your art from humidity damage.
Let’s dive into how to create a beautiful and moisture-resistant display!
TL;DR Summary
- Choose moisture-resistant art and materials.
- Use appropriate hanging techniques to prevent damage.
- Follow step-by-step instructions to safely hang art in your bathroom.
- Enjoy your beautifully decorated bathroom without worrying about humidity.
TL;DR Summary
Editor’s Choice

Framed Black and White Botanical Wall Art, Set of 4 Piece Vintage Minima…

ZESLMG Adhesive Wall Hooks for Hanging, 16 Pack Self Sticky Hooks Heavy …

Heiple Framed Bathroom Art Bathroom Wall Decor Farmhouse Home Decor Sets…
Prerequisites/Materials Needed
- Art pieces (preferably moisture-resistant)
- Frames with protective glass or acrylic
- Waterproof adhesive or mounting strips
- Drill or hammer and nails (if needed)
- Measuring tape
- Level
- Protective sealant spray (optional)
Prerequisites/Materials Needed
Editor’s Choice

BEKERART Sand Dollar Wall Decor Outdoor – Coastal PVC Beach House Wall…

SnapeZo Weather Resistant Black Poster Frame 8.5×11 Inches, Outdoor Prof…

Gorilla Heavy Duty Double Sided Mounting Tape, Black Tape, 1″ x 120″ (Pa…
Skill Level & Time Estimate
Skill Level: beginner
Total Time Estimate: 1-2 hours
Step Breakdown:
- Gather materials: 10-15 minutes
- Prepare wall space: 15-20 minutes
- Hang art: 30-60 minutes
Skill Level & Time Estimate
Editor’s Choice

36 Inch Modern Bathroom Vanity with USB Charging, Solid Wood Bathroom Ca…

Funny Bathroom Wall Art Set of 4,Black and White Wall Decor Movie Poster…

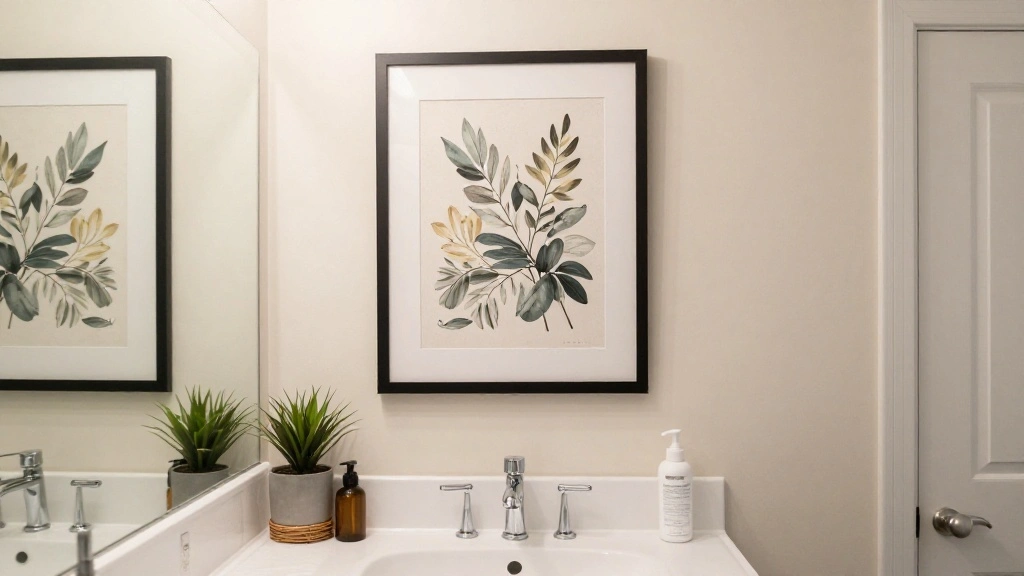
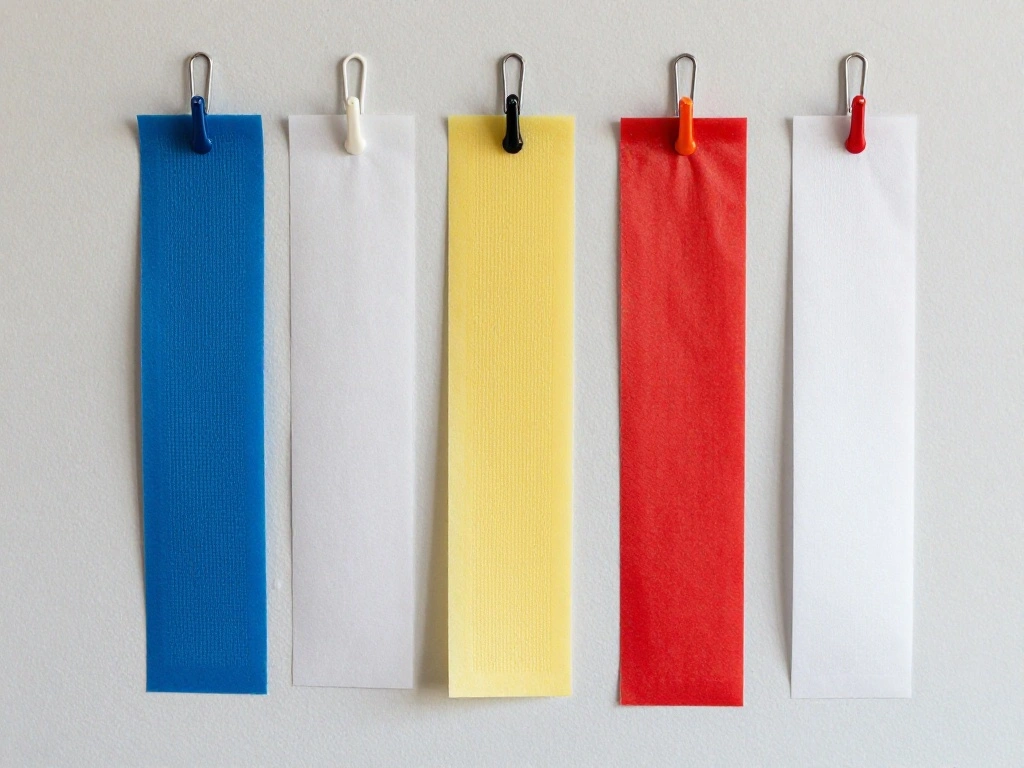
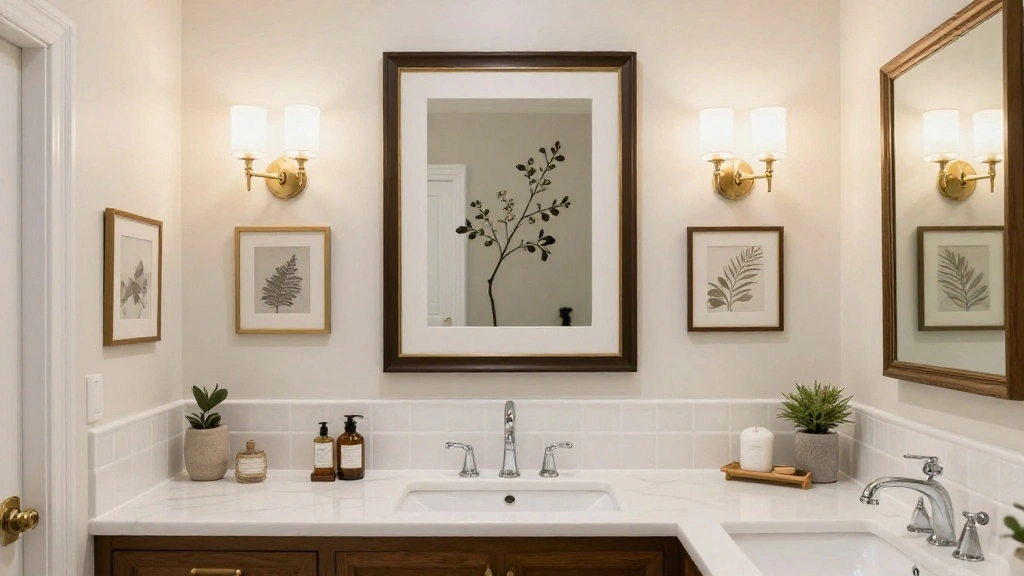
Step 1: Choose the Right Art
Select art pieces that are suitable for a bathroom environment. Look for moisture-resistant materials like metal, acrylic, or specially treated canvases. Avoid paper-based art as it can easily warp or mold.
1. Visit local art stores or online galleries.
2. Check product specifications for moisture resistance.
3. Choose art that complements your bathroom’s color scheme.
Pro Tip: Consider using prints under glass or acrylic to provide an extra layer of protection.
Why this matters: The right materials ensure longevity and reduce the risk of damage from humidity.
Estimated Time: 20 minutes
Step 1: Choose the Right Art
Editor’s Choice

Stupell Industries ‘Van Gogh Wheat Field with Cypresses Post Impressioni…

DOODLREAM 6 Pack Unframed Waterproof Canvas Wall Art Decor, Watercolor W…

Art Remedy Custom Framed Canvas Wall Art, Personalized Photo Print on Ca…
Step 2: Prepare the Wall Space
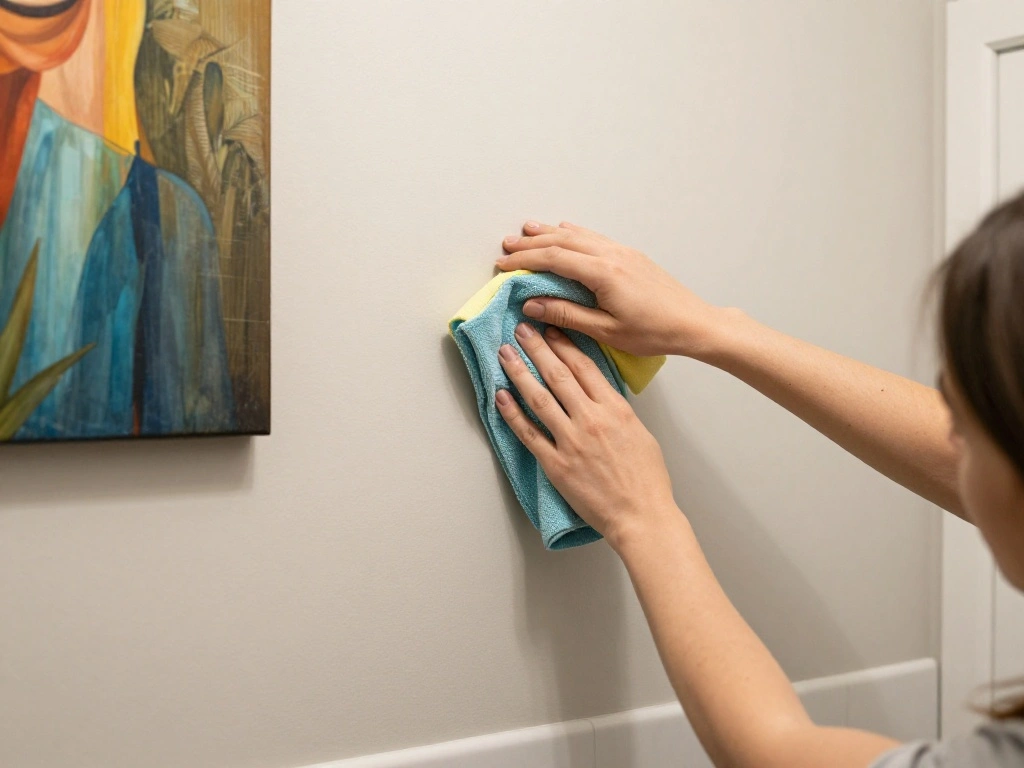
Before hanging your art, ensure the wall is clean and dry. Humidity can lead to mold if the surface is not properly prepared.
1. Wipe the wall with a damp cloth to remove any dust.
2. If you have paint, ensure it is fully cured before hanging art.
3. Allow the area to dry completely.
Warning: Avoid hanging art on a freshly painted wall until at least two weeks after painting.
Why this matters: Proper wall preparation prevents mold growth and ensures a secure hang.
Estimated Time: 15 minutes
Step 2: Prepare the Wall Space
Editor’s Choice

RMR Brands DIY Mold Remover Bundle – Complete Mold Killer & Stain Remove…

STAS Cliprail Picture Hanging System Set – Covers 9.84 ft of Wall Space …
Step 3: Measure the Space
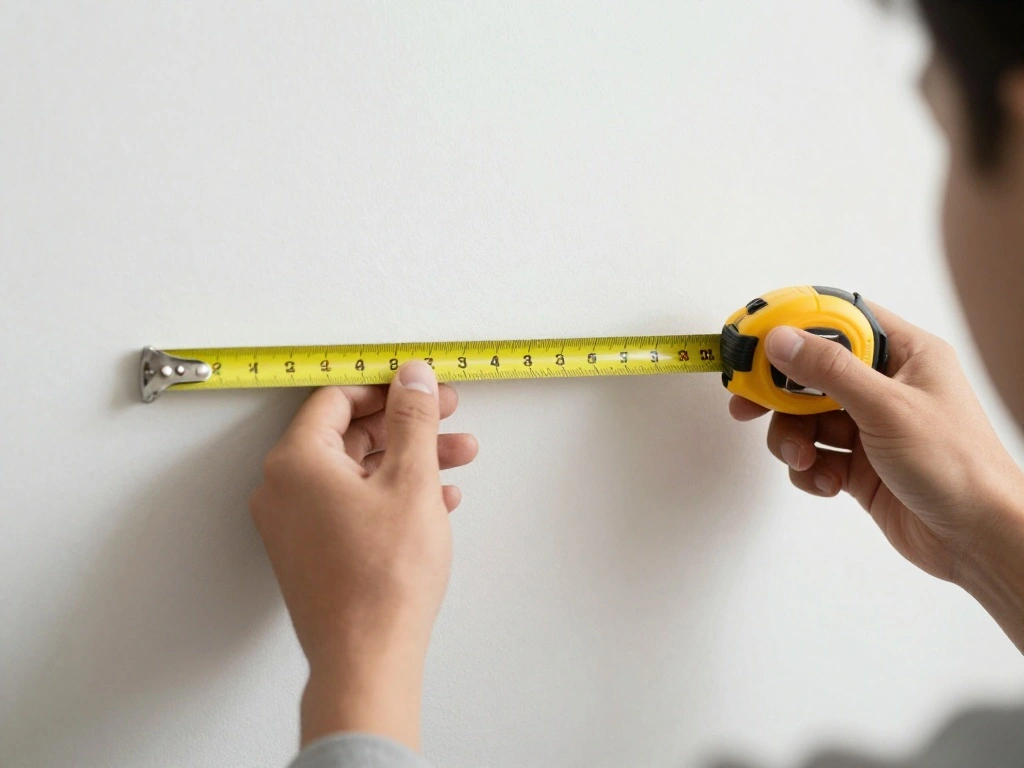
To ensure your art looks balanced and appealing, take the time to measure the space where you plan to hang it.
1. Use a measuring tape to find the center of the wall.
2. Mark the height at which you want to hang the art.
3. Consider the dimensions of the art piece and its relation to the bathroom fixtures.
Pro Tip: Hang art at eye level for the best visual impact.
Why this matters: Accurate measurements help avoid mistakes and ensure a polished look.
Estimated Time: 10 minutes
Step 3: Measure the Space
Editor’s Choice

Krylon K01309 Gallery Series Artist and Clear Coatings Aerosol, 11-Ounce…

KURUI 303Pcs Picture Hanging Kit, Picture Hangers Assorted Kit with Heav…
M&T Displays Lockable Weatherproof Snap Poster Frame 1.38″ Aluminum Prof…
Step 4: Choose the Hanging Method
Select an appropriate hanging method based on the weight of your art piece and the wall type. Options include wall anchors, nails, or adhesive strips.
1. For heavy pieces, use wall anchors and screws.
2. For lighter pieces, adhesive strips can work well.
3. Ensure the method is suitable for your wall surface (drywall, tile, etc.).
Warning: Avoid hanging heavy pieces on drywall without proper anchors, as this can cause damage.
Why this matters: Choosing the right method ensures your art stays securely hung.
Estimated Time: 15 minutes
Step 4: Choose the Hanging Method
Editor’s Choice

Uniclife 20 Pcs Adhesive Picture Hooks 20 lbs Max 2.2”Load No Drill Sc…

Command 15 lb Large Picture Hanging Strips 14 Pairs (28 Strips), Damage-…

Zinc Self-Drilling Drywall Anchors with Screws Kit, 25 Heavy Duty Metal …
Step 5: Mark the Hanging Points
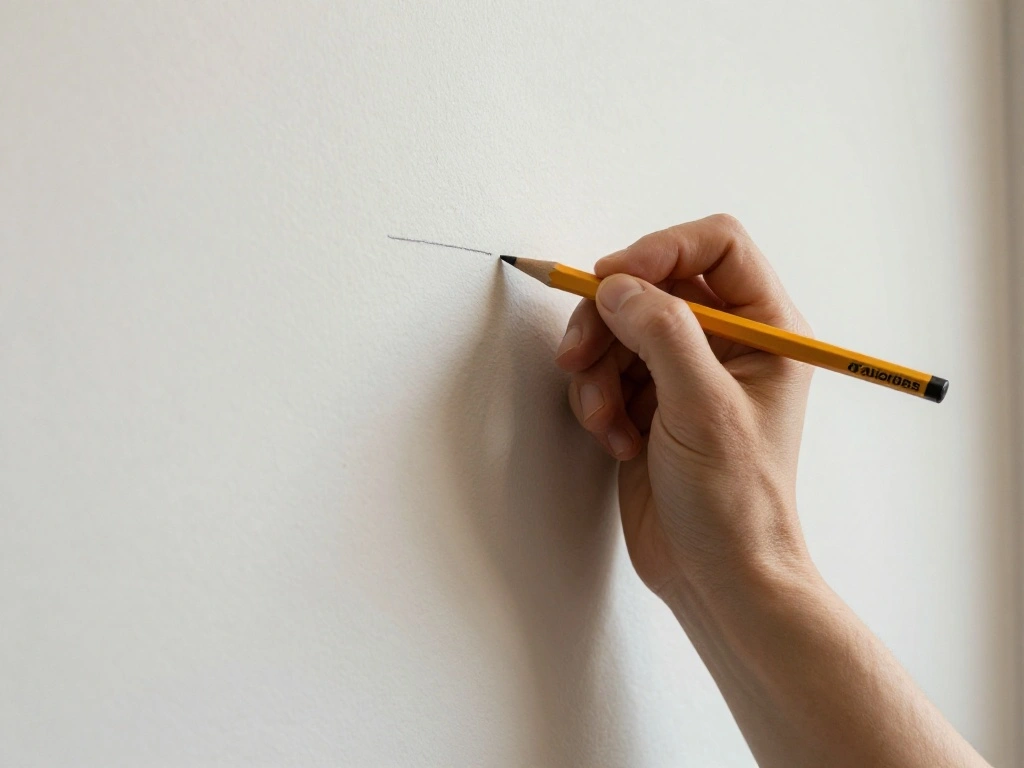
Once you have chosen a hanging method, mark where the fasteners will go on the wall to ensure accurate positioning.
1. Hold the art piece against the wall and level it.
2. Use a pencil to mark where the hanging hardware will be placed.
3. Double-check the level before proceeding.
Pro Tip: Use painter’s tape to outline the area for a cleaner look.
Why this matters: Accurate markings help prevent unnecessary holes in the wall.
Estimated Time: 10 minutes
Step 5: Mark the Hanging Points
Editor’s Choice

Abtgt 11×14 Canvas Floating Frame with 0.9″ Deep, Black Floater Frame fo…
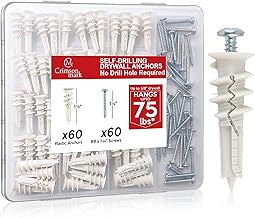
CrimsonMark 120Pcs #8 Self Drilling Drywall Anchors and Screws kit #8 x …
Step 6: Install the Hanging Hardware
Now, it’s time to install the hanging hardware based on your chosen method. Follow the specific instructions for each type.
1. For nails or screws, drill or hammer them into the marked spots.
2. If using adhesive strips, follow the package instructions to apply them to the back of the art.
3. Ensure everything is secure before proceeding.
Warning: Make sure you’re using the right tools for the job to avoid injury.
Why this matters: Proper installation prevents your art from falling and getting damaged.
Estimated Time: 20 minutes
Step 6: Install the Hanging Hardware
Editor’s Choice

MOVELYST 60-Pairs(120 Strips) Large Picture Hanging Strips Heavy Duty, R…

Gold Framed Vintage Wall Art Spring River Pond Landscape Painting Pictur…
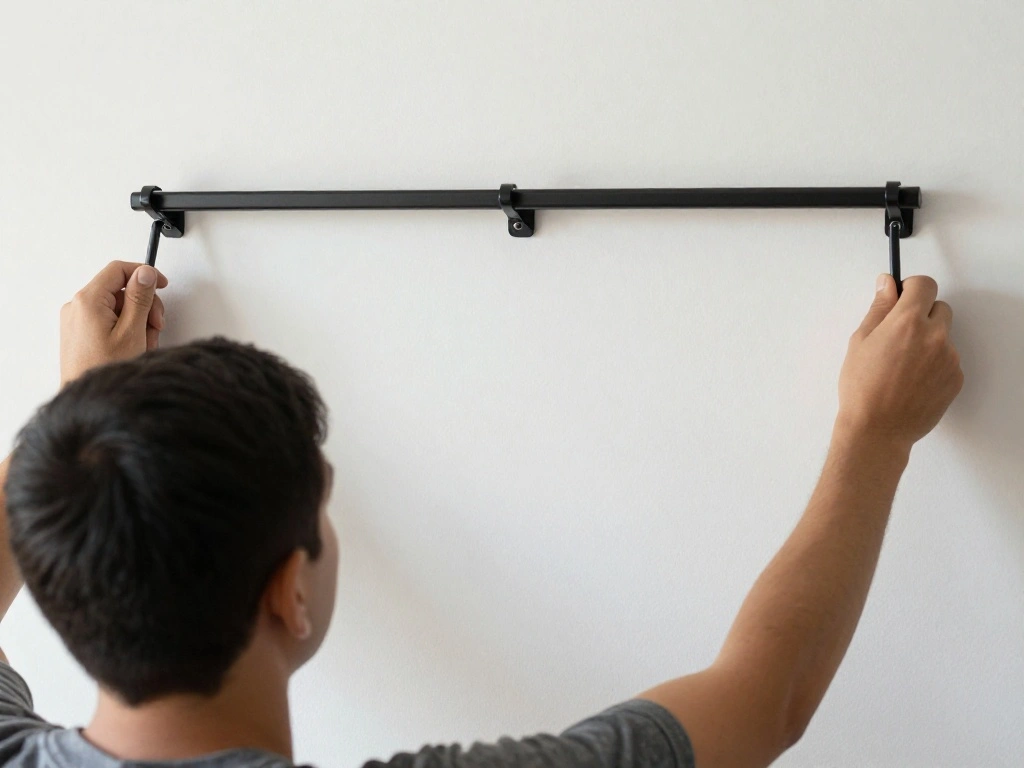
Step 7: Hang the Art
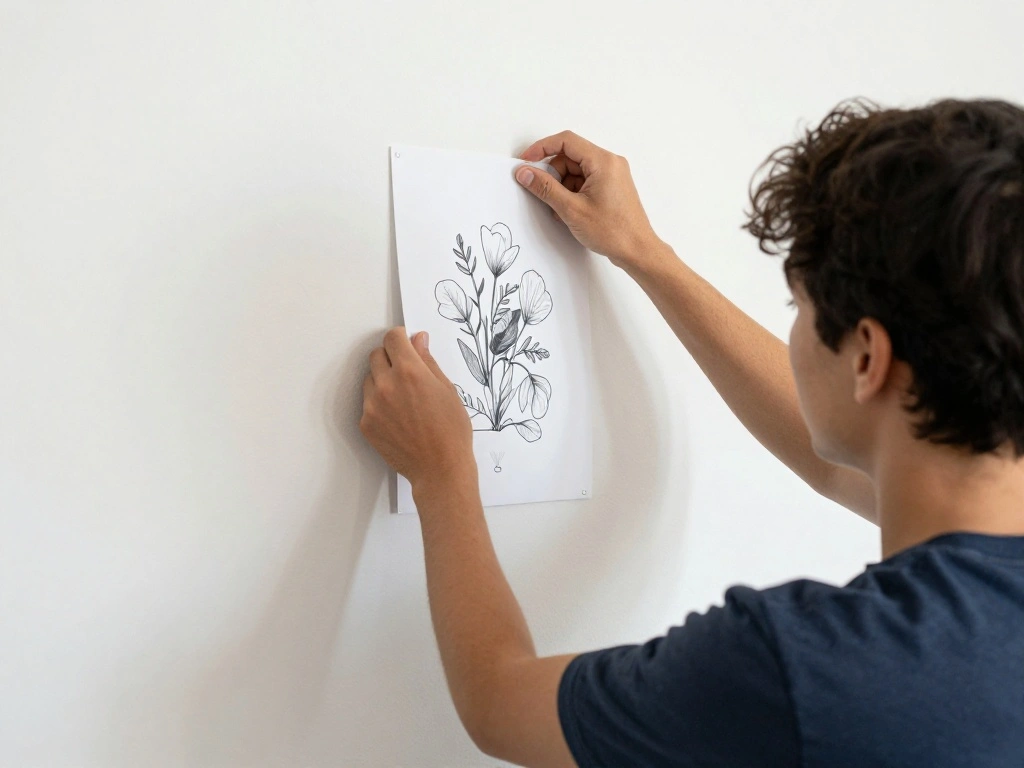
With the hardware in place, it’s finally time to hang your art.
1. Carefully lift the art and align it with the installed hardware.
2. Gently lower it onto the fasteners or adhesive strips.
3. Step back to assess the alignment and level.
Pro Tip: Use a level tool to ensure your art is perfectly straight.
Why this matters: Proper hanging ensures your art isn’t at risk of falling or appearing crooked.
Estimated Time: 15 minutes
Step 7: Hang the Art
Editor’s Choice

Laser Level Line Tool, Multipurpose Laser Level Kit Standard Cross Line …
Command 15 lb Large Picture Hanging Strips 14 Pairs (28 Strips), Damage-…

2 Pack 8 x 10 Floating Picture Frame 3d Farme Wooden Shadow Box Frames f…
Step 8: Protect the Art
To further protect your art from humidity, consider applying a protective sealant if your art piece allows.
1. Use a spray sealant designed for the type of material your art is made from.
2. Follow the application instructions carefully.
3. Allow the sealant to dry completely before using the bathroom.
Warning: Ensure the bathroom is well-ventilated while applying sealant.
Why this matters: A sealant provides an extra layer of moisture protection, prolonging the life of your art.
Estimated Time: 15 minutes
Step 8: Protect the Art
Editor’s Choice

FolkArt Outdoor Sealer (8-Ounce),Gloss Finish (Packaging May Vary)

Black Floating Framed Let The Good Times Roll Bathroom Canvas Wall Art F…
Step 9: Enjoy Your Decor
Once everything is in place and dry, step back and admire your work! Your bathroom now reflects your personal style without compromising the integrity of your art.
1. Make sure to periodically check the art for any signs of moisture damage.
2. Adjust decor as needed to maintain the aesthetic.
3. Show off your newly decorated bathroom to friends and family.
Pro Tip: Rotate your art seasonally for fresh decor updates.
Why this matters: Enjoying your space is the ultimate goal, and regular checks help maintain your decor.
Estimated Time: 10 minutes
Step 9: Enjoy Your Decor
Editor’s Choice

Frametory, Floating Picture Frame 11×14 – Black Aluminum Metal Photo Fra…

Boveda 62% Two-Way Humidity Control Packs For Storing ½ oz – Size 4 �…

Claude Monet Canvas Wall Art – Water Lilies Classic Artwork Picture Prin…
Pro Tips
- Tip for Framing: Use frames with protective glass to shield art from moisture.
- Tip for Art Selection: Choose abstract or vibrant pieces that can mask any potential humidity effects.
- Tip for Maintenance: Wipe down frames regularly to prevent dust accumulation.
- Tip for Seasonal Changes: Rotate art according to seasons for a refreshing look.
- Tip for Lighting: Use LED lights to minimize heat and humidity exposure.
Pro Tips
Editor’s Choice

upsimples 11×14 Picture Frame, Display Pictures 8×10 with Mat or 11×14 W…

IZORRO LED Modern Bathroom Lights Fixtures(4-Light,Dimmable,360°Rotate)…

Signs ByLITA Classic Framed Cleaning Supplies Sign (Black) – Small
Common Mistakes to Avoid
Warning: Hanging art without a level can lead to crooked displays. Always use a level for accuracy.
Warning: Using the wrong hanging method can cause damage. Choose the appropriate method based on weight and wall type.
Warning: Forgetting to check for moisture can lead to mold. Regularly inspect your art for any signs of damage.
Common Mistakes to Avoid
Editor’s Choice

Krylon K01305 Gallery Series Artist and Clear Coatings Aerosol, 11-Ounce…
SnapeZo Weather Resistant Black Poster Frame 8.5×11 Inches, Outdoor Prof…
Huepar Laser Level 360° with Tall Tripod, Self Leveling Rechargeable La…
Troubleshooting Section
Problem: Art is crooked after hanging.
Solution: Use a level to readjust the art and ensure it’s straight.
Problem: Art is damaged by humidity.
Solution: Remove the art, clean the area, and apply a protective sealant.
Problem: Adhesive strips aren’t holding.
Solution: Ensure the wall is clean and dry, and consider using a stronger adhesive method.
Troubleshooting Section
Editor’s Choice

Clear Acrylic Paint Sealer, High Gloss Varnish for Acrylic Painting & Ar…

Level Hang Magnetic Ruler, Precisely measure the frame dimensions for Wa…

EZlifego Double Sided Tape Heavy Duty, Nano Double Sided Adhesive Tape, …
Variations/Alternative Methods
1. Magnetic Frames: Use magnetic frames for easy art swaps. Good for changing decor frequently.
2. Wall Tapestries: Consider lightweight fabric pieces that can easily be washed and dried.
3. Gallery Wall: Create a collection of smaller pieces for a unique look. Just ensure all pieces are moisture resistant.
Variations/Alternative Methods
Editor’s Choice
Claude Monet Canvas Wall Art – Water Lilies Classic Artwork Picture Prin…
Avinyl Monet Waterlily Wall Tapestry, Green Floral Plant Art Poster for …

YixangDD 15 Pack Magnetic Picture Frame, 4 x 6 Inches Fridge Magnetic Ph…
FAQs
What if I don’t have moisture-resistant art? Consider using frames with glass to protect standard art pieces from humidity.
How long should I wait after painting the bathroom to hang art? Wait at least two weeks for the paint to cure fully.
Is it safe to use adhesive strips in a bathroom? Yes, provided they are rated for moisture resistance.
FAQs
Editor’s Choice
M&T Displays Lockable Weatherproof Snap Poster Frame 1.38″ Aluminum Prof…

Large Arched Wall Mirrors for Living Room, 31.5″x47.2″ Scalloped Bathroo…

14 Pack Shower Caddy Adhesive Replacement, Strong Adhesive Hooks, Waterp…
Conclusion
Congratulations on successfully hanging art in your bathroom without the worry of humidity damage! You’ve created a beautiful, personal space that reflects your style.
Your next steps could involve exploring more decorative options or even creating art yourself to personalize your space further. Enjoy the atmosphere you’ve created, and don’t hesitate to make changes as your style evolves!
Keep your art looking great by maintaining the space and inspecting regularly. Happy decorating!