
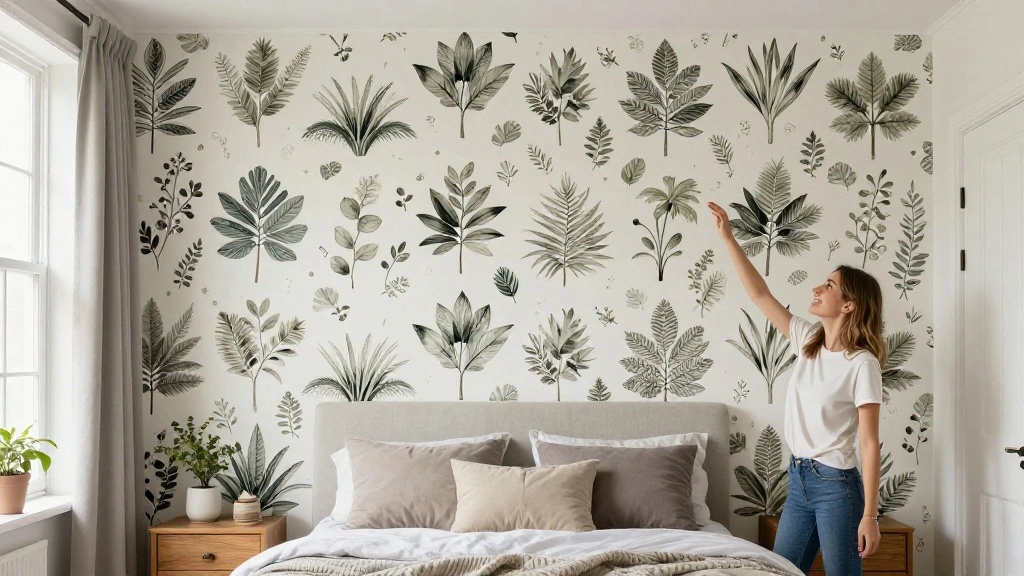
Are you tired of bland rental walls but worried about damaging them with permanent wallpaper? Many renters face this dilemma, feeling trapped in a space that lacks personality. Fortunately, there’s a solution that allows you to transform your walls without the risk of losing your security deposit!
In this guide, you will learn how to easily apply and remove peel-and-stick wallpaper, ensuring your rental remains intact. You’ll discover the best practices to follow, from preparation to application, and how to safely remove it when it’s time to move out.
This guide is designed for beginners and will take an estimated 2-3 hours to complete. Get ready to create a stunning new look for your home without worry!
TL;DR Summary
- Learn how to apply and remove peel-and-stick wallpaper without damaging rental walls.
- Gather all necessary materials before starting.
- Follow step-by-step instructions for a flawless application.
- Discover troubleshooting tips and common mistakes to avoid.
TL;DR Summary
Editor’s Choice

Art3d Smoothing Tool Kit for Applying Peel and Stick Wallpaper, Vinyl Ba…

Roman’s E-Z Hang Peel & Stick Wallpaper Helper, Clear, Non-Staining, 3…
Prerequisites/Materials Needed
- Peel-and-stick wallpaper: 1-2 rolls, depending on wall size
- Measuring tape: 1 unit
- Utility knife: 1 unit
- Level: 1 unit
- Smoothing tool: 1 unit (or a credit card)
- Cleaning solution: mild soap and water
- Cloth or sponge: 1 unit
Prerequisites/Materials Needed
Editor’s Choice

EHDIS Wallpaper Smoothing Tool Kit Wallpaper Smoothing Brush Large Wallp…
M&G White Board Wallpaper Dry Erase Board for Wall, 3.8 ft x 8 ft Whiteb…
DIYSELF Craft Knife with 10 Extra #11 Blades, Precision Hobby Knife Set …
Skill Level & Time Estimate
Skill Level: beginner
Total time estimate: 2-3 hours
Breakdown: Preparation (30 minutes), Application (1-2 hours), Removal (30 minutes)
Skill Level & Time Estimate
Editor’s Choice

15.7″ X 118″ Black Silk Wallpaper Embossed Self Adhesive Peel and Stick …
Art3d Smoothing Tool Kit for Applying Peel and Stick Wallpaper, Vinyl Ba…
Art3d Smoothing Tool Kit for Applying Peel and Stick Wallpaper, Vinyl Ba…
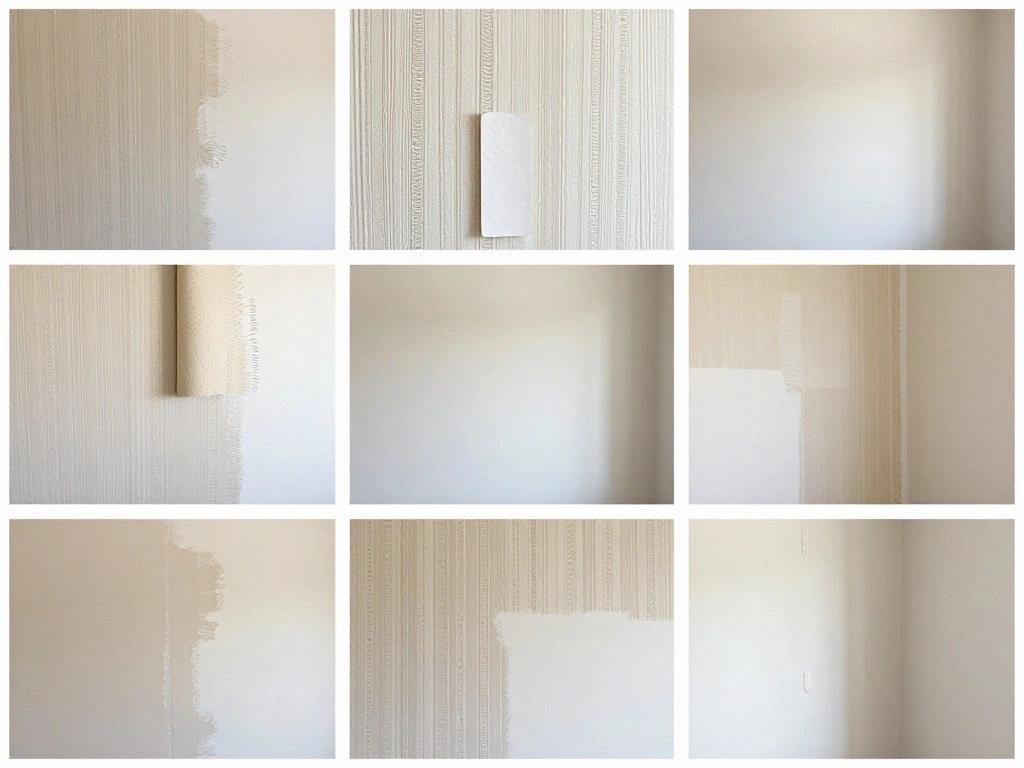
Step 1: Prepare the Wall Surface
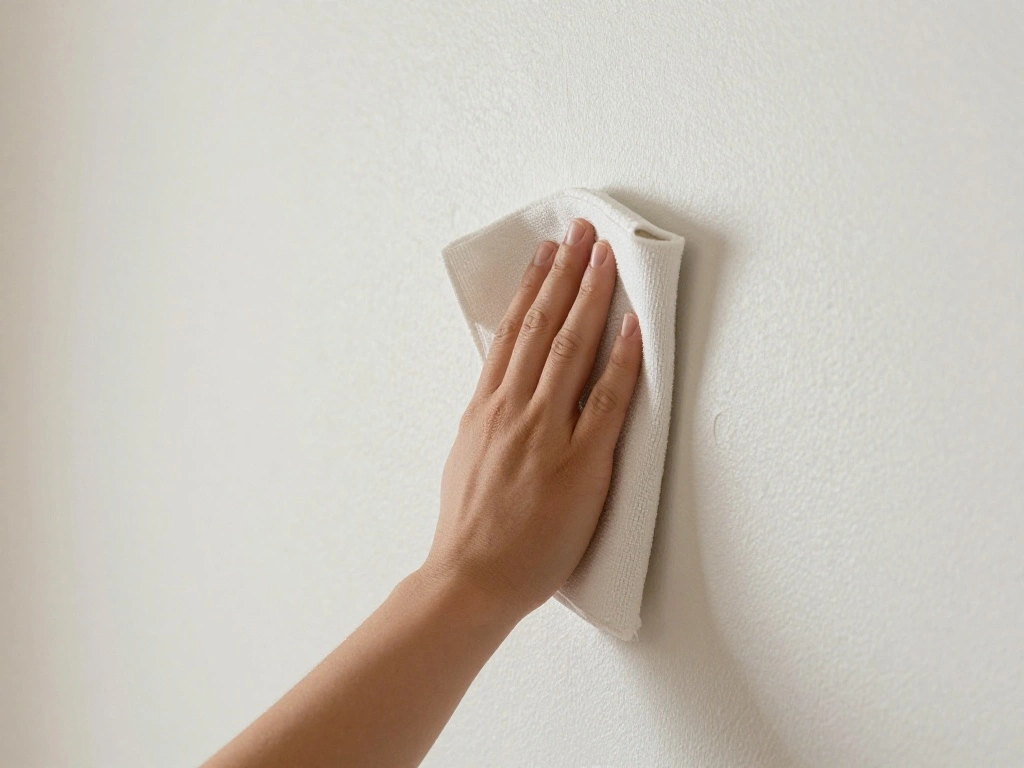
Before applying your peel-and-stick wallpaper, ensure the wall surface is clean and smooth. This step is vital because any dirt or imperfections can prevent the wallpaper from adhering properly.
1. Use a damp cloth or sponge with a mild soap solution to wipe down the wall.
2. Rinse with clean water to remove any soap residue.
3. Allow the wall to dry completely before proceeding.
Pro Tip: Use a level to check for any bumps or uneven areas that may need sanding down.
Why this matters: A clean surface ensures better adhesion and a smoother finish.
Estimated time: 30 minutes.
Step 1: Prepare the Wall Surface
Editor’s Choice

Tin Wall Decor Birthday Wall Decor | I Love My Nasty Woman Hippie For Wa…

FOSHIO Wallpaper Smoothing Tools Kit, Wallpaper Tools with Squeegee Smoo…

Step 2: Measure and Cut the Wallpaper
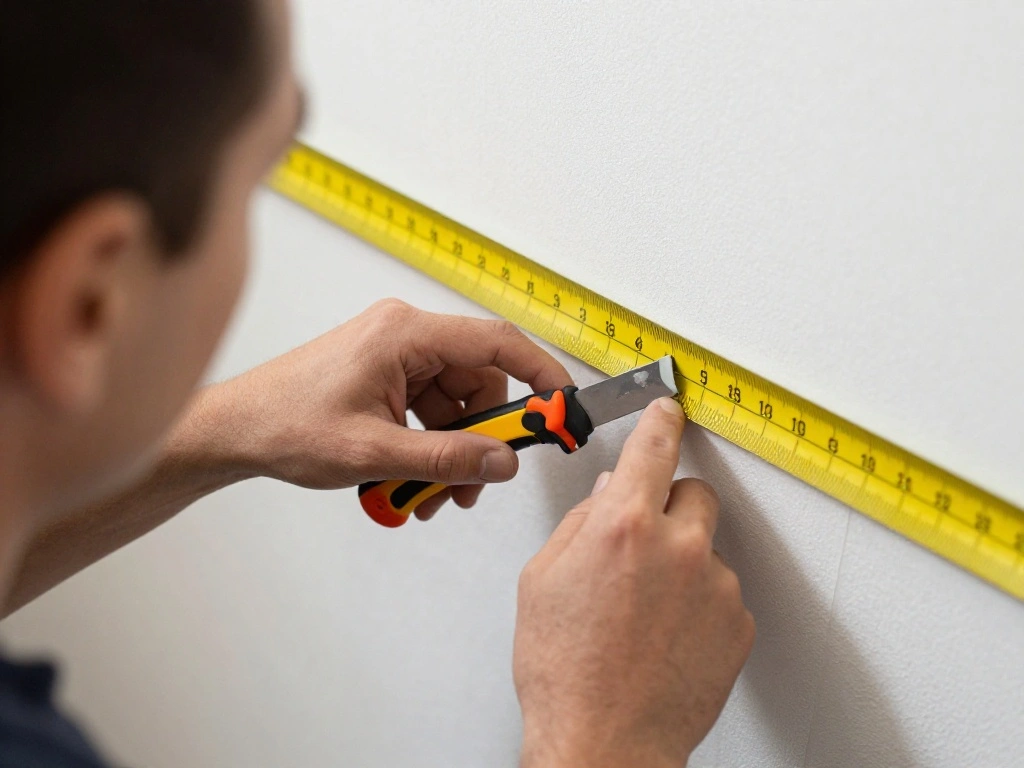
Take accurate measurements of your wall to ensure the wallpaper fits perfectly.
1. Use a measuring tape to determine the height and width of the wall segment you want to cover.
2. Cut the wallpaper to size, allowing for a little extra to trim later.
3. Double-check your measurements to avoid any mistakes.
Warning: Cutting too short means you’ll need to start over, wasting time and materials.
Why this matters: Proper measurements lead to a cleaner, more professional-looking installation.
Estimated time: 30 minutes.
Step 2: Measure and Cut the Wallpaper
Editor’s Choice

GDMINLO Soft Tape Measure Double Scale Body Sewing Flexible Tailor Craft…
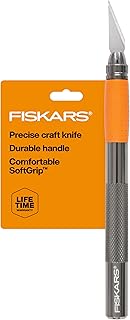
Fiskars Detail Craft Knife, Exacto Hobby Knife for Crafting, Arts, Model…
Step 3: Apply the Wallpaper
Now that you’ve prepared your wall and cut your wallpaper, it’s time to apply it.
1. Start from the top corner of the wall.
2. Peel off a portion of the backing and align it with the top edge, making sure it’s straight.
3. Gently press the wallpaper onto the wall, smoothing it down with your hand or a smoothing tool as you go.
4. Continue peeling and pressing down until the entire strip is applied.
Pro Tip: Work slowly and carefully to avoid bubbles or wrinkles.
Why this matters: Proper application ensures a smooth finish and lasting adhesion.
Estimated time: 1 hour.
Step 3: Apply the Wallpaper
Editor’s Choice

WORKPRO Premium Utility Knife, Retractable All Metal Heavy Duty Box Cutt…
Art3d Smoothing Tool Kit for Applying Peel and Stick Wallpaper, Vinyl Ba…
Art3d Smoothing Tool Kit for Applying Peel and Stick Wallpaper, Vinyl Ba…
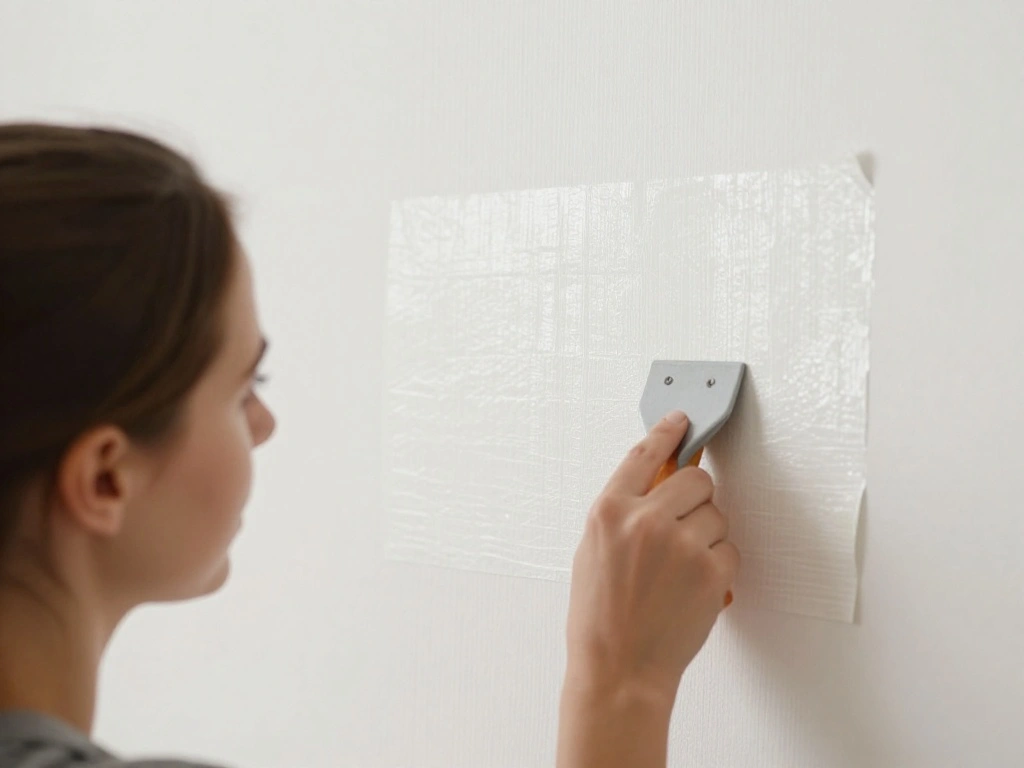
Step 4: Smooth Out Bubbles
After applying the wallpaper, check for any air bubbles or wrinkles that may have formed.
1. Use a smoothing tool or credit card to gently push air bubbles toward the edges.
2. For stubborn bubbles, you can lift the wallpaper slightly and reapply it to release the trapped air.
3. Ensure the wallpaper adheres securely to the wall without any imperfections.
Warning: Avoid using sharp objects that can damage the wallpaper.
Why this matters: Smooth wallpaper enhances the aesthetic and durability.
Estimated time: 15 minutes.
Step 4: Smooth Out Bubbles
Editor’s Choice
Art3d Smoothing Tool Kit for Applying Peel and Stick Wallpaper, Vinyl Ba…

WP Chomp World’s Best Wallpaper Stripper: and Sticky Paste Remover, Ci…
Step 5: Trim Excess Wallpaper
After smoothing the wallpaper, you may have some excess at the edges.
1. Use a utility knife to carefully trim away any excess wallpaper along the edges of the wall.
2. Make sure to cut along the edge of the wall for a neat finish.
3. Remove any small pieces left behind with your fingers.
Pro Tip: Cut the wallpaper while it’s still slightly lifted to ensure a clean edge.
Why this matters: Clean edges make your wallpaper look professionally installed.
Estimated time: 15 minutes.
Step 5: Trim Excess Wallpaper
Editor’s Choice

anezus Self Healing Sewing Mat, 12inch x 18inch Rotary Cutting Mat Doubl…
WORKPRO Premium Utility Knife, Retractable All Metal Heavy Duty Box Cutt…
Step 6: Repeat for Additional Panels
If you plan to cover more than one wall or add more panels, repeat the above steps for each section.
1. Measure and cut each new panel as you did before.
2. Align it with the previous one for a seamless look.
3. Continue applying, smoothing, and trimming until complete.
Pro Tip: Overlap the edges slightly if using patterned wallpaper to ensure a perfect match.
Why this matters: Consistency in application results in a cohesive look across your walls.
Estimated time: 1 hour.
Step 6: Repeat for Additional Panels
Editor’s Choice

ALLWAY KBS100 3-Notch Safety Knife Blades, Rounded Point, 100 Pack

Wallpaper Smoothing Tools, Wallpape-r Tool Kit with Felt Squeegee Seam R…
Art3d Smoothing Tool Kit for Applying Peel and Stick Wallpaper, Vinyl Ba…
Step 7: Allow to Settle

Once you have applied all the wallpaper, let it set for a bit.
1. Allow the wallpaper to adhere to the wall without disturbance for at least 24 hours.
2. Avoid touching or pushing on the wallpaper during this time.
Warning: Avoid excessive heat or humidity, as it may cause the wallpaper to peel.
Why this matters: Allowing the wallpaper to settle ensures that it adheres properly for long-lasting results.
Estimated time: 24 hours.
Step 7: Allow to Settle
Editor’s Choice
Art3d Smoothing Tool Kit for Applying Peel and Stick Wallpaper, Vinyl Ba…
15.7″ X 118″ Black Silk Wallpaper Embossed Self Adhesive Peel and Stick …
Step 8: Safely Remove Wallpaper When Needed
When it’s time to remove the wallpaper, follow these steps to ensure your rental walls remain undamaged.
1. Start at a corner and gently peel the wallpaper away from the wall.
2. If it’s stubborn, use a heat gun or hairdryer on low to soften the adhesive.
3. Clean the wall with a damp cloth to remove any residue left behind.
Warning: Do not pull too hard, as this may damage the wall.
Why this matters: Proper removal ensures you leave the walls in good condition for your landlord.
Estimated time: 30 minutes.
Step 8: Safely Remove Wallpaper When Needed
Editor’s Choice

SEEKONE Heat Gun 1800W 122℉-1202℉(50℃- 650℃)Fast Heating Hea…
PULIDIKI Car Cleaning Gel Car Clean Putty, Universal Car Interior Cleane…

WRAPXPERT Peel and Stick Wallpaper Tools,Wallpaper Smoothing Tool Kit wi…
Pro Tips
- Alignment Matters: Ensure patterns or designs align perfectly for a seamless look.
- Use a Squeegee: If you don’t have a smoothing tool, a squeegee works just as well for smoothing out bubbles.
- Test Adhesive: Always test a small section first to ensure the adhesive doesn’t damage your wall.
- Keep It Dry: Avoid applying wallpaper in humid conditions to ensure the best adhesion.
- Store Properly: If you have leftover wallpaper, store it flat to prevent curling or damage.
Pro Tips
Editor’s Choice

Removable Wallpaper Swatch – Skater Girls Retro 1970S Skateboard Feminis…

Stickyart Ladies Wallpaper Peel and Stick Tan Vintage Glamour Woman Flor…
Art3d Smoothing Tool Kit for Applying Peel and Stick Wallpaper, Vinyl Ba…
Common Mistakes to Avoid
Warning:
Common Mistakes to Avoid
Editor’s Choice
EHDIS Wallpaper Smoothing Tool Kit Wallpaper Smoothing Brush Large Wallp…

Krud Kutter Gloss-Off Prepaint Surface Preparation Cleaner, 32 oz, No Sa…

CRAFTSMAN 25-Ft Tape Measure with Fraction Markings, Retractable, Self-L…
Troubleshooting Section
Problem: Wallpaper won’t stick.
Solution: Clean the wall thoroughly and ensure it’s completely dry before reapplying.
Problem: Bubbles appear after application.
Solution: Use a smoothing tool to push the bubbles toward the edges. Lift and reapply if necessary.
Problem: Wallpaper tears during application.
Solution: Cut a new piece and start fresh; be gentle during application.
Troubleshooting Section
Editor’s Choice
Art3d Smoothing Tool Kit for Applying Peel and Stick Wallpaper, Vinyl Ba…

NextWall Harry & Grace Ink Rose Abstract Floral Peel and Stick Wallpaper…

CHOMP! Painted Wall Cleaner Spray: Healthier Home 5-Minute CleanWalls 4-…
Variations/Alternative Methods
Consider these alternatives based on your needs:
1. Temporary Wall Decals: Great for smaller spaces; easy to reposition.
2. Removable Paints: Offers a similar aesthetic without the need for wallpaper.
3. Fabric Wallpaper: A unique texture option that can also be removed easily.
Variations/Alternative Methods
Editor’s Choice

Her Vibe is Pretty Wall Decal Decor Vivid Butterflies Wall Sticker Inspi…

Custom Size Wall Murals, Fashion Women Stylish Outfits Bags Self – Adhes…

Removable African Woman Beauty Salon Decor Wall Art Decal Beautiful Afro…
FAQs
What if I don’t have a smoothing tool? A credit card works well to smooth out bubbles.
How long should I let the wallpaper settle? At least 24 hours for best results.
Is it safe to apply wallpaper over textured walls? Not recommended; wallpaper adheres best to smooth surfaces.
FAQs
Editor’s Choice

Ismoon Peel and Stick Wallpaper Vintage Floral Contact Paper Boho Waterc…
Art3d Smoothing Tool Kit for Applying Peel and Stick Wallpaper, Vinyl Ba…
Art3d Smoothing Tool Kit for Applying Peel and Stick Wallpaper, Vinyl Ba…
Conclusion
Congratulations! You’ve successfully transformed your rental space with peel-and-stick wallpaper, adding style without risking damage. Now that you know how to apply and remove it, feel free to experiment with different designs to further personalize your space.
As you continue decorating, consider exploring additional home improvement projects that can enhance your living environment. Enjoy your newly decorated home!