
Creating a cozy reading nook is essential for any book lover, but many struggle to find the right inspiration and execution. You want a space that evokes the intellectual charm of Dark Academia—a style characterized by dark colors, vintage aesthetics, and a scholarly ambiance. Without the right wall setup, your nook may not achieve the desired vibe, leaving you uninspired when you want to curl up with a good book.
In this guide, you’ll learn how to build a stunning Dark Academia reading nook wall, complete with artistic elements, functional shelves, and enchanting mood lighting. By the end, you’ll have a wall that perfectly complements your literary pursuits and provides a sanctuary for relaxation.
This guide will walk you through selecting art, mounting shelves, and adding lighting to create the ultimate reading space. Difficulty Level: Intermediate. Estimated Time: 2-3 hours. Get ready to transform your space into a haven for bookworms!
TL;DR Summary
- Transform your wall into a Dark Academia-inspired reading nook.
- Learn to select art, mount shelves, and add mood lighting effectively.
- Follow step-by-step instructions suitable for intermediate skill levels.
- Complete your project in about 2-3 hours.
Recommended Products

Size: Each print measures 8 x 10 Inch, a widely used size that fits most ready-made frames. This makes it easy for you to frame and hang the artwork without the need for custom sizing or adjustments.

[Perfect Size – Effortlessly Frame & Display]:Expertly sized to fit most standard frames—no trimming required. Whether you're curating a gallery wall or refreshing a cozy nook, it’s the ideal size to elevate your décor with ease.

SIZE & DETAILS: 12x16x1.4in(30x40x3.5cm)Manual measurement. Sized for easy arrangement and versatile.Use Vintage frame made of PS material. It's lightweight and has extremely strong stability. Printed on canvas and has waterproof function, making it easy to maintain。
TL;DR Summary
Editor’s Choice

Starunder 6 Pack Floating Shelf Brackets, 6 Inch Heavy Duty Industrial S…

Gritin 19 LED Rechargeable Book Light for Reading in Bed with Memory Fun…

Containlol 60 Pcs Vintage Wall Collage Kit Maximalist Paintings Art Prin…
Prerequisites/Materials Needed
- Art: 2-3 framed prints (vintage or classic styles)
- Shelves: 2 floating shelves (24-36 inches long)
- Lighting: 1-2 LED strip lights or fairy lights
- Tools: Drill, level, measuring tape, screws, and anchors
- Decor: 2-3 decorative items (bookends, plants, or vintage trinkets)
Recommended Products
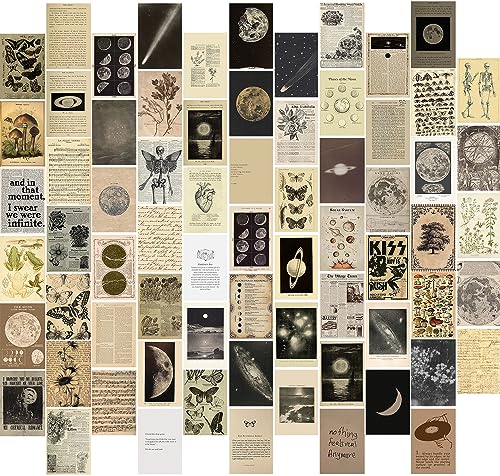
【Vintage Photo Wall Collage Kit】This vintage aesthetic wall collage kit contains 70pcs retro aesthetic pictures (Size:4x6inch). This vintage posters are perfect for dorm rooms, bedrooms, and apartment decor, and it will refresh your decor and make a statement in your college dorm, bedroom or living room.

【ADAPTS TO ANY SPACE】Elevate your living space with this collection of vintage wall art set, perfect for rustic room decor. Antique farmhouse oil paintings bring a touch of timeless charm to your home. Embrace the trendy now prints that add a contemporary flair to the vintage decor.bohemian flair, there's something for every taste and every space.

Vintage Wall Collage Kit: Create a charming, nostalgic look with this vintage wall collage kit, featuring a mix of vintage botanical prints and cottagecore posters for a cozy, nature-inspired vibe.
Prerequisites/Materials Needed
Editor’s Choice

WOPITUES Wood Floating Shelves Set of 6, Shelves for Wall Decor, Farmhou…

YJIKRTVT Consume More Books Humorous Canvas Wall Art, Vintage Outsider A…
![24 Pack Fairy Lights Battery Operated [3 Modes] 7ft 20 LED Mini Twinkle ...](https://m.media-amazon.com/images/I/81YK+BKeKLL._AC_UL320_.jpg)
24 Pack Fairy Lights Battery Operated [3 Modes] 7ft 20 LED Mini Twinkle …
Skill Level & Time Estimate
Skill Level: Intermediate
Total Time Estimate: 2-3 hours
Breakdown:
- Choosing Art: 30 minutes
- Mounting Shelves: 1 hour
- Installing Lighting: 30 minutes
- Decorating: 1 hour
Recommended Products

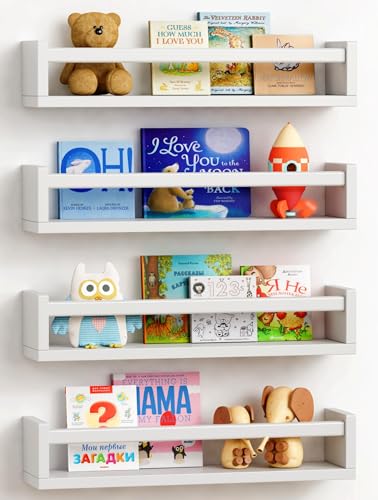
Transform your hardcover books into stunning floating shelves! This wall-mounted design makes your books appear as if they are levitating, adding a sleek, modern touch to any room. Perfect for book lovers and home decor enthusiasts.
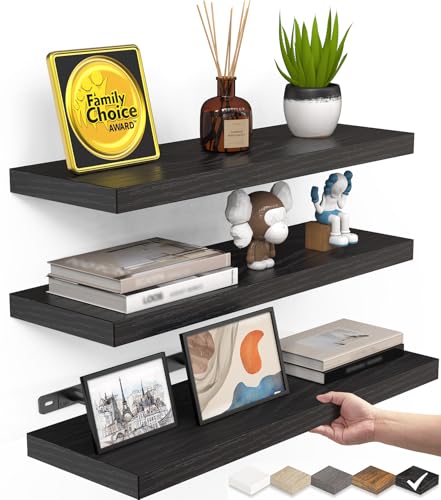
𝐌𝐨𝐝𝐞𝐫𝐧 & 𝐕𝐞𝐫𝐬𝐚𝐭𝐢𝐥𝐞 𝐒𝐭𝐲𝐥𝐞: The 𝐡𝐢𝐝𝐝𝐞𝐧 𝐛𝐫𝐚𝐜𝐤𝐞𝐭 𝐝𝐞𝐬𝐢𝐠𝐧 𝐠𝐢𝐯𝐞𝐬 𝐚 𝐜𝐥𝐞𝐚𝐧, 𝐟𝐥𝐨𝐚𝐭𝐢𝐧𝐠 𝐥𝐨𝐨𝐤 that works beautifully in modern, farmhouse, or classic decor styles, 𝐚𝐝𝐝𝐢𝐧𝐠 𝐰𝐚𝐫𝐦𝐭𝐡 𝐚𝐧𝐝 𝐬𝐭𝐲𝐥𝐞 without overwhelming your space, 𝐟𝐫𝐨𝐦 𝐭𝐨𝐢𝐥𝐞𝐭, 𝐨𝐟𝐟𝐢𝐜𝐞, 𝐥𝐚𝐮𝐧𝐝𝐫𝐲 𝐫𝐨𝐨𝐦, 𝐜𝐥𝐨𝐬𝐞𝐭, 𝐠𝐚𝐫𝐚𝐠𝐞, 𝐧𝐮𝐫𝐬𝐞𝐫𝐲, 𝐚𝐩𝐚𝐫𝐭𝐦𝐞𝐧𝐭, 𝐝𝐨𝐫𝐦, 𝐩𝐥𝐚𝐲𝐫𝐨𝐨𝐦, 𝐞𝐧𝐭𝐫𝐲𝐰𝐚𝐲, 𝐡𝐚𝐥𝐥𝐰𝐚𝐲, 𝐛𝐚𝐬𝐞𝐦𝐞𝐧𝐭, 𝐬𝐮𝐧𝐫𝐨𝐨𝐦 𝐭𝐨 𝐜𝐨𝐧𝐭𝐞𝐦𝐩𝐨𝐫𝐚𝐫𝐲 𝐥𝐢𝐯𝐢𝐧𝐠 𝐬𝐩𝐚𝐜𝐞𝐬

[Functional Kid's Shelves] - These floating nursery book shelves add both style and storage functionality to any nursery or kids' room, making them a great addition to your home decor. In addition, they can be used upside down, with hangers for children's clothing storage.
Skill Level & Time Estimate
Editor’s Choice
Starunder 6 Pack Floating Shelf Brackets, 6 Inch Heavy Duty Industrial S…

uniro Vintage Wall Art Decor Prints Farmhouse Wall Decor Vintage French …

KSIPZE 100ft Led Strip Lights RGB Music Sync Color Changing Led Lights w…
Step 1: Choose Your Art

Start by selecting the art pieces you want to display. This is crucial as they set the tone for your reading nook. Follow these steps:
- Visit local thrift stores or browse online marketplaces for vintage or classic art prints.
- Select 2-3 pieces that resonate with the Dark Academia theme—think dark tones, historical figures, or literary quotes.
- Frame your art in complementary frames, preferably in dark wood or antique styles.
Pro Tip: Hang art at eye level (about 57-60 inches from the floor) for optimal viewing. Why this matters: Art creates the visual foundation for your nook, enhancing its overall appeal.
Time Estimate: 30 minutes
Recommended Products

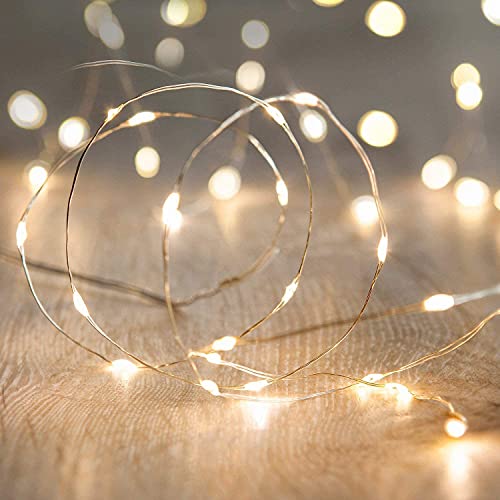
Commercial quality string lights: The globe around the lights are shatterproof because they are made out of plastic. 100 led bulbs give off a warm white light. An ul listed power adapter comes with the lights. Diameter of the bulb is 0.7 inch, and the spacinga between bulbs is 4 inches
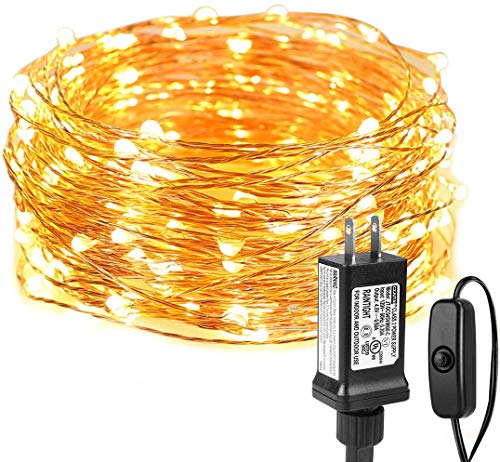
Versatile Fairy lights: String with 100 durable LEDs creates a warm, joyful, and festive ambience, ideal decorations for Christmas, holiday, party, wedding, etc.
【Timing & Brightness Adjustable & Remote Control 】The string lights for bedroom is equipped with an intelligent remote control, two timing modes (6 hours on ,18 hours off and 8 hours on ,16 hours off ), and 4 levels brightness adjustment. There are also 8 lighting modes for you to choose, such as stable, flashing, slow gradient and so on. Whether it's decorated for indoors or outdoors, this fairy lights will create a warm and romantic atmosphere for you !
Step 1: Choose Your Art
Editor’s Choice

Miortior Corner Floor Lamp – Smart RGB LED Corner Lamp with App and Remo…

Kathfly 20 Pack Vintage Picture Frames for Wall or Tabletop Display Orna…

Framed Moody Victorian Bookish Canvas Wall Art Dark Academia Library Can…
Step 2: Measure and Mark Your Wall
Once you have your art selected, it’s time to plan your wall layout. This ensures everything is well-placed and visually appealing:
- Use a measuring tape to determine the best height and spacing for your art and shelves.
- Mark the spots on the wall with a pencil where you want to hang your art and install shelves.
- Double-check your markings with a level to ensure they’re straight.
Warning: Avoid measuring errors by always double-checking your markings before drilling. Why this matters: Proper placement enhances visual balance and harmony in your nook.
Time Estimate: 20 minutes
Recommended Products
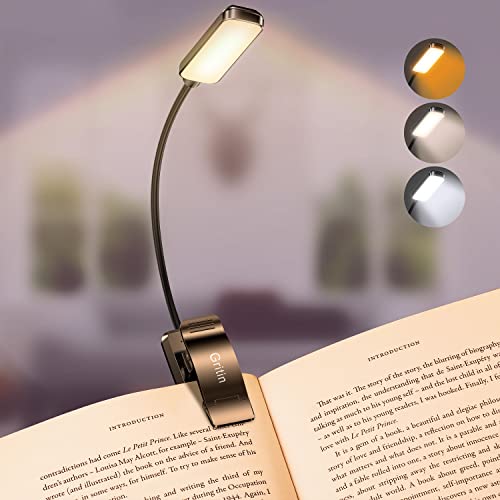
Stepless Dimming and 3 Color Modes: Adjust the brightness from 100% to 10% by long press button to suit different reading environment. Simple switch 3 color temperature lighting modes by clicking the button: mixed color, cool white, warm
7 Leds & 9 Color Temperature - The reading lights have 7pcs leds. The book lights are equipped with 7 upgraded smd leds which life span is more than 50,000 hours to diver more uniform luminance than normal leds. The reading have 9 different color temperature modes: warm white(2800k/3000k/3200k), warm cool white(4000k/4500k/5000k) and cool white(6000k/6500k/7000k)

Horizontal Head Book Light: The reading light adopts a horizontal head design with a wider irradiation range.19 LED lamp beads are arranged in a straight line and the ABS material lampshade provides stable and sufficient lighting without disturbing others
Step 2: Measure and Mark Your Wall
Editor’s Choice

WORKPRO 25FT Pink Tape Measure, Dual Lock Tape Measure with Fractions Ev…


Picture Hanging Kit, 315pcs Hanging Hardware with Hooks, Wire, Nails, D …
Step 3: Install the Shelves

Next, it’s time to install the shelves to hold your books and decorative items:
- Drill holes at the marked spots, ensuring each hole is level.
- Insert wall anchors if necessary for added support.
- Attach the brackets or mounts for your shelves securely.
- Place the shelves on the installed brackets, ensuring they are stable and secure.
Pro Tip: Use a stud finder to locate studs in the wall for a more secure installation. Why this matters: Properly installed shelves will hold your books and decor safely, preventing accidents.
Time Estimate: 1 hour
Recommended Products

【Dark Academia Book Wall Art】Featuring an open antique book with glowing butterflies, framed canvas wall art brings a moody, intellectual atmosphere to space. Perfect choice for dark academia wall art, book wall art, bookish decor, and library wall decor.

Vintage Victorian Reading Wall Art: Book wall art captures the elegance of a Victorian woman reading a book.Moody girl aesthetic wall decor featuring soft tones charm, This art decoration can easily be integrated into a comfortable and elegant space

High-Quality Frames: 8x10in(20x25cm) Use high-quality wooden frames to ensure the durability and long-term beauty of the paintings
Step 3: Install the Shelves
Editor’s Choice

Franklin Sensors Prosensor M210 Stud Finder With 13-Sensors, Wood & Meta…

BAYKA Floating Shelves for Wall, Wall Mounted Rustic Wood Shelves for Ba…

KURUI 140Pcs #8 Self Drilling Drywall Anchors with Screws Kit, Heavy Dut…
Step 4: Add Mood Lighting
Lighting is crucial for creating the right atmosphere in your reading nook. Here’s how to incorporate it:
- Decide on the type of lighting—LED strip lights or fairy lights work well.
- Carefully install the lights along the edges of the shelves or above the art for an ambient glow.
- Plug in the lights and check the brightness; adjust as needed.
Pro Tip: Use warm white lights for a cozy feel. Why this matters: The right lighting enhances your reading experience and adds to the Dark Academia aesthetic.
Time Estimate: 30 minutes
Recommended Products


Sage Green Room Decor: This sage green room decor set includes 9 pcs posters in a unified Matisse and botanical style. Each poster measures 10 x 8 inch, creating a clean and consistent wall collage kit layout. The full set offers a curated aesthetic vintage look, making it perfect green room decor for creating a personalized and cohesive gallery wall at home or in the office

【ADAPTS TO ANY SPACE】Elevate your living space with this collection of vintage wall art set. Whether you're looking to adorn a living room, bedroom, bathroom, dining room, hallway, kitchen, hotel or office, this wall decor will integrate effortlessly, enhancing any area you can envision
Step 4: Add Mood Lighting
Editor’s Choice
KSIPZE 100ft Led Strip Lights RGB Music Sync Color Changing Led Lights w…

Lutron Diva LED+ Dimmer Light Switch for Dimmable LED, 150 Watt, Single-…

Brightown 12 Pack LED Fairy Lights Battery Operated String Lights – 7ft …
Step 5: Decorate Your Nook

After your shelves and lighting are set, it’s time to bring your reading nook to life with decor:
- Start by arranging your books on the shelves, mixing sizes and orientations for visual interest.
- Add decorative items like vintage bookends, plants, or framed photos to personalize the space.
- Ensure the decor complements the Dark Academia theme—think dark greens, browns, and golds.
Pro Tip: Leave some empty space on the shelves to avoid a cluttered look. Why this matters: Thoughtful decoration creates a warm, inviting atmosphere that encourages relaxation and reading.
Time Estimate: 1 hour
Recommended Products

High-Quality Wood: Crafted from premium hardwood, our wall-mounted bookshelf ensures durability and a long-lasting finish, making it a reliable addition to any child's room
[Great Floating Shelves for Baby Nursery and Kids Room] Wall mounted nursery book shelves on your kids room or bedroom, Childrens can stow books, toys, stuffed animals and games in wall shelf, where they’ll be off the floor and easy to reach.

Floating Wall Shelves for Wall Storage Set of 6 - The size of the WOPITUES floating wall shelves is 16.5*6*0.6 inches. WOPITUES Floating Wall Shelves for Bathroom/Bedroom Set of 6 could give you extra storage space in the bathroom, bedroom, guest bathroom, kitchen, and living room. You can install our floating wall shelves anywhere you like. Let’s make life simpler.
Step 5: Decorate Your Nook
Editor’s Choice

S-MANTIS Vintage Wall Sculpture, Antique Pediment, Hallway Wall Art, Han…

Ceramic Modern Glaze Succulent Planter Pot with Drainage Hole and Saucer…

Vintage Wooden Bookends with Drawers – Decorative False Book Shelf Org…
Step 6: Personalize Your Space

Your reading nook should reflect your personality. Here’s how to make it uniquely yours:
- Add a cozy throw blanket or plush cushions to your seating arrangement.
- Incorporate personal items like photos or memorabilia that resonate with you.
- Consider a small side table for drinks or snacks while you read.
Pro Tip: Choose a comfortable chair that suits the Dark Academia style—look for vintage or leather options. Why this matters: Personal touches make your nook more inviting and tailored to your preferences.
Time Estimate: 30 minutes
Recommended Products
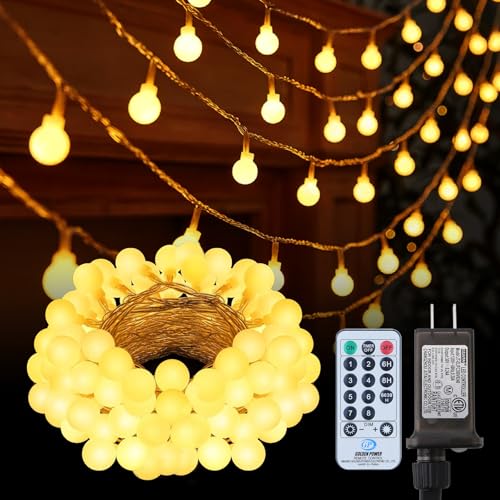
Battery Operated String Lights: Powered by 3*AA battery (batteries NOT included). The battery box is not waterproof, please keep it away from water

✨ 150 LED Warm White Fairy Lights for Stunning Ambiance Transform any space with these LED fairy lights featuring 150 bright micro LEDs. These warm white fairy lights create a soft, cozy glow perfect for bedrooms, patios, weddings, and holiday décor.

【Globe String Lights】The Led string lights come with frosted globes can create a soft, cosy light to take care of your eyes. So the lighting effect of the frosted ball is irreplaceable by other LED string lights. The cute string lights indoor provide a fun feel for room aesthetic to the bedroom, dorm, classroom, living room. The globe around the lights are shatterproof, it not only create a unique relaxing and soothing indoor atmosphere, but also enhances the durability of the string lights
Step 6: Personalize Your Space
Editor’s Choice

TYBOATLE Accent Chair, Comfy Modern Living Room Brown Leather Reading Ac…

Halloween Blanket Book Lovers Goth Skull Bookshelf Throw Blanket Gifts f…

Solid Wood Accent End Table – Hand Carved Vintage Boho Folding Side Tabl…
Step 7: Final Touches and Enjoy
Now that everything is in place, it’s time to add the final touches:
- Take a step back and assess your nook. Make adjustments to art, lighting, or decor if necessary.
- Keep a few of your favorite books within reach to inspire you to read.
- Settle into your chair with a cup of tea or coffee, and enjoy your new space!
Pro Tip: Regularly change the decor to keep your nook feeling fresh and inspiring. Why this matters: Final adjustments ensure that your nook meets your aesthetic and functional needs perfectly.
Time Estimate: 30 minutes
Recommended Products

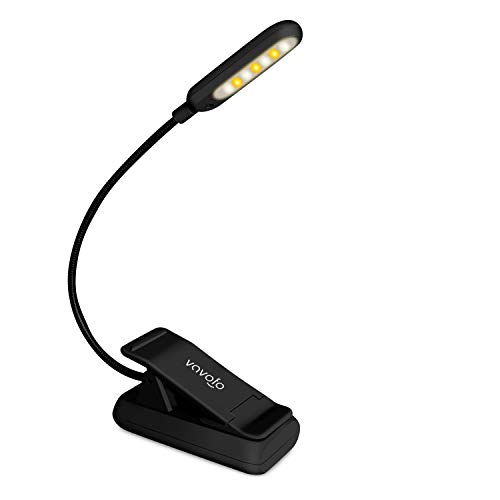
[Advanced Eye Care & Partner-Friendly] Featuring 13 premium LED and an extended 2.76" lamp head, this book lights for reading at night delivers a wider, brighter, and more evenly diffused beam. The refined beam-focus design keeps light concentrated on your pages, offering soft, flicker-free, shadow-free illumination that reduces eye strain. Ideal as a bed book reading light, it won't disturb your family or partner, creating a private, comfortable night-reading zone.
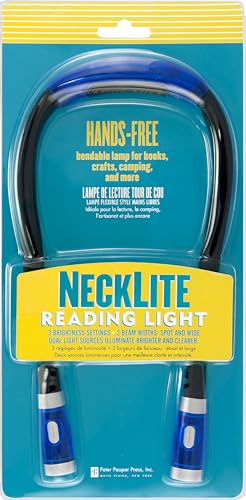
Dual light sources shine from multiple angles, providing brighter illumination and fewer shadows.
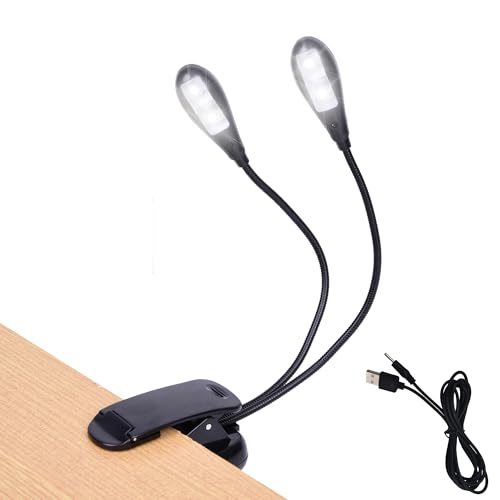
MULTI-USE: Great for music stands, reading (iPad, Kindle, tablets and regular books), piano play, orchestra pits, gig, work tables, DJ's, craft tables, computers, keyboard or as Podium light etc.
Step 7: Final Touches and Enjoy
Editor’s Choice

Jane Austen – I Shall Be Miserable If I Have Not An Excellent Library: 1…

DUMOS 5 Tiers Bookshelf, Classical Modern Book Shelf, Tall Display Shelv…

Fenmzee Bedside Table Lamp for Bedroom – 3 Way Dimmable Touch Lamp USB C…
Pro Tips
- Lighting Placement: Consider adding a reading lamp next to your chair for additional light when needed.
- Seasonal Decor: Change your decor with the seasons for a fresh look throughout the year.
- Book Arrangement: Arrange books by color or size for a visually appealing display.
- Texture Variety: Incorporate different materials (wood, metal, fabric) for a more dynamic aesthetic.
- Layered Lighting: Use multiple light sources to create different moods at different times of the day.
Pro Tips
Editor’s Choice

upsimples 6 Pack Wooden Floating Shelves, Wall Storage Decor Shelf for B…

ONEWISH Industrial Table Lamp for Bedroom, Fully Dimmable Modern Bedside…

BOURINA Beige Throw Blanket 50×60 Inches Throw Textured Solid Soft Sofa …
Common Mistakes to Avoid
Warning: Don’t overcrowd your shelves. Too many items can make the space feel cluttered and overwhelming. To fix this, leave some empty space for breathing room. Warning: Avoid using harsh, bright lighting. Instead, opt for warm tones to enhance the cozy atmosphere. If you notice your lights are too bright, consider using dimmable options or warm bulbs. Warning: Don’t neglect wall space. Empty walls can make your nook feel unfinished. Add art or shelves to fill gaps effectively.
Common Mistakes to Avoid
Editor’s Choice

97 Decor Dark Academia Wall Art – Dark Academia Decor For Bedroom, Moody…
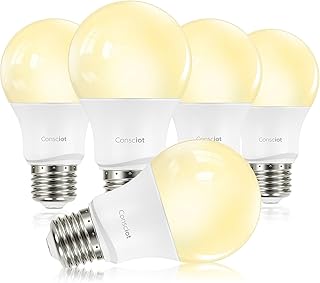
Consciot A19 LED Light Bulbs Dimmable,60W Equivalent,3000K Warm White,9W…

BAYKA Floating Shelves Set of 2, 22.5 inches Farmhouse Rustic Wood Wall …
Troubleshooting Section
Problem: The shelves feel unstable. Solution: Check the installation; ensure brackets are securely fastened and use wall anchors if needed. Problem: Lighting is too dim. Solution: Replace bulbs with brighter options or add additional light sources. Problem: Art doesn’t look right on the wall. Solution: Rearrange or swap out pieces until you find a pleasing arrangement. Problem: The nook feels cluttered. Solution: Remove a few items or reorganize to create a more balanced look.
Troubleshooting Section
Editor’s Choice

Ougourim Furniture Anchors (10 Packs) Anti Tip Furniture Anchors for Bab…

SummerBrite Picture Hanging Strips 40 Strips, Damage Free Removal, Wall …

evelor 6-Packs A19 LED Light Bulbs,100 Watt Equivalent Daylight 5000K Br…
Variations/Alternative Methods
Consider these alternatives for achieving a Dark Academia vibe:
- Gallery Wall: Instead of a single or few art pieces, create a gallery wall with various artworks, creating a dynamic focal point.
- Textured Wall: Use wallpaper with vintage patterns or a paint technique to add depth to your nook.
- Different Lighting Options: Instead of LED strips, use lanterns or vintage lamps for a more classic look. Each option has its pros and cons, so choose based on your personal style and space constraints.
FAQs
What if I don’t have enough wall space? Consider using a corner nook or vertical shelves to maximize space. How long should I wait before rearranging my decor? It’s best to wait at least a few months to determine what works best for you. Is it safe to use adhesive lights on painted walls? Most adhesive lights are safe, but always test a small area first to avoid damage. Can I mix different styles? Yes, blending styles can create a more personalized space, but keep a cohesive color palette. What if I want to change the theme later? Most elements can be easily adjusted or replaced to accommodate a new theme.
Conclusion
Congratulations on creating your Dark Academia reading nook wall! You’ve transformed your space into a cozy retreat perfect for diving into literary worlds. Now that you have your setup, consider hosting a small gathering with friends who appreciate literature as much as you do.
Explore additional resources online for inspiration on maintaining your nook or expanding it with new elements. Remember, the key to a successful reading nook is personalization and comfort—so make it your own!