
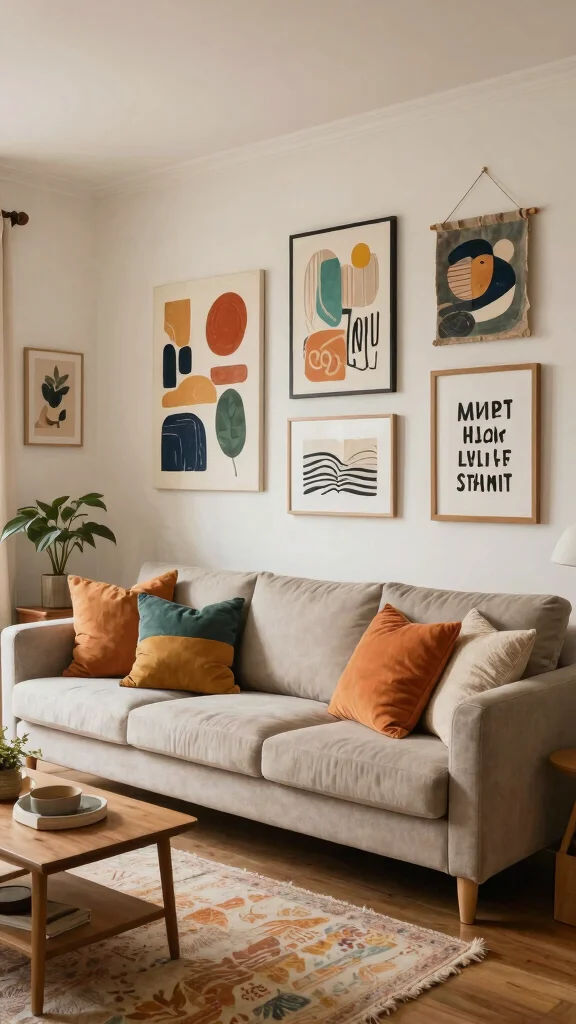
Transforming your living room can feel daunting, especially when it comes to choosing the right wall art. If you’re like many people, you might find yourself craving unique pieces that truly express your personality without breaking the bank. This post is here to help! We’ve curated a list of 10 DIY large wall art ideas that will not only enhance your space but also give you that sense of accomplishment that comes with creating something beautiful from scratch.
If you’re someone who loves home decor and enjoys creative projects, this guide is perfect for you. Whether you have limited space or are just looking to add a personal touch to your modern living room, these DIY projects are designed for everyone from beginners to seasoned crafters. You’ll discover how easy and fun it can be to create affordable wall art that captures your style and makes a bold statement.
Get ready to dive into a world of creativity! We pulled together these DIY large wall art ideas to inspire you and help you transform your living room into a space that feels uniquely yours. With materials you likely already have around the house or can easily acquire, these projects are not only fun but also completely achievable. Let’s bring your walls to life together!
Key Takeaways
– Affordable Options: Each DIY project is budget-friendly, making it easy for you to add creative wall decor without spending a fortune.
– Variety of Styles: The ideas range from oversized abstract canvases to nature-inspired macramé wall hangings, ensuring there’s something for every taste.
– Step-by-Step Guidance: You’ll find clear instructions for each project, helping you navigate through your creative process smoothly.
– Personalized Touch: Each piece allows you to express your individual style, making your living room truly unique and inviting.
– Fun for Everyone: These projects are suitable for all skill levels, so you can involve family and friends for a fun crafting experience.
Recommended Products

[Framed Wall Art]: This large 40x40 inch framed colorful abstract wall art features intricate, flowing multicolor line patterns, creating a vibrant and dynamic focal point in any room. The artwork is encased in a sturdy wood frame, providing elegance
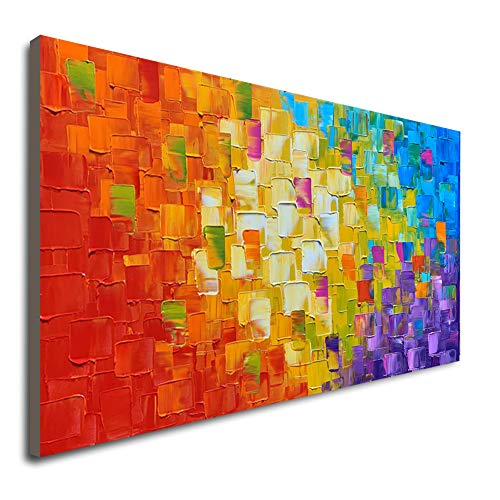
1. Oversized Abstract Canvas

An oversized abstract canvas can transform your living room into a vibrant showcase of creativity. This choice works beautifully because large canvases allow for bold colors and dynamic shapes, creating visual interest that draws the eye. You might consider using bright acrylics, palette knives, or even pouring techniques to achieve an exciting effect that feels both personal and artistic. Hang your masterpiece above a sofa or a console table to anchor the room’s design.
To make this project budget-friendly, check local craft stores for oversized canvases and affordable acrylic paints. Experiment with drip techniques or sponge applications to add unique textures to your artwork.
Consider these tips to elevate your abstract canvas:
– Use painter’s tape to create geometric shapes for a modern look.
– Layer colors for depth and visual interest.
– Don’t stress about perfection; embrace the unique qualities of your art.
Incorporating this art piece will add a lively focal point to your space, while the textures and colors enhance the overall aesthetic.
Recommended Products
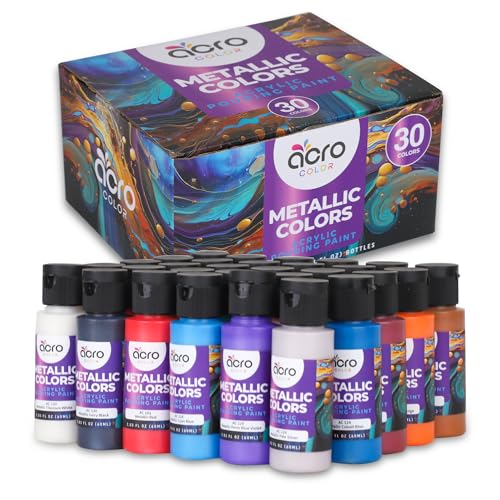
High Quality, Vibrant Results - Each color in our acrylic pour paint set is formulated for brilliance and clarity, ensuring your art shines with vivid hues and stunning finishes, whether you're an amateur or a professional.

HIGH QUALITY PAINT: Equipped with a unique recipe, our Metallic Pouring Acrylic Paints come in 18 shimmering metallic shades, each uniquely vibrant and can create cellular effects, allowing you to unleash your creativity to create one-of-a-kind works of art

Ready-to-Pour Consistency: This acrylic pouring paint is formulated like honey to ensure smooth flow when tilting the canvas, making it easy to create color movement. Features the ideal viscosity right out of the bottle.
🎨 Perfect Your Gallery Wall!
Transform your living room with our step-by-step workbook to design and hang stunning wall art effortlessly.
Difficulty Rating & Requirements
Overall Difficulty Rating: Medium
Creating DIY large wall art for your living room can be a fun and rewarding project. However, the difficulty level varies depending on the specific project you choose. Some ideas may require basic crafting skills, while others might need more advanced techniques or tools. This medium rating makes it suitable for individuals with some DIY experience, as well as beginners willing to learn and try new things.
Time Estimate: ⏱ Estimated time: 4-10 hours
Depending on the complexity of your chosen wall art, the time spent can vary significantly. For simpler projects like oversized abstract canvases, you might need around 4 hours, including drying time. More intricate designs, such as a geometric wood panel or a macramé wall hanging, can take up to 10 hours due to preparation, assembly, and finishing touches.
Skill Requirements:
– Required skills: Basic painting, cutting, and assembling skills.
– Beginner-friendly: Yes. Many projects can be tackled by beginners with a willingness to learn new techniques.
– Skills that can be learned include painting techniques, basic woodworking, and knotting for macramé projects. Advanced skills, such as woodworking or sophisticated painting techniques, might require prior experience.
Tools & Materials Needed:
🧰 Essential items checklist:
– Canvas or wood panels (required)
– Paints or fabric (required)
– Brushes and tools for cutting (required)
– Adhesive for fabric or wood (required)
– Hanging hardware (optional)
– Decorative elements like dried flowers or stencils (optional)
– Ruler or measuring tape (required)
– Scissors (required)
Step-by-Step Overview:
1. Planning the Design (1-2 hours): Start by sketching your ideas or choosing a design online. This phase involves selecting colors, shapes, and materials. Make a list of everything you’ll need.
2. Gathering Materials (1-2 hours): Purchase or gather the necessary materials. Check if you have some items at home to save on costs.
3. Creating the Art (2-5 hours): Depending on your project, this phase covers painting, cutting wood, or assembling your decorative pieces. Ensure each piece is properly dried and secured.
4. Finishing Touches (1 hour): Add any additional elements, such as mounting hardware or final decorative touches. This step also includes letting everything dry completely before hanging.
5. Hanging the Art (30 minutes): Finally, choose the perfect spot on your wall and hang your artwork securely. Make sure it’s leveled for the best look.
Professional vs DIY:
Creating your wall art can be budget-friendly, with DIY costs ranging from $50 to $150, depending on materials and size. In contrast, hiring a professional artist can cost $300 to $1,000 or more for custom artwork. If you’re on a budget or enjoy hands-on projects, DIY is a great option. However, if you’re looking for a polished, specific design, hiring a professional might be worth the investment.
Recommended Products

Large Size: This large tapestry wall hanging measures about 43" x 32", making it a bold centerpiece for any room. Its generous scale fills your wall with rich texture and natural boho beauty (lroning makes the tassels straighter and nicer)

Extra Large Size: Our bohemian headboard is 70.8 x 39 inches and is a great fit for your wall, a large wall decor curtain can bring high-quality texture and harmonious atmosphere to your room without any other decorations.

【Large Woven Tapestry】The large size 39"X29.5"(100X75cm) is a great fit for your wall, great size to place at any place of your house. The package includes 3 splicing wooden rods, which can be easily assembled into a large macrame wall hanging or also divided into two small wall decorations.
Oversized Abstract Canvas
Editor’s Choice

Large Canvases for Painting 36×48 Inch 2-Pack, 12.3 oz Triple Primed Aci…

Shuttle Art Acrylic Paint, 36 Colors Acrylic Paint Set with Brushes & Pa…

CONDA Palette Knife Painting Stainless Steel Spatula Palette Knife Oil P…
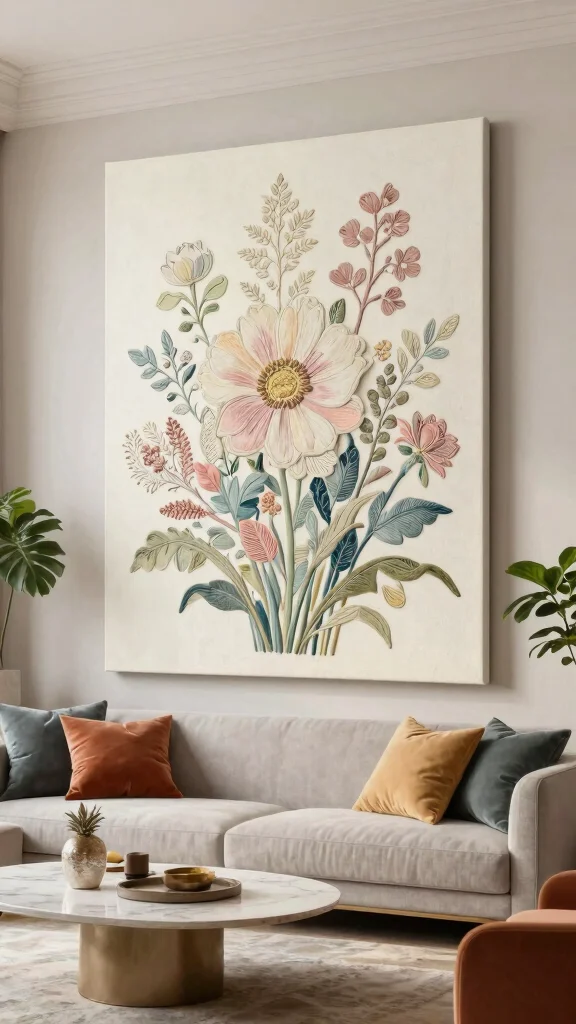
2. Framed Fabric Wall Art

Framed fabric wall art is an inviting way to add warmth and texture to your living room! This approach offers a delightful mix of patterns and colors, whether you prefer vintage florals or modern prints. By framing large swatches or arranging smaller pieces, you can create a captivating gallery that showcases your style and personality.
For a simple DIY, stretch your fabric over cardboard or foam board and secure it before framing. This method allows you to easily swap out fabrics seasonally without the need for new artwork. Plus, it’s a fantastic way to use leftover materials from previous projects!
Try these ideas to make the most of your framed fabric:
– Mix and match patterns for an eclectic style.
– Use a contrasting colored frame to make the fabric pop.
– Consider fabrics with texture, like burlap or velvet, to add dimension.
This art form not only enhances your decor but also reflects your personal taste while keeping the space feeling fresh.
Fun fact: fabric wall art can cost up to 70% less than canvas prints, yet dramatically boosts warmth. With DIY large wall art ideas living room projects, stretch fabric over foam board and frame it, then swap fabrics seasonally for a fresh gallery vibe.
Recommended Products
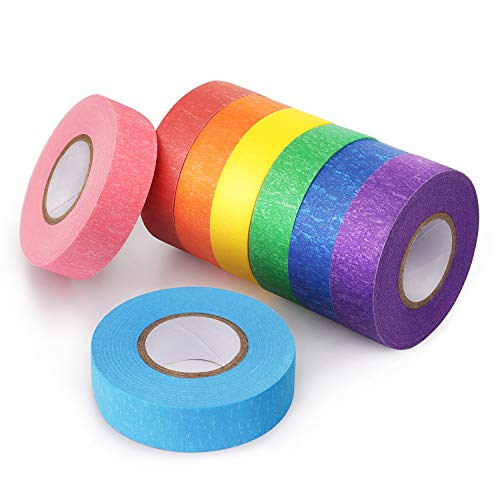
High Quality: Colored masking tape is made of eco-friendly crepe paper which is non-toxic, acid-free and odorless, making it safe to use, but this product is not suitable for children under 12.
Framed Fabric Wall Art
Editor’s Choice
Chunoy Women Floral Beach Wear Cover Up Chiffon Kimono Cardigan Open Fro…

Picture Hanging Kit, Magnetic Hammer and Nails and Level Set for Hanging…

MapofBeauty Women Men Wig Stand, Mannequin Head Foam Display for Masks H…
3. Geometric Wood Panel Art
Add a touch of modern elegance to your living room with geometric wood panel art! By cutting various shapes from plywood and painting them in a mix of colors, you can create a striking visual display that introduces texture and depth to your walls. This project allows for creativity in design, whether you opt for a structured grid or a more organic arrangement.
To make installation easier, mount these panels at different depths for a three-dimensional effect. This versatility ensures it complements any style, from rustic to contemporary, making it ideal for evolving home decor.
Here are some ways to enhance your geometric wood panel art:
– Use a combination of natural wood tones and painted colors for contrast.
– Secure the panels with heavy-duty adhesive or screws for stability.
– Incorporate LED strip lights behind the panels for a backlit effect at night.
This stunning art piece will not only elevate your space but also create a unique atmosphere, enriched by the textures of wood.
Fun fact: 3D geometric wood panels can visually expand a small living room by up to 20%. Install at varying depths to create shadow and texture, quickly transforming your space. DIY large wall art ideas living room lovers swear by this simple upgrade.
Recommended Products

[3D Effect Numbers] - Clock with large size and acrylic mirror surface, this 3D DIY wall clock will let your room get a modern wall decoration. The large DIY wall clock finishing size is depends on your preference to decorate your wall.

Warm Gratitude Quote + Charming Floral Vase Design = Heartwarming Home Decor: Bring a sense of joy and thankfulness to your space with this beautiful wall decal featuring the beloved phrase “Thankful Grateful Blessed”. Paired with 3 floral vases printed with “POWER”, “DREAM”, and “BRAVE”, plus delicate butterfly accents, this decal creates a cozy, inviting focal point in your living room, bedroom, or kitchen. The classic black-and-white design blends effortlessly with farmhouse, modern, or traditional decor, making it both a stylish statement and a daily reminder of life’s blessings.
Notice:Plastic mirror tiles are made of high quality PVC with smooth surface. There is a protective film that is used to protect the surface, please peel it off before use. This product is made of acrylic, can not be used as a mirror. This is a decorative product.
Geometric Wood Panel Art
Editor’s Choice

Apple Barrel, Vibrant Spectrum Collection Acrylic Craft Paint, PROMOABII…

Gorilla Wood Glue, 8 oz., Water Resistant PVA Wood Glue for Indoor & Out…

Baltic Birch Plywood Custom Cut Craftwood Customized to Size, B/BB Grade…
4. Nature-Inspired Macramé Wall Hanging
Create an earthy oasis in your living room with a large macramé wall hanging! Using cotton cords, yarn, or jute, you can weave intricate designs that evoke tranquility and a natural vibe. Macramé has surged in popularity, serving as a beautiful way to introduce warmth and texture to your decor.
A larger design can act as a statement piece, or you can layer several smaller hangings for a dynamic look. Pair your macramé with greenery to enhance its organic feel, creating a harmonious connection to nature.
Utilize these tips for your macramé project:
– Experiment with different knots and patterns to create unique designs.
– Use a wooden dowel or branch for a rustic touch.
– Paint or stain the cord to match your living room’s palette.
This stunning wall hanging will enrich your space with texture and character, bringing a sense of calm and natural beauty.
Recommended Products

【Oversized Abstract Horizontal Wall Art】This oversized 72"W x 36"H horizontal framed canvas print wall art features bold black ink-style organic outline shapes on a warm neutral background, creating a mid century modern minimalist statement piece for your living room, bedroom, dining room, home office, hallway or entryway

Large wall art size: 29x58 inches,blue and white abstract canvas wall art for living room office wall decor.
High quality 100% handmade home oil painting reproduction on canvas painted by our professional artist with years of oil painting experience. A perfect Christmas and New Year gifts for your relatives and friends.
📹 Related Video: DIY Macrame Tree of Life Wall Hanging | Step by Step Tutorial|How to make Macrame Tree of Life
Nature-Inspired Macramé Wall Hanging
Editor’s Choice

MIGO Creates DIY Macrame Kit for Beginners with 9 Macrame Projects Ebook…

Cute Body Shaped Planter Fun Resin Plant Pots Indoor with Drainage Hole …
5. Bold Typography Art

Elevate your living room with bold typography art that reflects your personality! You can use large canvases or wooden boards to paint inspiring quotes, song lyrics, or personal phrases that resonate with you. This art form is not just stylish; it also brings motivation and positivity to your space.
Choose a font that fits your style—whether modern, vintage, or handwritten—and use contrasting colors for maximum impact. If you’re not confident in freehand lettering, stencils or vinyl lettering can help achieve a polished finish.
Here are some tips to create standout typography art:
– Choose a phrase that inspires you or reflects your family’s values.
– Balance the typography with surrounding decor to maintain harmony.
– Use a gallery wall layout to mix typography with other art styles.
This art piece will serve as a conversation starter while enhancing your living room with a personal touch.
Recommended Products
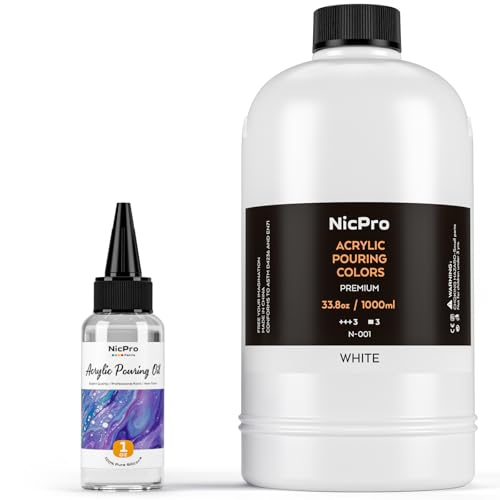
1.Endless Creativity: Come with 33.8 ounce titanium white color pour paint and 1 ounce silicone pour oil,10 pairs gloves. Mix the pour paint with silicone oil to create cells - Come with Instruction


Let your creativity flow! If you haven't tried Fluid Art (a.k.a paint pouring), now is the time to jump in. Fluid Art Ready to Pour Paints have the ideal consistency for flowing across canvas, wood, and more! These highly pigmented colors can be used together, and all will stay bright and bold when dry.
Bold Typography Art
Editor’s Choice

ESRICH Stretched Canvas for Painting 30×40 Inch, 3Pack Large Canvas for …

6-Piece Wildflower Stencil for Painting – Large Reusable Floral Design f…

Acrylic Paint Set Canvas Art Paints 24 Colors Perfect Paint Finish (0.41…
6. Statement Photo Collage
Bring your cherished memories to life with a statement photo collage! By framing large prints or mixing smaller photos, you create a stunning visual display that tells your unique story. This project allows you to showcase your individuality in a creative way.
Choose a theme for your collage, such as family vacations or special moments, and arrange the photos artfully with a mix of frames for added interest. This DIY project can be budget-friendly; thrifted frames or homemade options can add character without breaking the bank.
Implement these ideas to craft your photo collage:
– Maintain a consistent color palette for a cohesive look.
– Use craft paper to outline your arrangement on the wall before hanging.
– Incorporate decorative elements like tassels or string lights for added flair.
This collage will not only personalize your space but also keep your favorite memories alive and visible.
Recommended Products

Large Size: This large tapestry wall hanging measures about 43" x 32", making it a bold centerpiece for any room. Its generous scale fills your wall with rich texture and natural boho beauty (lroning makes the tassels straighter and nicer)

Large Size: Approximately 43" W x 32" H.

【Exquisite craftsmanship】:Our macrame rope wall decorations are completely hand woven wall decor living room , After careful consideration of knotting.The product is designed to be disassembled into front and back sections. Macrame wall art tassel at the front can be detached separately.Macrame distance between each one can be easily adjusted.
Statement Photo Collage
Editor’s Choice

SaFeHoM 212 Pcs DIY Vintage Journal Set for Women Gifts Scrapbook Diary …

Black Girl Wall Art African American Women Painting Wall Decor Fashion B…

Family Picture Frame, Best Friend Picture Frame Gifts for Best Friend Wo…
7. Large Canvas Stencil Art
Make a bold statement with large canvas stencil art that combines creativity and ease! This DIY project is perfect for anyone who wants a striking look without the stress of freehand painting. Choose a large canvas and a stencil that suits your theme, whether it’s florals, geometric patterns, or quotes.
Applying paint over the stencil using spray paint or a sponge creates a stunning design that’s uniquely yours. This method encourages experimentation with colors and patterns, ensuring each piece is one-of-a-kind.
Follow these steps for your stencil art:
– Secure your stencil to the canvas to prevent paint seepage.
– Experiment with layering colors for a multidimensional effect.
– Choose a canvas that harmonizes with your existing decor.
This art will stand out in your living room, showcasing your personal style with ease.
Recommended Products

WRITABLE BLACK CRAFT TAPE: Marks cleanly with pen, marker, and pencil. Label classroom supplies, color-code folders, add borders to art projects, or create bold contrast lines for wall art and décor. Black shows up on any surface, any background.

Formula Upgrade: This 200 ft rolls are made from premium pulp, offering tear resistance and a translucent cool white finish that balances aesthetics with visibility

✅【VERSATILE SET OF SIZES】: Unleash your creativity with a set of 5 rolls, each offering a different width - 1/16", 1/8", 1/4", 1/2" and 3/4". This diverse range empowers you to tackle a variety of projects with precision and finesse.
8. Quirky DIY Wall Tapestry
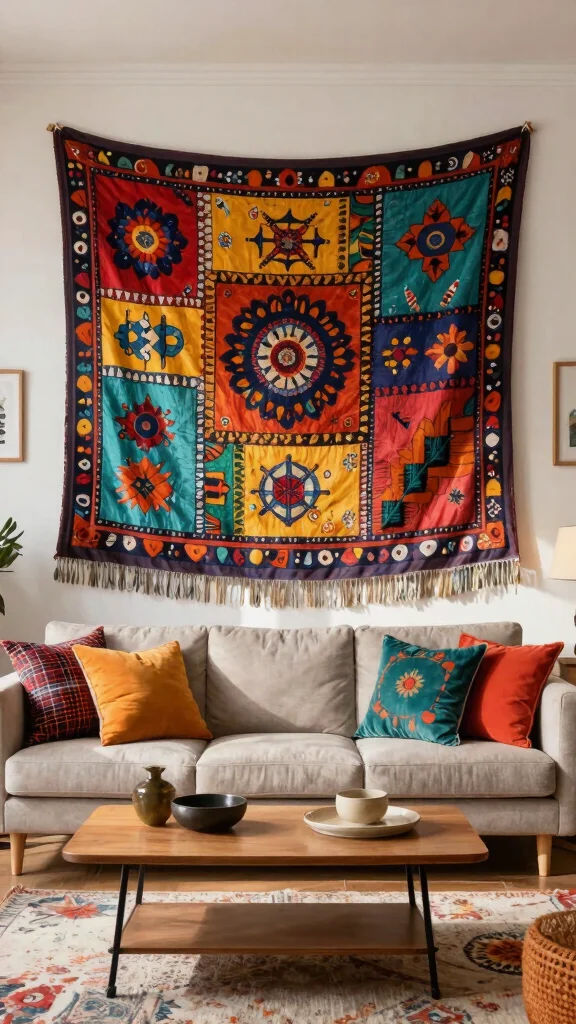
Transform your living space with a quirky DIY wall tapestry that adds character and charm! Using fabric, yarn, or even recycled materials, you can weave or tie-dye your own tapestry, allowing for endless creativity in colors and patterns. This soft backdrop contrasts beautifully with harder surfaces in your room.
Hang your tapestry behind your sofa or in a cozy nook for an inviting atmosphere. Tapestries are lightweight and easy to switch out, making them a great choice for those who love change.
Try these techniques for your tapestry:
– Explore various knotting techniques for unique designs.
– Use recycled fabrics for an eco-friendly touch.
– Consider adding fringe or beads for extra character.
This tapestry will infuse your living room with warmth and personality, creating a welcoming environment.
Recommended Products

Real 3D Design: Diamond pattern with 1 inch raise design makes our wall panels more eye-catching. A box comes in 33 tiles, which covers 32.Sq.Ft.

Large Capacity: (Mouse ears not included)This hanging mouse ear headband holder can store up to 21 headbands. Easy to hang, it allows the full display of each headband’s design, pattern, and details, turning your collection into an elegant showcase. It adds a touch of refined, unique decor to your space
Quirky DIY Wall Tapestry
Editor’s Choice

WaldyWop Crochet Kit for Beginners – 8 Flower Bookmarks Knitting Kit w/S…

Vanstek 20 Colors Tie Dye Kit, Tie Dye Shirt DIY Fabric Dye for Women, K…

Fabric, 50 pcs/lot Top Cotton 8″ x 8″ (20cm x 20cm) Squares Patchwork, P…
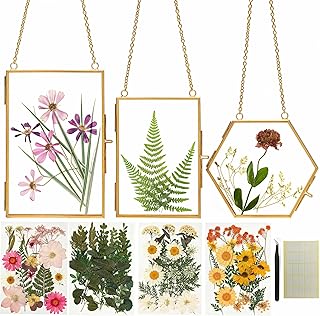
9. Dried Flower Wall Art
Bring the beauty of nature into your home with dried flower wall art—a charming and organic decor option! Gather an assortment of dried flowers, grasses, and foliage to create a stunning display. You can frame these flowers or mount them on a canvas to highlight their natural beauty.
Select flowers that complement your decor or change them seasonally to keep the look fresh throughout the year. Dried arrangements are low maintenance yet offer a unique aesthetic for your living space.
Consider these tips for your dried flower art:
– Mix different textures and colors for a dynamic look.
– Use a combination of clear and colored frames for contrast.
– Incorporate quotes or small art elements alongside the flowers.
This artwork will add an elegant touch to your living room, celebrating the simplicity and beauty of nature.
Did you know dried flowers can last 6–12 months with no water? Create DIY large wall art that stays vibrant by framing or mounting on canvas—seasonal changes keep your living room feeling fresh without daily maintenance.
Dried Flower Wall Art
Editor’s Choice

Silipull 3D Puzzle Vase,160 Pieces 3D Puzzle Vase for Flowers,Unique Adu…
Relaxing Garden Pressed Flower Craft Kit for Adults & Women, DIY Floatin…

Sherr 96 Pcs 12 Sets Pre Drawn Canvas Kit for Painting Craft Sip and Pai…
10. Interactive Chalkboard Art

Unleash your creativity with interactive chalkboard art that invites self-expression! Paint a section of your wall with chalkboard paint, creating a fun canvas for quotes, doodles, or seasonal messages. This DIY project is perfect for those who love to keep their decor lively and ever-changing.
Add colorful chalk borders to frame your artwork or use magnets for convenient note-taking. The interactive element engages family members and guests, making it a standout feature in your home.
Implement these ideas for your chalkboard art:
– Use quality chalkboard paint for a smooth finish.
– Keep a set of colorful chalks handy for varied expressions.
– Regularly wipe down and refresh your art for a polished look.
This playful art form will keep your living area dynamic and inviting, encouraging creativity and interaction.
Interactive Chalkboard Art
Editor’s Choice

Rust-Oleum 206540 Chalkboard Brush-On Paint, 30 oz, Black

The Mega Deals Chalkboard Colored Chalk, Thin Colored Chalk for Chalkboa…

2 Packs Chalkboard Eraser – Washable Reusable Microfiber Eraser Cleaning…
Conclusion
These DIY large wall art ideas for your living room offer endless possibilities for creativity and personalization.
Whether you opt for a bold abstract canvas or a cozy dried flower piece, each project allows you to express your unique style while enhancing your living space. As you dive into these artistic endeavors, remember that the process is just as enjoyable as the finished piece.
So gather your materials, unleash your creativity, and transform your living room into a vibrant and inviting sanctuary filled with your own personal touch!
Note: We aim to provide accurate product links, but some may occasionally expire or become unavailable. If this happens, please search directly on Amazon for the product or a suitable alternative.
This post contains Amazon affiliate links, meaning we may earn a small commission if you purchase through our links, at no extra cost to you.
Frequently Asked Questions
What are the best DIY large wall art ideas for small living rooms to create a bold statement?
For small living rooms, the goal is to make a big impact without crowding floor space. Here are DIY large wall art ideas living room that stay affordable and chic in compact spaces.
1) Oversized canvas abstract painting: pick one or two large canvases, acrylic paints, and a palette knife. Paint bold shapes or swirls, layer colors, let dry, then seal with a matte varnish for a polished finish.
2) Geometric wooden panels: cut plywood into large geometric shapes, paint or stain in a cohesive palette, and mount on a backer board for a contemporary modern living room ideas vibe.
3) Large printable art in a statement frame: download a high-res design, print at poster size, mount on foam board, and frame with a wide, minimal frame for a dramatic focal point.
4) Painter’s tape wall mural: use painter’s tape to create a large geometric pattern right on the wall, fill with color, then peel away for crisp lines—perfect for easy DIY projects.
5) Textile wall art: stretch a thrifted fabric or tapestry over a simple frame or canvas for texture and warmth without adding bulk.
Tip: pick a cohesive color palette and let this single piece anchor the room, delivering a striking statement art piece without overwhelming the space.
How can I choose affordable wall art that still looks modern and cohesive in a living room?
Looking for affordable wall art that feels fresh and cohesive? Try these ideas: opt for downloadable or printable art and switch frames to keep costs low, stick to a limited color palette to unify pieces, and consider one large focal piece instead of many small ones. Thrifted frames and DIY canvases can dramatically cut costs while delivering a modern living room ideas look. Steps: 1) choose a theme and color family, 2) pick one large piece or a tight 2–3 piece grid, 3) frame with affordable frames or mount directly on boards, 4) hang at eye level and balance with lighting. Bonus: incorporate statement art pieces like a single oversized print or metal accent that reflects your style.
What materials and techniques work best for DIY large wall art in small spaces?
Materials and techniques that work well for DIY large wall art ideas living room in small spaces include lightweight bases (canvas, plywood panels, foam board), acrylic paints or wall-safe stencils for bold shapes, and painter’s tape for clean lines. Techniques to try: 1) paint-by-shape with bold color blocking, 2) geometric mosaic using pre-cut wooden panels, 3) tape murals directly on the wall for fast, easy DIY projects, 4) fabric art stretched over a frame for texture. Finish with a protective coat, add secure hanging hardware, and consider modular pieces you can rearrange later to refresh the room.
How should I arrange or hang DIY large wall art to maximize wall space in a small living room?
Plan the wall like a gallery: measure the available space, visualize layouts on the floor, and choose between a single oversized piece or a cohesive 2–3 piece grid. For small rooms, a bold statement art piece can anchor the wall, or use a light, evenly spaced grid with generous negative space. Practical tips include hanging at eye level, using a slim backer board or hanging rail for easy adjustments, and pairing the art with lighting to keep the space feeling bright and open.
What are common mistakes to avoid when creating or hanging DIY large wall art?
Common missteps include choosing pieces that are too small for the wall, ignoring lighting or glare, hanging art too high or too low, and skipping proper mounting hardware. Also avoid busy patterns that clash with furniture and finishes; test color in the room and stick to a scalable palette. Plan ahead with affordable wall art options that still deliver impact, and always secure your DIY large wall art ideas living room with appropriate wall anchors and hardware.
Related Topics
home decor
DIY large wall art
affordable wall art
creative wall decor
small spaces
statement art pieces
modern living room
easy DIY projects
beginner friendly
wall art techniques
budget friendly
trending decor