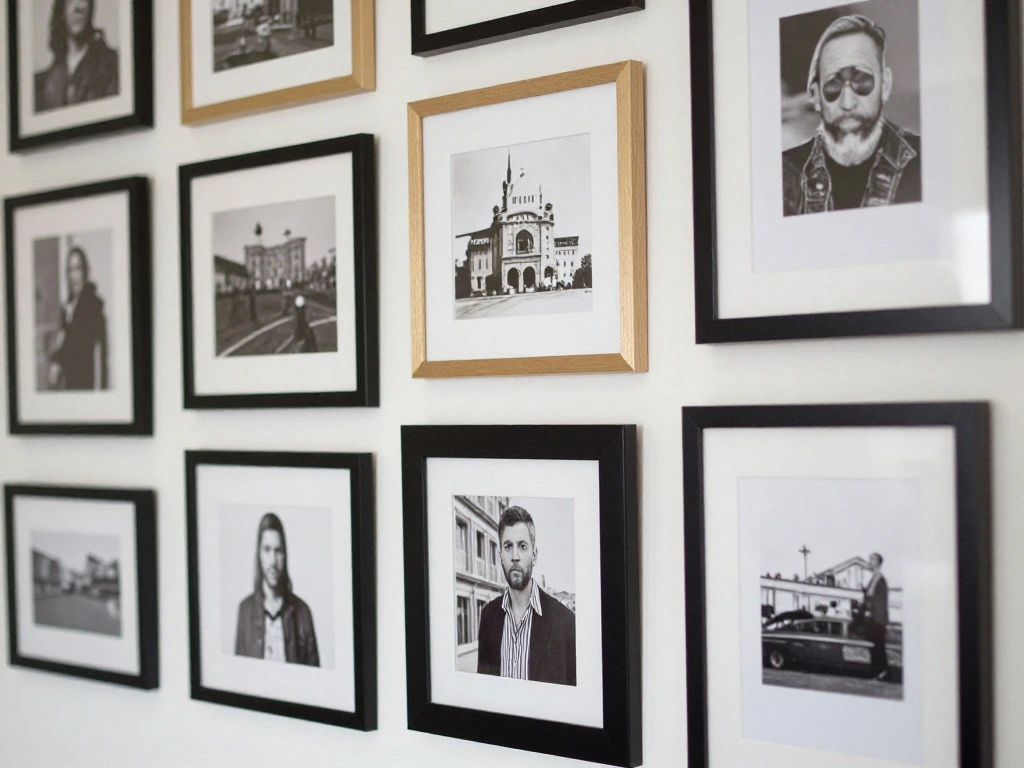
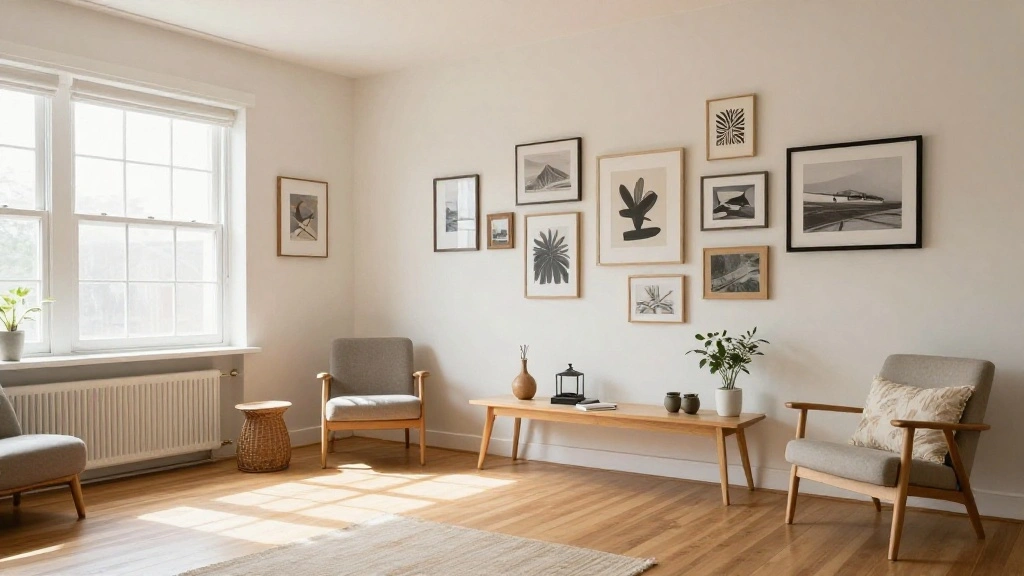
Are you tired of staring at a blank wall? Designing a gallery wall can be daunting, especially if you want it to look cohesive and stylish. Without a plan, you risk drilling holes in the wrong places, leading to frustration and wasted effort.
In this guide, you’ll learn how to effectively plan a stunning gallery wall using simple paper templates. By the end, you will have visualized your layout without damaging your walls, ensuring perfection before you even pick up a drill.
You will discover how to choose the right frames, arrange your photos or artwork, and finally bring your vision to life. With a beginner skill level required and an estimated time of only 1-2 hours, this project is accessible and rewarding.
Let’s transform that empty wall into a beautiful gallery that reflects your unique style!
TL;DR Summary
- Gather materials for creating paper templates.
- Plan your layout on the floor before drilling.
- Use painter’s tape to mark placement.
- Drill and hang frames once satisfied with the design.
Recommended Products

Cost-Effective DIY Wallpaper Alternative: Achieve a custom patterned wall finish without the high cost of vinyl decals or wallpaper rolls. This kit includes comprehensive written instructions and video tutorials to guide users through pattern alignment and paint application techniques.

GALLERY DESIGN - Total 7 photo frames display (There is 1 square photo frame for 4" x 4" pic | 1 large photo frames for 3 horizontal 4" x 6" pic | 1 rectangle photo frame for 4" x 6" pic | 4 rectangle photo frames for 5" x 7" pic) | Comes with easy to install hanging hardware | DIY wall hanging decor letters & multi shape photo frames

Package contains 1 piece wall Stencil, 20x24 Inch.
TL;DR Summary
Editor’s Choice

Angrox Geometric Drawings Templates Measuring Geometry Rulers 15 Pcs wit…

IRWIN Tools Strait-Line Flagging Tape, 150-foot, Glo-Pink (65603)

Level Ruler Picture Hanging Tool with Level – Precision Wall Mount Gui…
Prerequisites/Materials Needed
- Paper (like craft or wrapping paper)
- Scissors
- Painter’s tape
- Measuring tape
- Pencil
- Level
- Wall anchors and screws (if necessary)
- Frames or artwork
Prerequisites/Materials Needed
Editor’s Choice

Torpedo Level Magnetic, Firecore 9 Inch Shockproof Small Leveler Tool wi…

SMART&CASUAL Brown Wrapping Paper Roll 17.8″×1,200″(100′) Kraft Paper f…

Scotch General Purpose Masking Tape, 1.88 in x 60.1 yd, Beige, Sticks fo…
Skill Level & Time Estimate
Skill Level: beginner
Total time estimate: 1-2 hours
Step breakdown:
1. Gather materials: 15 minutes
2. Create paper templates: 30 minutes
3. Layout on the floor: 30 minutes
4. Mark and drill: 30 minutes
5. Hang frames: 15 minutes
Skill Level & Time Estimate
Editor’s Choice


Luocute Picture Hanging Level Tool, Sturdy ABS Material Frame Positionin…

KURUI 303Pcs Picture Hanging Kit, Picture Hangers Assorted Kit with Heav…
Step 1: Gather Your Materials
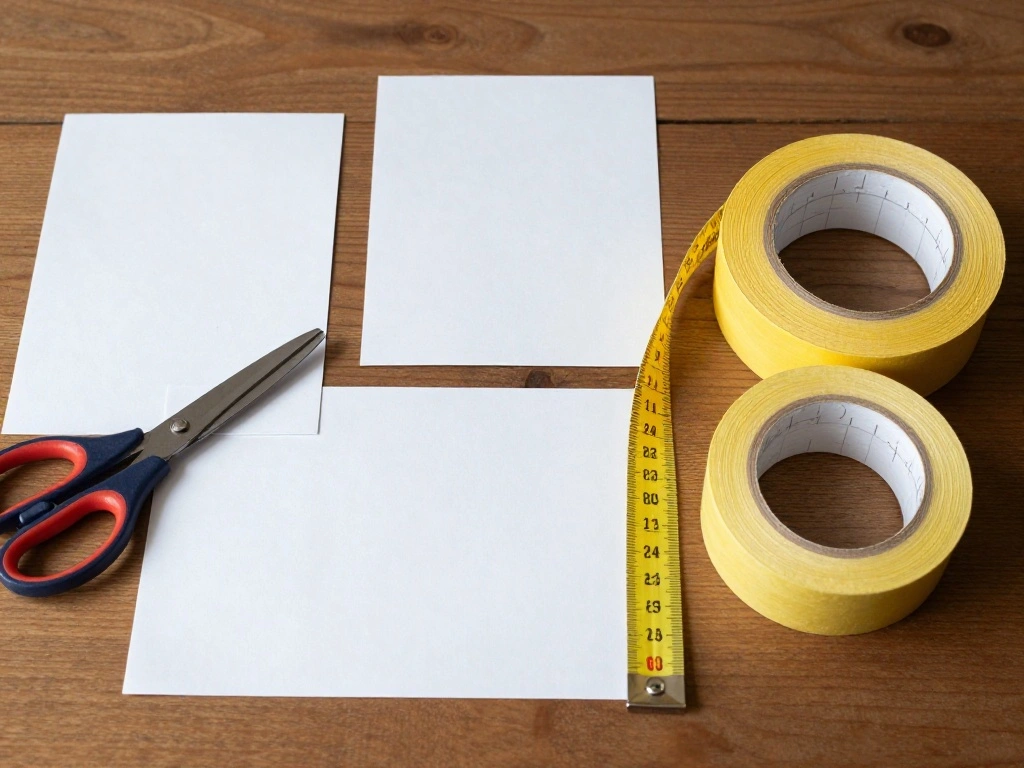
Do this: Start by collecting all the materials needed for this project. You will need enough paper to create templates for each frame you plan to use.
1. Choose paper that is easy to cut, like wrapping or craft paper.
2. Gather scissors, painter’s tape, measuring tape, and a pencil.
3. Take note of the frames or artwork you want to include in your gallery wall.
Pro Tip: Use a wide painter’s tape to easily mark your wall later on.
This step is crucial because having all materials on hand will streamline the process and keep your workspace organized.
Time estimate: 15 minutes.
Step 1: Gather Your Materials
Editor’s Choice


EFOK Blue Painters Tape 3 Inch Wide Bulk – Paint Tape 3 Inches x 55 Yard…

PerkHomy 36″ x 2,400″ (200′) Brown Kraft Paper Roll for Craft Bulletin B…
Step 2: Create Paper Templates

Do this: Use your paper to create templates that match the sizes of your frames.
1. Lay your frames on the paper and trace around them with a pencil.
2. Cut out the traced shapes carefully.
3. Label each template with the corresponding artwork or photo.
Pro Tip: If you have different frame sizes, ensure each template is clearly marked to avoid confusion later.
This step allows you to visualize your layout without making any permanent decisions.
Time estimate: 30 minutes.
Recommended Products

🎨 【72-Piece Botanical & Butterfly Kit】: Ultimate nature stencil collection! Features 72 reusable templates including delicate wildflowers, tropical leaves, monarch butterflies, dragonflies, and forest foliage. Perfect for whimsical wall murals, scrapbooking embellishments, garden art journals, kids' room decor, and mixed media projects. Endless floral insect designs to explore!
【Quality Material and Safe Alphabet Stencils】: These painting DIY stencils are made of eco-friendly PET material, laser cutting, sturdy for you to use, and not easy to break. No sharp edges, safe for you.

🌱🥳 VERSATILE HOME DECOR STENCIL KIT: These 6 Pcs (14.5"L X 11"W) Reusable Large Plastic Plant Stencils Feature Patterns Including Flower Stencils, Leaf Stencils, Fern Stencils and More. That Can Be Spliced and Combined Freely to Create Lush, Seamless Wall Murals or Small Furniture Accents. Ideal For Crafting Tropical-Themed Walls, Vibrant Children's Room Decor, Or Personalized Handmade Artworks, Elevating Your Home's Ambiance with DIY Plant Stencil Creativity. Empower You to Become a Home Decor Expert with Boundless Creativity👩🔧🏡
Step 2: Create Paper Templates
Editor’s Choice

Strathmore (411-9 400 Series Layout Bond Pad,White , 9″x12″, 50 Sheets
KURUI 303Pcs Picture Hanging Kit, Picture Hangers Assorted Kit with Heav…
Luocute Picture Hanging Level Tool, Sturdy ABS Material Frame Positionin…
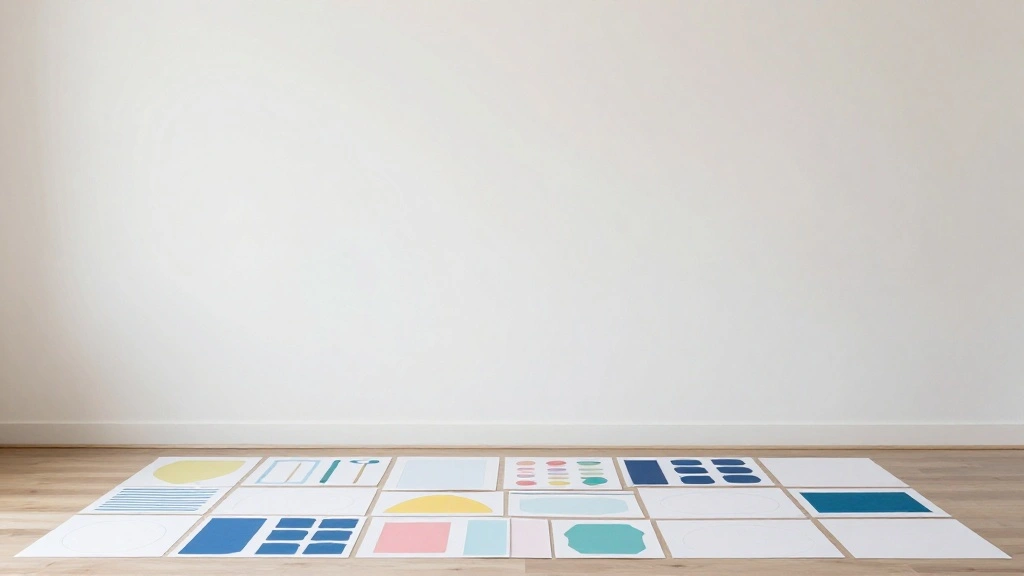
Step 3: Arrange Templates on the Floor
Do this: Before committing to a layout, arrange your templates on the floor.
1. Choose a space that resembles the wall where you will hang your gallery.
2. Start placing the templates on the floor, experimenting with different arrangements.
3. Keep adjusting until you find a layout you love.
Pro Tip: Consider the balance of color and size in your arrangement to create a visually appealing display.
This step is essential for ensuring you are happy with your design before drilling holes in your wall.
Time estimate: 30 minutes.
Recommended Products

GALLERY DESIGN - Total 8 photo frames which holds 9 pictures of size of (4"x6" , 5"x7" and 4"x4" ) to display , sets also include: (1) Family Plaque (2) Leaves Plaque (3) Trunk Plaque | Comes with easy to install hanging hardware | Beautiful life tree display design for all the pieces

REUSABLE WALL STENCIL for painting your walls, ceilings and floors. Try modern wall stencils instead of wallpaper and save hundreds on room makeover! Easy to use even for beginners. We offer free video tutorials and informative step-by-step blogs to help you with your project.
Step 3: Arrange Templates on the Floor
Editor’s Choice
Torpedo Level Magnetic, Firecore 9 Inch Shockproof Small Leveler Tool wi…

Komelon F12 12-Foot Stick and Measure Flat Tape Measure
Angrox Geometric Drawings Templates Measuring Geometry Rulers 15 Pcs wit…
Step 4: Mark Template Placement on the Wall
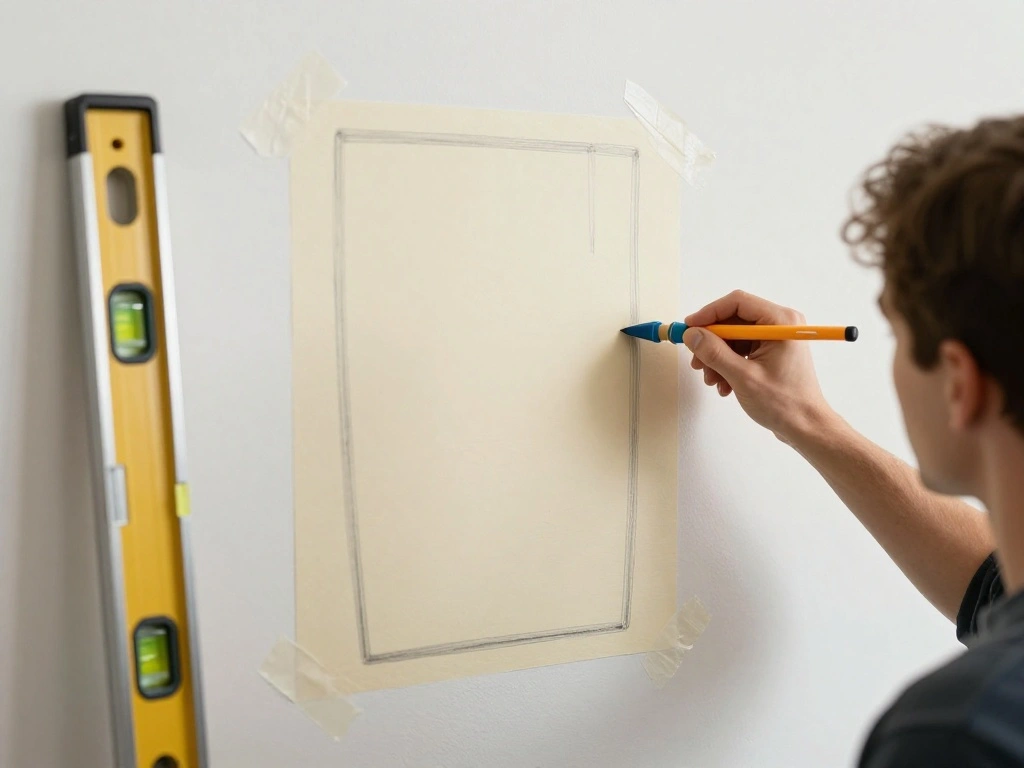
Do this: Once satisfied with your floor layout, it’s time to transfer your design to the wall.
1. Use painter’s tape to outline where each template will go on the wall.
2. Ensure the tape is level and straight.
3. Double-check the spacing between each template, adjusting if necessary.
Pro Tip: Use a level tool to confirm that your tape is perfectly straight to avoid crooked frames.
This step is crucial for a clean and professional-looking gallery wall.
Time estimate: 30 minutes.
Step 4: Mark Template Placement on the Wall
Editor’s Choice

Go Hang It! Pro, All-in-One Picture Hanging Kit – Picture Leveling and H…

Scotch Greener Masking Tape, 0.94 in x 60 Yard, 2050, 1 roll

Motovera Self Leveling Laser Level 100ft, Green Cross Line with Tripod, …
Step 5: Drill and Install Wall Anchors
Do this: Prepare to hang your frames by drilling holes into the wall.
1. Following the tape outline, mark the spots where you’ll drill.
2. Use a drill to create holes and insert wall anchors if necessary.
3. Ensure the anchors are secure before proceeding.
Warning: Always check for electrical wires or plumbing before drilling into walls.
This step is necessary to ensure your frames will hang securely on the wall.
Time estimate: 30 minutes.
Step 5: Drill and Install Wall Anchors
Editor’s Choice

KURUI Drywall Anchors and Screws Assortment Kit 270PCS, 135 Plastic Dry …

PULITUO’S 20V Cordless Drill/Driver, Electric Screwdriver – 2 Batteries,…

Zircon StudSensor A100 Stud Finder and Wall Scanner – Edge Locating St…
Step 6: Hang Your Frames
Do this: Now it’s time to hang your frames on the wall.
1. Use the marked spots to align each frame with the wall anchors.
2. Carefully hang the frames, ensuring they are secure.
3. Step back and check for alignment and levelness.
Pro Tip: Use a level tool again to ensure each frame is straight after hanging.
This step finalizes your gallery wall, putting your hard work on display.
Time estimate: 15 minutes.
Step 6: Hang Your Frames
Editor’s Choice
Luocute Picture Hanging Level Tool, Sturdy ABS Material Frame Positionin…

Mighty Fasteners Wedge Anchors – Heavy-Duty 304 Stainless Steel Expans…
24PCS Picture Hangers Without Nails, Wall Hangers Without Nails, Adhesiv…
Step 7: Adjust and Finalize Your Gallery Wall
Do this: Take a moment to step back and assess your gallery wall.
1. Evaluate the spacing and alignment of the frames.
2. Make any necessary adjustments to achieve a balanced look.
3. Enjoy the completed display!
Pro Tip: Don’t hesitate to rearrange if something feels off; it’s all part of the creative process!
Step 7: Adjust and Finalize Your Gallery Wall
Editor’s Choice

SESEAT Picture Frames Collage, Gallery Wall Frame Set with 11×14 8×10 5x…

Gallery Perfect – 12-Piece White Square Photo Frame – Set with Hanging T…

3-in-1 Picture Hanging Tool, All-in-One Art Hanging Kit with Leveling, P…
Step 8: Celebrate Your Work
Do this: Take a moment to appreciate your hard work and the beautiful result.
1. Invite friends or family to admire your gallery wall.
2. Consider adding personal touches like lights or decorative items around your gallery.
3. Keep the space refreshed by rotating artwork occasionally.
Pro Tip: Document your gallery wall with photos to keep a record of your creativity.
This final step is all about celebrating your accomplishment and enjoying your new space!
Time estimate: 15 minutes.
Step 8: Celebrate Your Work
Editor’s Choice
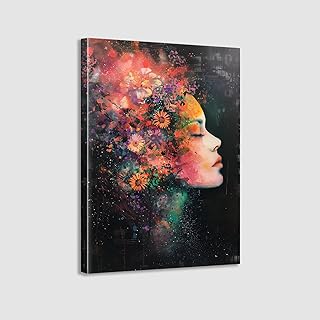
Framed Canvas Wall Art Beautiful Woman With Colorful Flowers, White Flow…

Plug in Wall Sconces Set of Two: Wall Lights with On/Off Switch – Steple…
Pro Tips
- Use a Template App: Consider using an app to visualize your gallery wall layout digitally before starting.
- Mix Frame Styles: Don’t be afraid to mix different frame styles for an eclectic look.
- Lighting Matters: Good lighting can enhance the appearance of your gallery wall; consider spotlighting your artwork.
- Seasonal Changes: Rotate artwork seasonally to keep your space fresh and engaging.
- Ask for Help: Don’t hesitate to ask a friend for a second opinion on your layout.
Pro Tips
Editor’s Choice
Umbra Exhibit Picture Frame Gallery Set, Adjustable Wall Collage Display…

EZVALO Picture Light for Wall, 4800mAh Rechargeable Wireless Remote, 16i…
Common Mistakes to Avoid
Warning: Incorrect Spacing: Leaving too much or too little space between frames can disrupt the flow. Measure carefully and maintain consistent spacing.
Warning: Not Checking Level: Hanging frames without checking for level can result in a crooked appearance. Always use a level tool.
Warning: Drilling in the Wrong Spot: Double-check your markings before drilling to prevent unnecessary holes in the wall.
Common Mistakes to Avoid
Editor’s Choice
Luocute Picture Hanging Level Tool, Sturdy ABS Material Frame Positionin…
KURUI 303Pcs Picture Hanging Kit, Picture Hangers Assorted Kit with Heav…
Komelon F12 12-Foot Stick and Measure Flat Tape Measure
Troubleshooting Section
Problem: Frames are not aligned.
Solution: Use a level tool to check alignment and make adjustments as necessary.
Problem: Wall anchors don’t hold.
Solution: Ensure you are using the correct size for the weight of your frames.
Problem: Paper templates are not accurate.
Solution: Measure your frames again and adjust the paper templates accordingly.
Troubleshooting Section
Editor’s Choice

Digital Caliper, Sangabery 0-6 inches Caliper with Large LCD Screen, Aut…
Motovera Self Leveling Laser Level 100ft, Green Cross Line with Tripod, …

PHS Anti Theft Picture Hangers – Bulk Pack – 25 Pack Security Frame Lock…
Variations/Alternative Methods
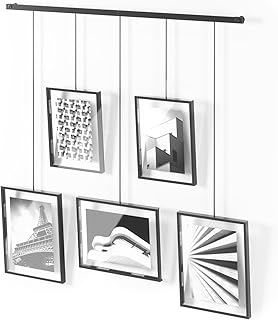
Framing Styles: Consider using shadow boxes for 3D items or using clipboards for easier swapping of artwork.
Color Themes: Choose a monochromatic color scheme for a modern look or go with a colorful mix for a playful vibe.
Gallery Ledges: Instead of hanging each frame, consider using a ledge to display frames for easy rearrangement.
Variations/Alternative Methods
Editor’s Choice

Califortree 8×8 Shadow Box Frame with Soft Linen Back – Push Pins Includ…

13″ x 17″ Artist Sketch Board with Handle – Portable Clipboard for Paint…

upsimples Floating Shelves for Wall, Wall Shelves for Decor Storage Set …
FAQs
What if I don’t have a level tool? You can use a smartphone level app as an alternative.
How long should I wait before changing the artwork? Consider changing it seasonally or whenever you feel inspired.
Is it safe to drill into any wall? Always check for electrical wiring and plumbing before drilling.
FAQs
Editor’s Choice

Digi-Pas 2-Axis Smart Cube Level, DWL-90PRO, WIRELESSLY displays levelin…

Stud Finder Wall Scanner – 5 in 1 Stud Finder Tool w/Smart Chip and HD L…
Conclusion
Congratulations on completing your gallery wall! You’ve taken a blank space and transformed it into a personalized display that showcases your creativity.
Now that you’ve mastered the art of planning a gallery wall, consider exploring new ways to enhance your home decor. Whether it’s adding new elements to your gallery or starting a new project, the possibilities are endless.
Keep your artistic spirit alive and enjoy your newly decorated space!