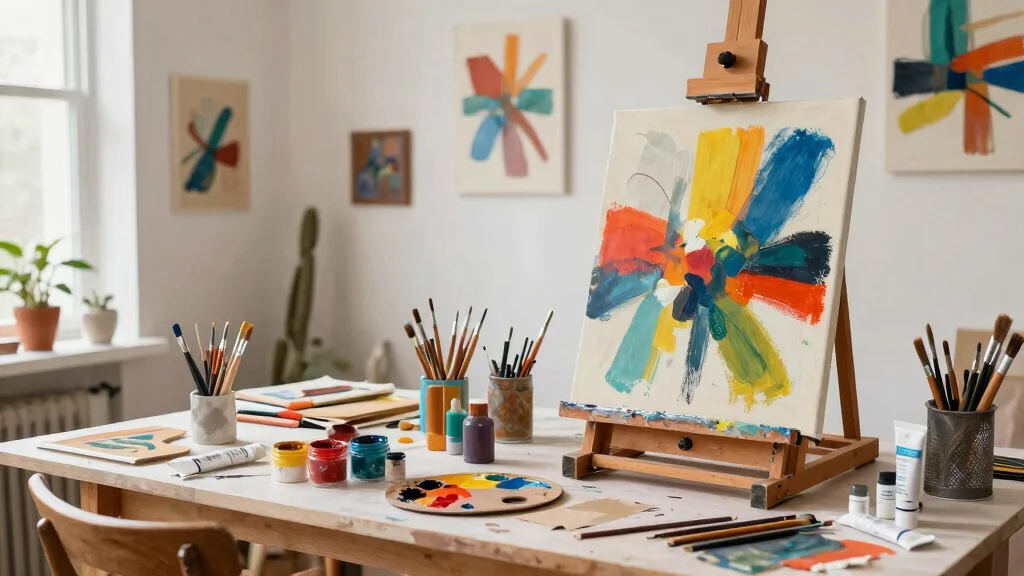
Creating a home that reflects your personality can sometimes feel overwhelming, especially when it comes to decorating your walls. You might find yourself craving a unique touch that doesn’t break the bank. That’s why I compiled this list of 11 DIY abstract wall art ideas for beginners. These projects are not only budget-friendly, but they also allow you to express your creativity and make a statement in your living space.
If you’re someone who loves home decor but feels intimidated by the idea of creating art, this post is for you. Whether you’re a stay-at-home parent, a busy professional, or just someone looking to spruce up your space, these ideas are designed to inspire you. You’ll discover various techniques that are simple and fun, proving that you don’t need to be an artist to create beautiful art for your home.
By the end of this post, you will have a treasure trove of creative wall art ideas that are easy to implement. Each project focuses on using sustainable materials and methods, ensuring that your walls not only look great but also tell a story about your values. Let’s dive in and explore how you can turn your blank walls into a canvas of self-expression!
Key Takeaways
– You can create stunning DIY abstract wall art without prior experience or expensive materials.
– Each of the 11 projects is designed for beginners, making them approachable and fun to try.
– The artworks utilize sustainable materials, allowing you to decorate your home responsibly.
– Techniques like pour painting and watercolor splashes provide easy ways to experiment with color and texture.
– Completing these projects will give your space a personal touch, making it feel more like home.
Recommended Products
High quality 100% handmade home oil painting reproduction on canvas painted by our professional artist with years of oil painting experience. A perfect Christmas and New Year gifts for your relatives and friends.

【Canvas Wall Art】: This canvas wall art is not include frame, you can directly paste it on the wall or according to your room decorate in style, prepare a frame of your own liking to frame your mural and enjoy DIY.
1. Nature-Inspired Textured Canvas
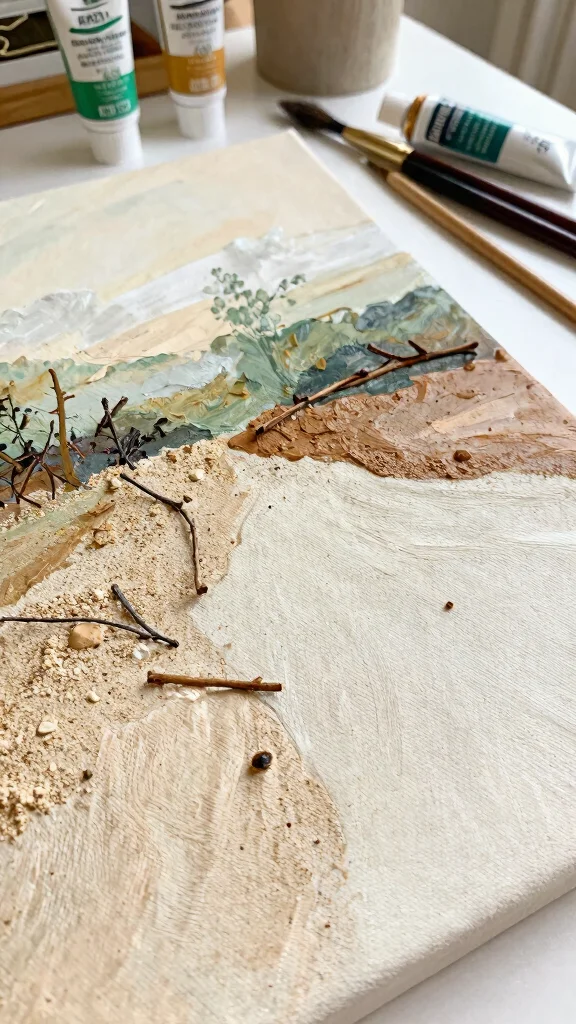
Infuse your space with the beauty of nature by creating textured canvas art. Combining natural elements like sand, leaves, or twigs with a base of earthy acrylic paints creates a stunning visual experience. This blend not only showcases the outdoors but also promotes sustainability through the use of repurposed materials. Imagine using rich greens and browns that resonate with your home, delivering a unique piece that celebrates imperfection and creativity.
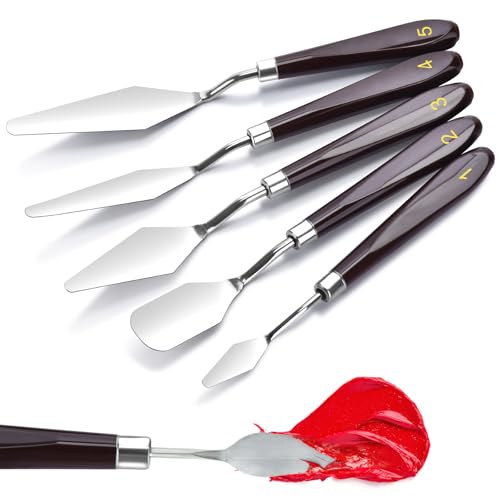
To bring this project to life, consider gathering materials during a nature walk to ensure freshness and sustainability. Using a palette knife will help you create interesting textures with the paint. Remember to let your artwork dry completely to achieve the best results before hanging it up.
Consider these essential steps to enhance your nature-inspired art:
– Pair textured sand with a soft green base layer
– Incorporate dried leaves for a pop of color
– Use twigs to create an organic frame effect
This project not only adds a personal touch but also enriches your home with natural textures, creating a warm and inviting atmosphere.
Did you know repurposed materials can cut art waste by up to 60%? Nature-inspired textured canvases using sand, leaves, and twigs prove sustainable DIY wall art for beginners can be stunning.
Difficulty Rating & Requirements
Overall Difficulty Rating: Easy
Creating DIY abstract wall art for beginners is rated as easy. This project is perfect for those new to crafting and art. It allows you to express your creativity without any prior experience required. Whether you’re a student, a busy parent, or just someone looking to add a personal touch to your space, these projects are approachable and fun!
Time Estimate:
⏱ Estimated time: 2-5 hours, depending on the project and your pace.
– Planning & Gathering Materials: 1-2 hours
– Creating the Art: 1-3 hours (varies by technique)
– Drying Time (if applicable): Additional waiting time may be needed for paint or glue to dry.
Skill Requirements:
– Required skills: Basic painting, cutting, and gluing skills.
– Beginner-friendly: Yes! All techniques can be learned quickly and easily with practice. You don’t need special training to get started.
– Skills like mixing colors or creating texture can be learned along the way, while more complex techniques may require a bit of experience. However, the most challenging aspects are manageable with a little patience and creativity!
Tools & Materials Needed:
🧰 Essential items checklist:
– Canvas or Wood Panel (required)
– Acrylic Paints (required)
– Paintbrushes (required)
– Glue (required)
– Scissors (required)
– Old magazines or newspapers for collage (optional)
– String or yarn for string art (optional)
– Watercolor paper for watercolor techniques (optional)
Step-by-Step Overview:
1. Planning & Inspiration: Spend about 30 minutes brainstorming and looking for ideas online. Decide on the technique you want to try.
2. Gathering Materials: Allocate 1 hour to collect all needed supplies. Make sure you have a clean work area.
3. Creating the Art: Set aside 1-3 hours to dive into your chosen project. This includes painting, gluing, or assembling your artwork.
4. Drying & Finishing Touches: If your work involves wet paint or glue, allow for drying time. This could take anywhere from 30 minutes to several hours, depending on the materials used.
Cost Comparison:
Professional vs DIY: Hiring a professional to create abstract wall art can cost between $100 and $1000 depending on size and artist reputation. In contrast, you can create your own stunning piece for around $20 to $50 by purchasing supplies. Taking the DIY route not only saves you money but also gives your home a personal touch that reflects your unique style! You may consider hiring help if you desire a specific style or have limited time, but for beginners, DIY offers a rewarding, cost-effective alternative.
Nature-Inspired Textured Canvas
Editor’s Choice

Centurion Deluxe Professional Oil Primed Linen Canvas Panels – 11″x14″ -…

Shuttle Art Acrylic Paint, 36 Colors Acrylic Paint Set with Brushes & Pa…

2 Pounds Natural Decorative Real Sand for use in Crafts, Decor, Vase Fil…
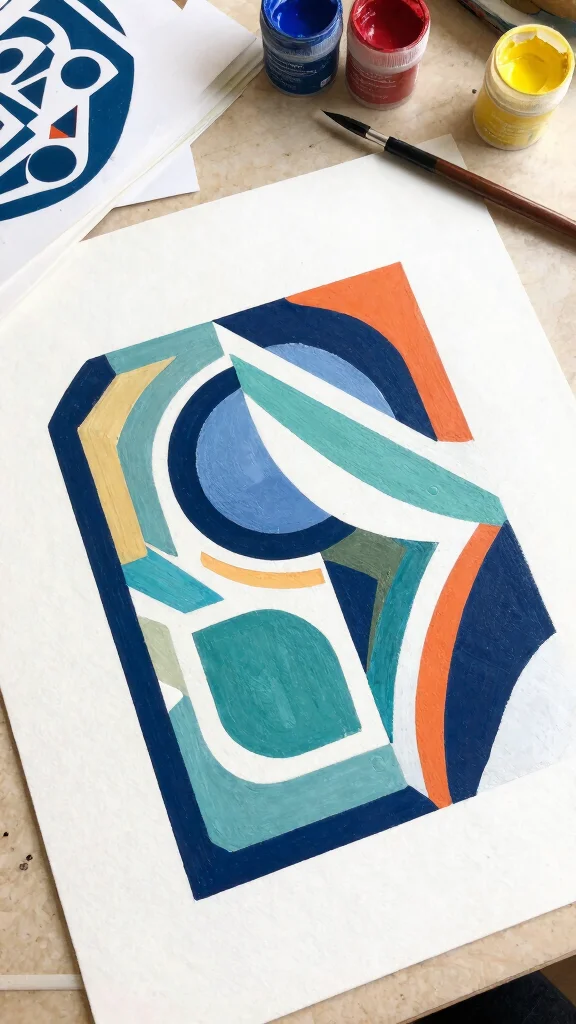
2. Color Block Canvas Magic
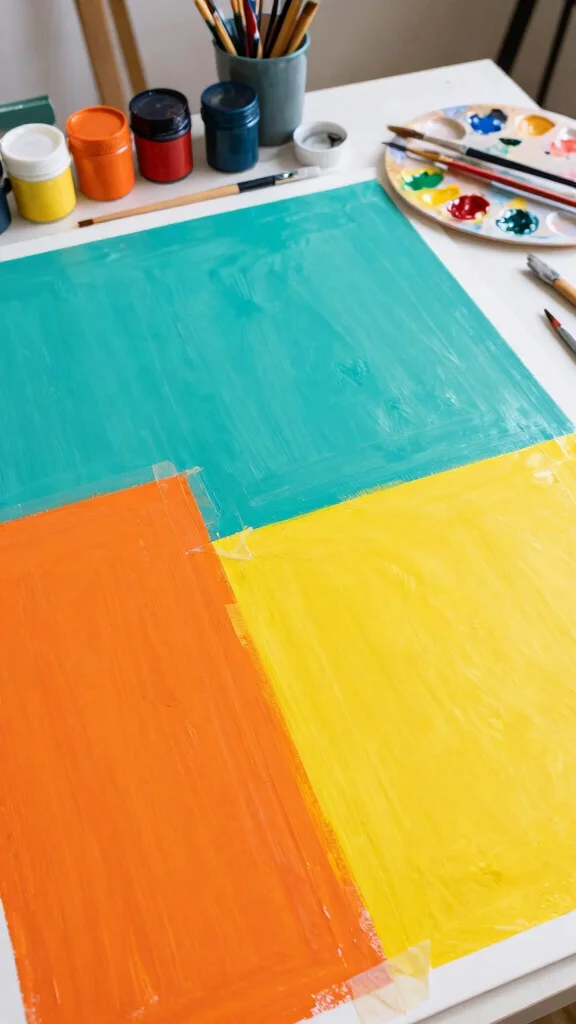
Enter the vibrant world of color blocking with a striking and modern technique. By painting bold blocks of color on canvas, you can express your personality while creating a visually appealing piece of art. Using painter’s tape ensures clean lines and allows you to easily switch up colors whenever you desire. Layering different shades can also add depth, making your artwork truly dynamic and engaging.
To implement this technique, select colors that resonate with your existing decor to tie everything together effortlessly. Play with geometric shapes, such as triangles or circles, for a fresh look. A glossy finish can elevate the overall sophistication of your piece, making it stand out even more.
Try these tips to make the most of your color block art:
– Pair colors that complement your room’s palette
– Experiment with shapes for added fun
– Use a glossy finish for a modern touch
Your vibrant creation will bring joy and personality to any space, making it a delightful exploration of abstract design.
DIY abstract wall art for beginners is all about color blocking with bold blocks and clean lines. Grab painter’s tape, block in your colors, and layer shades to add depth—then swap hues until the piece feels like your own.
Recommended Products

ARTIST PALETTE KNIFE: 12.75'' W x 6'' H x 0.5'' D, 5 Pieces Set includes 1-each of all 5 Standard Paint knife Styles.Every spatula has one individual package in case the entire safety. This high quality knife has been crafted with the finest stainless blade that resists all wear and corrosion from any media including acrylics

【RELIABLE QUALITY】This palette knife is sturdy and lightweight, blade made of stainless steel, it is resilience、flexible and anti-resistant; plastic handles with ergonomic design handles make it easy to grip; bending the metal rod firmly connects the blade and handle, it is durable.

【Package Included】: The oil painting supplies come with 29 palette knife and paint spatula of different shapes and sizes; from generating textured backgrounds to painting intricate details, the palette knife set can help you handle different areas
📹 Related Video: Quick Tip 179 – Block In Colors
Color Block Canvas Magic
Editor’s Choice

Colorations Paraben-Free Washable Tempera Paint for Kids – 1 Gallon Valu…

4 Rolls Premium Painters Tape, Blue Tape, Masking Tape, Paint Tape for M…

Simetufy 12 Pack 8×10 Canvas Boards for Painting, Blank Flat Canvas Pane…
3. Recycled Paper Collage Art
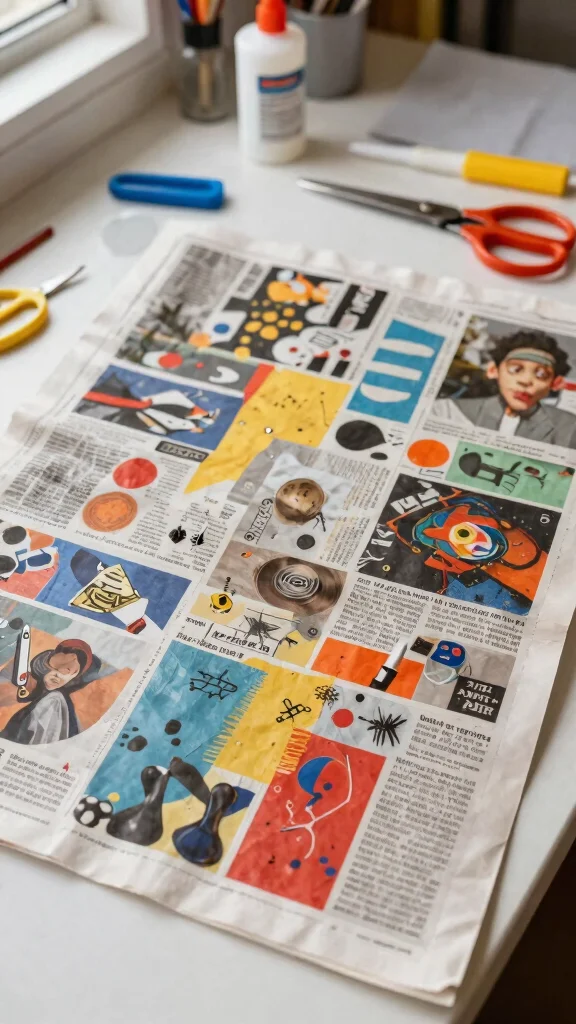
Transform scraps of paper into a beautiful collage that showcases your creativity. Using old magazines, newspapers, and colorful papers, tear them into various shapes and arrange them on a canvas. The interplay of colors and textures will form an abstract masterpiece that reflects your unique style. This eco-friendly approach not only reduces waste but also encourages creative expression through artistic experimentation.
Gather a diverse collection of textured papers to enhance your collage. Consider themes like emotions or landscapes to guide your color choices. Invite your kids to join in; it’s a wonderful way to bond and explore art together.
Follow these suggestions to elevate your recycled paper collage:
– Use glossy and matte papers for visual interest
– Create themes to inspire your design
– Let your children contribute their ideas for a family project
Your finished piece will highlight your personality while adding a vibrant touch to your home decor.
Recommended Products

Layered Tropical Leaf Design - Features multiple overlapping botanical leaves in deep and light greens with rich natural texture.

【Modern Neutral Wall Art】12*16 inches, set of 3. This set of large vintage botanical wall art depicts three forms of wildflowers and plants through watercolor technique. It adds a serene natural touch to your living space and fosters an ambience of peace and beauty. This simple and quiet feeling will help you get rid of fatigue.

Birch forest landscape with calming blue-green tones creates a peaceful natural atmosphere for any room.
Recycled Paper Collage Art
Editor’s Choice

Multi piece set Craft Scissors Decorative Edge – Fancy Zigzag & Patter…

Scotch Permanent Glue Sticks, Acid-Free Non-Toxic Adhesive (2-Pack) – …
Simetufy 12 Pack 8×10 Canvas Boards for Painting, Blank Flat Canvas Pane…
4. Pour Painting for Abstract Expression

Embrace the captivating art of pour painting, where fluid acrylics create mesmerizing designs. By mixing paint with a pouring medium, you achieve a smooth consistency that flows beautifully on canvas. Choose colors that resonate with you, layering them in a cup before pouring. This method allows for spontaneous blending, resulting in stunning patterns that are both satisfying to create and visually appealing.
Start your pour painting journey by elevating your canvas to catch drips for easy cleanup. Don’t shy away from combining unexpected colors to create dramatic effects. Be sure to cover your workspace, as this technique can get a little messy.
Here are key tips to make your pour painting experience enjoyable:
– Use an elevated canvas for easy paint flow
– Experiment with various colors for unique results
– Protect your workspace to simplify cleanup
Pour painting is not only a fun activity but also a way to produce stunning, professional-looking art that enhances any room.
Recommended Products

Unframed Prints: Watercolor wall art prints - (Set of 2) - Unframed - 16x24 inches.


🎨 【6-Piece Geometric Stencil Set】: Package includes 8 reusable geometric painting templates 11 x 7 inches(18 x 28 cm). Perfect size for wall stenciling, floor patterns, furniture, canvas, and DIY home decor. Create stunning repeat patterns easily!
🖼️ Perfect Your Gallery Wall!
Transform your space effortlessly with our step-by-step workbook to create stunning wall displays that inspire creativity.
Pour Painting for Abstract Expression
Editor’s Choice
Simetufy 12 Pack 8×10 Canvas Boards for Painting, Blank Flat Canvas Pane…

Liquitex Professional Effects Medium, 946ml (32-oz), Gloss Pouring Medium

Nicpro 14 Colors 8.45oz Acrylic Pour Paint Supplies Kit, Large Volume Pr…
5. String Art Abstract Designs
Introduce a captivating element to your decor with string art, a delightful way to craft geometric shapes or abstract patterns. By mapping points on a wooden board and wrapping string around nails, you can create stunning designs that draw the eye. This tactile approach offers a satisfying creative process while allowing you to explore various colors and patterns.
To succeed in string art, use a hammer to ensure even spacing of the nails for a clean look. Consider experimenting with different types of string, such as twine or embroidery floss, to add varied textures. Painting the board in a complementary color can enhance the overall visual impact.
Try these tips for a successful string art project:
– Use a hammer for precise nail placement
– Incorporate different string types for texture
– Paint the board for an eye-catching backdrop
This project beautifully blends artistry and craftsmanship, adding warmth and character to any space.
Relatable tip: Even beginners can nail it with simple geometry. Pro tip: map points, space nails evenly with a hammer, and try bold colors for a striking DIY abstract wall art for beginners. Your first design will surprise you with its clean lines and texture.
Recommended Products

You Will Have: The package comes with 4 pieces of split cups, comprising 2, 3, 4 and 5 channels dividers, Each slot can be filled with a different color, allowing you to infuse your creations with a variety of different colors, creating a variety of beautiful patterns when poured.

Enough for Your Needs: you will receive 3 pieces of split cups for paint pouring and 3 pieces of petal paint pour cups, different number of dividers and the number of petals, enough for you to use and replace, easily meet your needs for daily use

Package Includes: the package will offer you 7 pieces of paint accessories, including 3 pieces of multi channel split cups, 2 pieces of open cups and 2 pieces of flower pour cups; They are rich in quantity and various in style, enough to meet your daily use and replacement needs
String Art Abstract Designs
Editor’s Choice

3 Pack Unfinished Wood Cutting Board with Handle, Charcuterie Boards, Wo…

Lightweight Hammer for Home Project, Small Hammer for Jewelry Making, Li…

RINGSTRING Art Kit for String Art Creation from Any Photo – Custom Craft…
6. Upcycled Fabric Swatch Art
Create stunning abstract art using upcycled fabric swatches for a sustainable touch. Collect leftover pieces from old clothes or craft projects, cutting them into various shapes. Arrange these fabric pieces on a canvas, mixing colors and patterns to form a unique design. Once satisfied, use fabric glue or sew the pieces for a tactile finish that showcases your creativity.
For added visual appeal, use contrasting patterns to make your piece pop. Blending solid fabrics with patterns can create a dynamic effect that draws the eye. Framing your finished piece can provide a polished touch that elevates your artwork.
Consider these creative tips for your fabric swatch art:
– Use contrasting patterns for visual interest
– Mix solid and patterned fabrics for dynamics
– Frame your piece for a polished look
This project allows you to repurpose materials while adding warmth and texture to your home.
Upcycled Fabric Swatch Art
Editor’s Choice

FITTDYHE Fabric Glue Permanent, 60 ML Washable Clear Clothing Glue, Supe…

Fabric Scissors Professional, 8″ Heavy Duty Sewing Scissor for Fabric Cu…

ESRICH Canvas Boards for Painting, 5 Pack Canvases for Painting 8×10 Cot…
7. Watercolor Splash Techniques
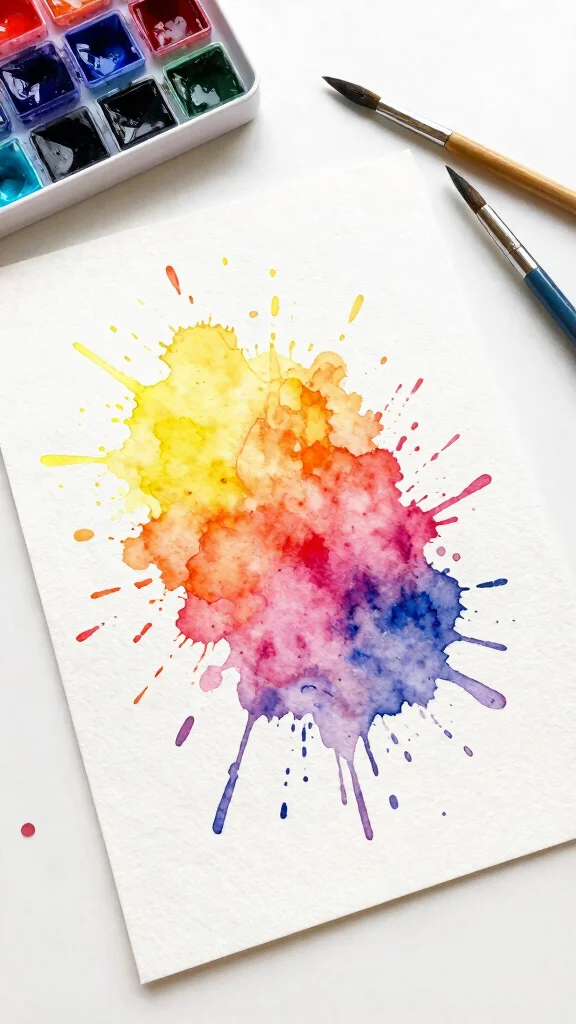
Discover the enchanting world of watercolors by creating vibrant splash art! This technique involves applying wet paint and using splatter tools to add playful drips and splashes. The unpredictable nature of watercolors allows for spontaneous creativity, making it a perfect outlet for beginners. Once dried, your artwork can be framed or displayed as a bold statement piece.
Experiment with wet-on-wet techniques to achieve softer edges and blended colors. Use salt or rubbing alcohol to create unique textures and patterns in your artwork. Layering colors adds depth, so be patient as each layer dries before adding more.
Enhance your watercolor splash art with these helpful hints:
– Use wet-on-wet methods for blending
– Incorporate salt for texture effects
– Layer colors patiently for depth
This project encourages freedom and expression, allowing you to create something truly beautiful and unique.
Recommended Products

ARTIST PALETTE KNIFE: 8 Pieces Set includes 5 Standard Paint knife Styles. and 3 plastic scrapers. Every spatula has one individual package in case the entire safety. This high quality knife has been crafted with the finest stainless blade that resists all wear and corrosion from any media including acrylics.
【Palette knife set】 5 styles of painting supplies knife can meet your different painting needs, so you can create at your own pace.
Comprehensive 11-Piece Set: Includes 5 durable stainless steel palette knife and 6 versatile plastic scrapers for various artistic and decorative needs.
Watercolor Splash Techniques
Editor’s Choice

Artist Watercolor Paint Brushes, Round Pointed Tip Paint Brushes Set, 12…

Fuumuui Watercolor Paint Set- 24 Color Opaque Semi-Moist Watercolor Pain…

Watercolor Paper, 250 Sheets Water Color Paper Bulk, Art Supplies for Ki…
8. Marble Paint Techniques
Dive into the captivating world of marble painting, a fun and simple method that produces stunning abstract effects. By swirling acrylic paint on water and dipping canvas or paper into it, you unveil mesmerizing designs that look intricate and unique. Choose a color palette that complements your decor, and consider creating a series of pieces for a cohesive display.
To achieve the best results, use a shallow tray filled with water for easy access. Experiment with different paint types, such as metallics, to add an exciting flair. Be sure to clean your workspace promptly, as dried paint can be tricky to remove.
Follow these pro tips to enhance your marble painting experience:
– Use a shallow tray for optimal dipping
– Try metallic paints for extra flair
– Clean up quickly to avoid messes
This technique is visually striking and offers an enjoyable way to create beautiful abstract art.
Marble Paint Techniques
Editor’s Choice

Liquitex Professional Heavy Body Acrylic Paint, 6 x 22ml (0.74-oz), Vibr…

MEEDEN 7-Well Studio Porcelain Paint Palette Tray,Artist Mixing Colour T…
Simetufy 12 Pack 8×10 Canvas Boards for Painting, Blank Flat Canvas Pane…
9. Geometric Stencil Art
Craft modern geometric art with stencils, a stylish and straightforward project. Choose your favorite shapes and either cut them from sturdy paper or use pre-made stencils. Position the stencil on your canvas and apply paint or spray to create sharp, defined images. Layering different shapes and colors adds depth, making your artwork truly captivating.
This project is ideal for beginners, allowing you to focus on composition without the pressure of freehand skills. Play with opacity by using lighter shades beneath darker ones for a unique effect, and varying sizes of shapes can create even more visual interest.
Consider these creative suggestions for your stencil art:
– Use lighter shades under darker ones for depth
– Incorporate varying sizes for dynamic designs
– Opt for a white canvas for striking contrast
Your geometric art will effortlessly elevate your walls with its modern touch.
Geometric Stencil Art
Editor’s Choice
Simetufy 12 Pack 8×10 Canvas Boards for Painting, Blank Flat Canvas Pane…

16 Pieces Stencils for Painting, Abstract Texture Mixed Media Art Suppli…
Shuttle Art Acrylic Paint, 36 Colors Acrylic Paint Set with Brushes & Pa…
10. Ombre Effect Canvas
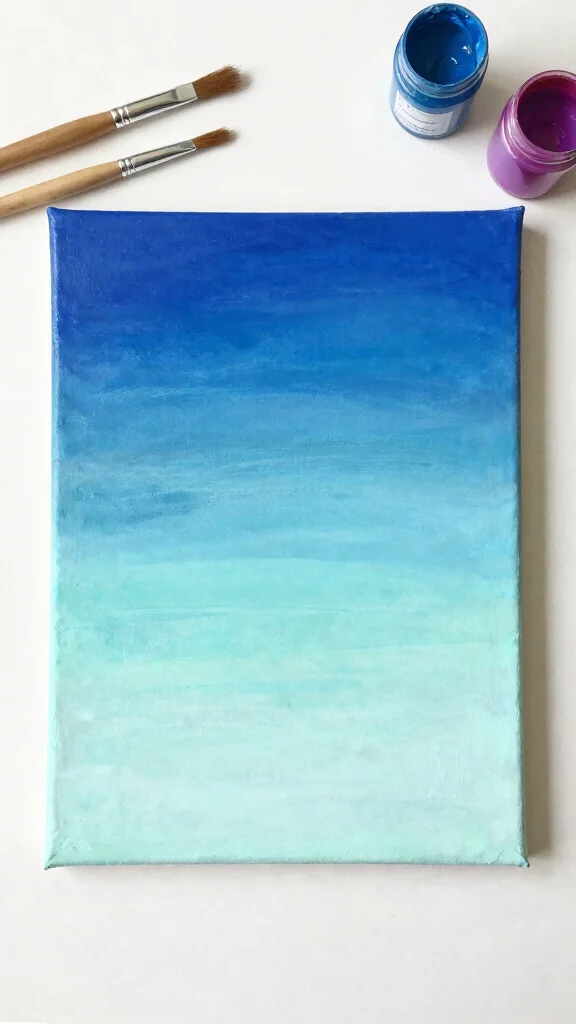
Create a calming ombre effect on your canvas with just a few colors. Select two or three shades that blend harmoniously together. Start with the darkest hue at the top, gradually mixing in lighter shades as you work down. This technique offers a serene atmosphere, making it easy for beginners to master.
Utilize a large brush for smooth blending between colors, and experiment with different combinations to find your unique twist. Once dried, consider adding a personalized quote or phrase to enhance the piece further.
Here are some helpful hints for your ombre canvas:
– Use a large brush for smooth transitions
– Experiment with color combinations for uniqueness
– Add a quote once dry for personalization
Your ombre creation will serve as a tranquil backdrop that complements your decor beautifully.
Ombre Effect Canvas
Editor’s Choice

TMOL Acrylic Paint Set, 24 Colors (2 oz/Bottle) with 12 Art Brushes, Art…
Simetufy 12 Pack 8×10 Canvas Boards for Painting, Blank Flat Canvas Pane…

GACDR Gilding Brush Set, 7 Pieces Versatile Goat Hair Blending Mop Brush…
11. Framed Nature Prints
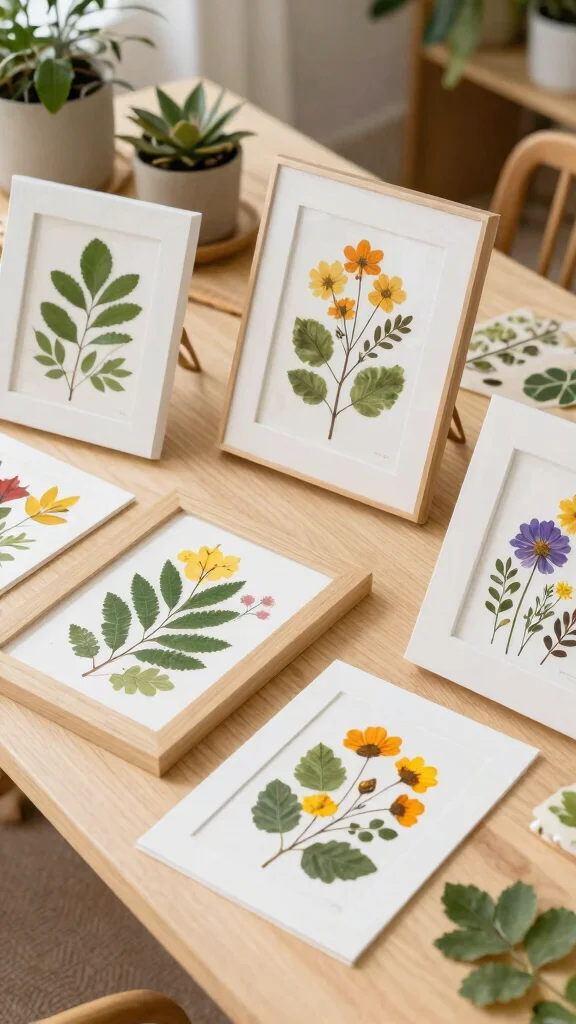
Create effortless abstract art by framing nature prints! Collect leaves, flowers, or vegetables and press them onto paper for unique designs. By applying paint to the natural items and pressing them onto the paper, you reveal beautiful impressions that reflect the essence of nature. Once dried, framing these prints adds a polished touch to your art.
Experiment with different natural items to discover unique shapes and patterns. Using colorful plants of varying sizes will create a dynamic display that draws the eye. Coordinating frames can help create a cohesive gallery wall that enhances your space.
Consider these tips for successful nature prints:
– Experiment with various items for unique shapes
– Use colorful plants for visual diversity
– Select matching frames for a cohesive look
This simple yet beautiful project brings the outdoors inside, adding vibrancy to your home.
Framed Nature Prints
Editor’s Choice

Picture Hanging Kit, 315pcs Hanging Hardware with Hooks, Wire, Nails, D …

ARTISTRO 100 Dual Tip Acrylic Paint Markers, Paint Pens, Drawing Markers…

Fuyoooo 58 Pcs Large Flower Press Kit, Craft Kits 10″ x 10″ 10 Layer Lad…
Conclusion
Creating your own DIY abstract wall art for beginners can be a fun and fulfilling way to enhance your home decor without breaking the bank. These projects not only help you express your creativity but also incorporate sustainable practices that are kind to the environment.
Whether you choose to explore techniques like pour painting or upcycled fabric art, there’s something for everyone in this collection of creative wall art ideas. So gather your supplies, unleash your artistic side, and start crafting your very own masterpieces today!
Note: We aim to provide accurate product links, but some may occasionally expire or become unavailable. If this happens, please search directly on Amazon for the product or a suitable alternative.
This post contains Amazon affiliate links, meaning we may earn a small commission if you purchase through our links, at no extra cost to you.
Frequently Asked Questions
What materials do I need for DIY abstract wall art for beginners, and how can I keep it sustainable?
Getting started with DIY abstract wall art for beginners doesn’t have to be fancy. Keep it simple and sustainable: reuse a thrifted canvas or sturdy cardboard as the base, grab a few tubes of acrylic paints, a couple of brushes, painter’s tape, and a scrap palette. For an eco-friendly approach, choose sustainable materials: upcycle frames, pick non-toxic, water-based paints, and reuse jars or containers. Quick plan: 1) select your support (canvas, wood panel, or cardboard), 2) choose 2–4 colors you love, 3) test a small swatch on scrap paper, 4) try one or two easy abstract art techniques like color blocking or simple textures, 5) seal with a water-based varnish to preserve the piece. This keeps your abstract wall decor budget-friendly and perfect for beginner wall art projects.
What are some easy abstract art techniques I can use for beginner wall art projects?
Here are some easy abstract art techniques perfect for beginner wall art projects: 1) Color blocking with painter’s tape for clean edges, 2) Gestural brush strokes—big, loose movements for energy, 3) Palette knife textures—layer color and drag the knife for subtle ridges, 4) Dry-brush textures—a nearly dry brush to create soft, scratchy details, 5) Simple marbling—swirl two colors in a dish of water or use a shaving-cream method on a surface, then press and lift to transfer the pattern. Finish with a sealant. You can repurpose leftover paints and household items to keep it budget-friendly while exploring creative wall art ideas.
How can I create abstract wall decor on a budget using upcycled materials?
Upcycling keeps costs down and aligns with sustainable DIY home decoration goals. Start with a scrap panel: an old wood board, a thrifted canvas, or even a sturdy cereal-box panel covered with paper. Use leftover acrylics or inexpensive paints, upcycle an old frame, and add texture with string, fabric scraps, or natural elements like dried leaves. Prep the surface with a light primer if you have it. Work in a simple two-color palette or soft washes, then apply one or two creative wall art ideas to build interest. Finish with a clear, water-based sealant. This approach makes your abstract wall decor feel polished without breaking the budget, perfect for beginner wall art projects.
How should I choose colors and composition when starting with DIY abstract wall art for beginners?
Start by considering the room’s mood and existing color palette. Pick 2–3 colors that complement your space, with one base color and one or two accents. Test swatches on paper or a practice surface before committing to the canvas. For composition, use the rule of thirds or center a bold focal point, and leave generous negative space to let the piece breathe. Vary line directions and scale to create rhythm, and sketch 3 quick thumbnail ideas to compare layouts before painting. This practical approach supports creative wall art ideas while keeping the project approachable for beginner wall art projects.
What common mistakes should beginners avoid in DIY abstract wall art for beginners, and how can I fix them?
Common missteps include overloading the piece with too many colors, skipping surface prep, and not letting layers dry between steps. Other pitfalls are choosing a scale that doesn’t fit the wall and neglecting a plan or thumbnail sketches. Fixes: limit your palette to 2–3 colors, lightly sand or prime the surface, allow adequate drying time between layers, check the wall space for proper scale before painting, and create 2–3 thumbnail layouts to guide you. Finally, seal the finished work with a clear, water-based finish to protect your DIY abstract wall art for beginners and keep it looking fresh as abstract wall decor.
Related Topics
DIY abstract wall art
beginner wall decor
sustainable art
creative home projects
easy abstract techniques
affordable decor
minimalist wall art
colorful designs
quick DIY
art for beginners
modern abstract
home decoration ideas