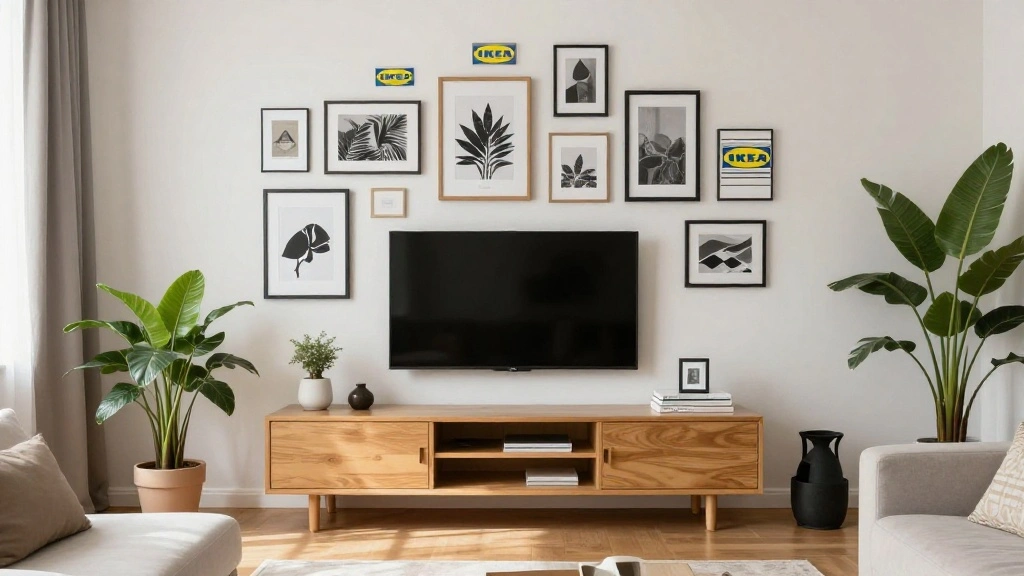
Are you tired of bare walls that lack character? A gallery wall can transform your space into a vibrant showcase of your favorite memories and art. Yet, many people hesitate to start this project due to uncertainty about design, arrangement, and the right materials. With this guide, you’ll learn how to create a stunning gallery wall using only IKEA frames, making the process approachable and fun.
By the end of this guide, you’ll have a beautiful gallery wall that reflects your personality and style. You’ll learn about selecting frames, arranging your artwork, and putting everything together seamlessly. This project is designed for beginners, so don’t worry if you’re new to DIY decor!
Expect to spend around 2-3 hours on this project, depending on your preparation. Let’s get started on your gallery wall adventure today!
TL;DR Summary
- Choose a variety of IKEA frames to suit your style.
- Plan your layout on the floor before hanging anything.
- Secure frames to the wall with the appropriate tools.
- Enjoy your new gallery wall that showcases your personality!
Recommended Products

Multi-size: 10pcs picture frames set come with TWO black frames 8x10in, FOUR gray frames 5x7in and FOUR wood grain brown frames 4x6in. Just remember to peel off the protective film on both sides of the plexiglass.
【Durable Material】Our collage frame is made of well made wood frame. Comes with a plastic cover, which provides a clear view of photos and is lighter than glass. No need to worry about hurt by glass broken.

Capture Your Memories: From the faces of your loved ones to great times with friends and family get-togethers, this collage photo frame lets you display an array of wonderful moments. It features 12 frames, each perfectly sized for 4x6 photos
TL;DR Summary
Editor’s Choice

15 Pack Picture Frames Collage Wall Decor, Gallery Frame Set for Wall Mo…
Prerequisites/Materials Needed
- IKEA frames (various sizes, e.g., 8×10, 12×16)
- Level tool
- Tape measure
- Pencil
- Hammer or wall hooks
- Artwork or photos
- Optional: Command strips for easy removal
Recommended Products

Gold Picture Frames Gallery Set: this 8 pieces gold bamboo frame set offers a complete gallery wall solution to transform your space; Two 10-inch frames, three 6-inch frames, and one each of 4-inch, 7-inch, and 5-inch frames, for a total of 8 frames, allowing you to create an eclectic and vintage inspired gallery wall in your living room, bedroom, dining area, or hallway

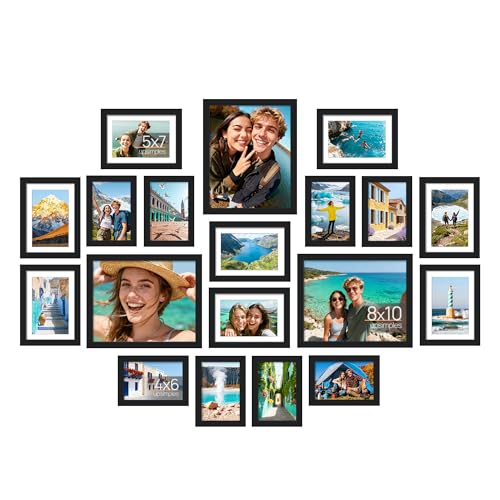
Multiple Sizes – This 15-piece set includes 3x 8x10", 6x 4x6", and 6x 5x7" picture frames, plus damage-free nails for easy hanging. Perfect for versatile wall arrangements!

16-Piece Mixed Color Frame Set: This all-in-one 16-pack includes 1 black & 1 white 11x14 frames, plus 1 black & 1 white 8x10 frames. Each of the 6 tones (black, white, natural brown, gray, dark walnut, distressed white) comes with one 5x7 and one 4x6 frame. Perfect for building a stylish gallery wall.
Prerequisites/Materials Needed
Editor’s Choice

Command 20 lb XL 8 Pairs Heavyweight Picture Hanging Strips (16 Strips),…

Laura Ashley 4×6 Pink Flower Textured Hand-Crafted Resin Picture Frame w…
Skill Level & Time Estimate
Skill Level: beginner
Total time estimate: 2-3 hours depending on preparation and layout planning.
Recommended Products


INCLUDES- 3 metallic gray hangers, 6 large strips, 6 stabilizer pairs; 1 hanger holds 5 lbs
Skill Level & Time Estimate
Editor’s Choice

Double Sided Standing Picture Frames – (White, 4 count) 4×6 Inch Pedesta…

3-in-1 Picture Hanging Tool, All-in-One Art Hanging Kit with Leveling, P…

CRAFTSMAN 25-Ft Tape Measure with Fraction Markings, Retractable, Self-L…
Step 1: Choose Your IKEA Frames

Start by selecting the right IKEA frames for your gallery wall. Consider the colors, sizes, and styles that will complement your space. Follow these sub-steps:
- Visit your local IKEA or browse their website.
- Pick a mix of sizes (e.g., small and large frames) to create visual interest.
- Choose frames that match your decor style (e.g., modern, rustic, minimalist).
Pro Tip: Consider using frames with matting for a more polished look. Warning: Make sure all frames are compatible with the artwork you intend to display. Take measurements if necessary.
Time estimate for this step: 30-45 minutes.
Step 2: Gather Your Artwork

Next, choose the artwork or photos you want to display. This step involves selecting pieces that resonate with you. Follow these sub-steps:
- Sort through your collection of photos, prints, or artworks.
- Select pieces that complement each other in tone and theme.
- Consider adding personal items such as postcards or travel mementos.
Pro Tip: Use a mix of framed and unframed items for a dynamic look. Warning: Avoid overcrowding your gallery wall; choose a balanced number of pieces.
Time estimate for this step: 30-45 minutes.
Recommended Products

Wide Assortment: 220-piece picture hanging kit includes 24 sets of 10lb picture hangers, 14 sets of 30lb picture hangers, 4 sets of 50lb picture hangers, 3 sets of 100lb picture hangers, 2 sets of 80lb, and 2 sets of 120lb picture hangers, 8 sets of D-rings, steel wire, screw eye hooks, and sawtooth hangers

Package includes: 50 Pieces small black hangers, 100 Pieces 10 mm screws. Suitable for small frames.
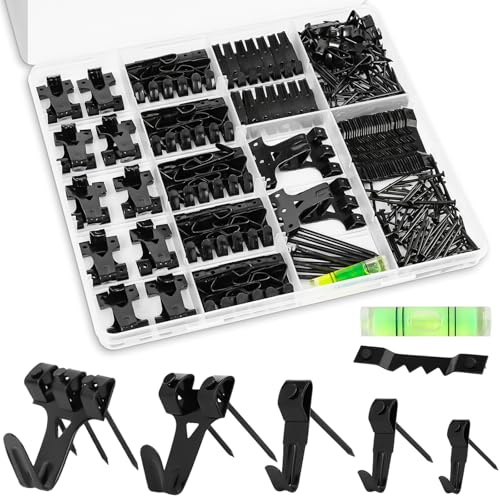
EFFORTLESS ORGANIZATION: Our 385pcs Heavy Duty Picture Hanging Kit boasts an exceptional design with categorized compartments, saving you precious time that would otherwise be spent searching for the right hardware. Plus, when you're done using it, everything neatly tucks away, eliminating any post-project mess. Can replace picture hanging strips.
Step 2: Gather Your Artwork
Editor’s Choice

15 lb Large Picture Hanging Strips 14 Pairs (28 Strips), Damage-Free Han…

Go Hang It! Pro, All-in-One Picture Hanging Kit – Picture Leveling and H…

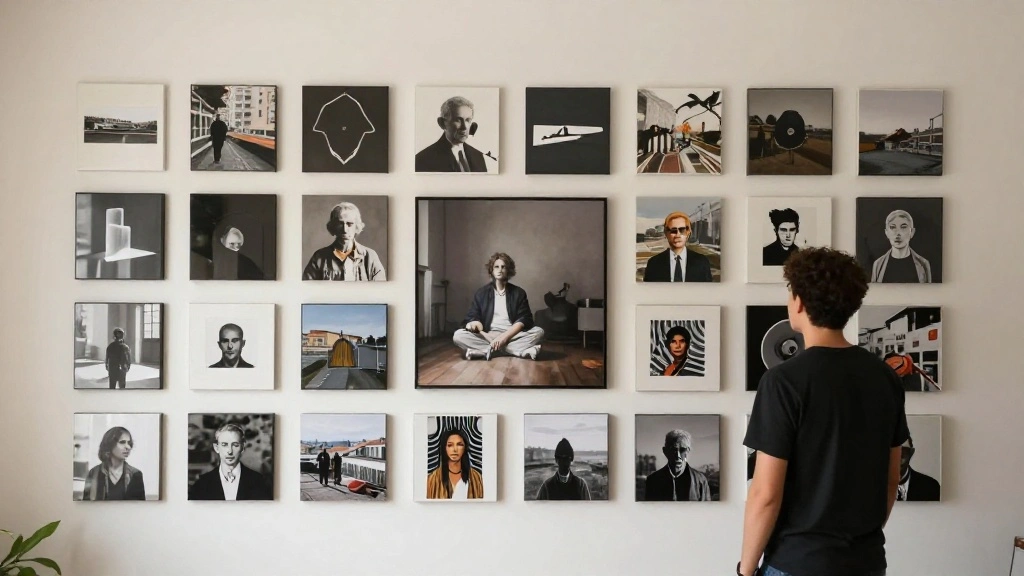
Step 3: Plan Your Layout

Before hanging your frames, it’s essential to plan your layout. This will help you visualize how everything will look together. Follow these sub-steps:
- Lay the frames on the floor to experiment with different arrangements.
- Start with the largest piece in the center or at eye level.
- Fill in the surrounding space with smaller frames.
Pro Tip: Use painter’s tape on the wall to outline where each frame will hang. Warning: Avoid placing frames too close to each other to maintain visual balance.
Time estimate for this step: 30-45 minutes.
Recommended Products

Modern Minimalist Style: Our Picture frames are carefully packaged with minimalist art in mind, featuring natural colors such as black, white, and brown. Whether used as wall hangings or desk decorations,the gallery wall frame set is suitable for all seasons. We prioritize the perfect balance of aesthetics and functionality, ensuring a comfortable and natural experience for our customers.

[Capture Your Memories] 12-Pack 4x6 inches photo frames let you display the memories you cherish most; enjoy the faces of your children, good times with friends, and family get-togethers

Versatile Sizes for Display: Vittanly 15-Pack Multi-Size Picture Frame Set includes 3x 8x10", 6x 5x7", and 6x 4x6" frames. Perfect for showcasing family photos, artwork in living rooms, bedrooms, and offices
Step 3: Plan Your Layout
Editor’s Choice
15 Pack Picture Frames Collage Wall Decor, Gallery Frame Set for Wall Mo…

4 Rolls Premium Painters Tape, Blue Tape, Masking Tape, Paint Tape for M…

WEIDDW Laser Level with Tripod, Self Leveling Laser Level 4×360°, Green…
Step 4: Measure and Mark the Wall
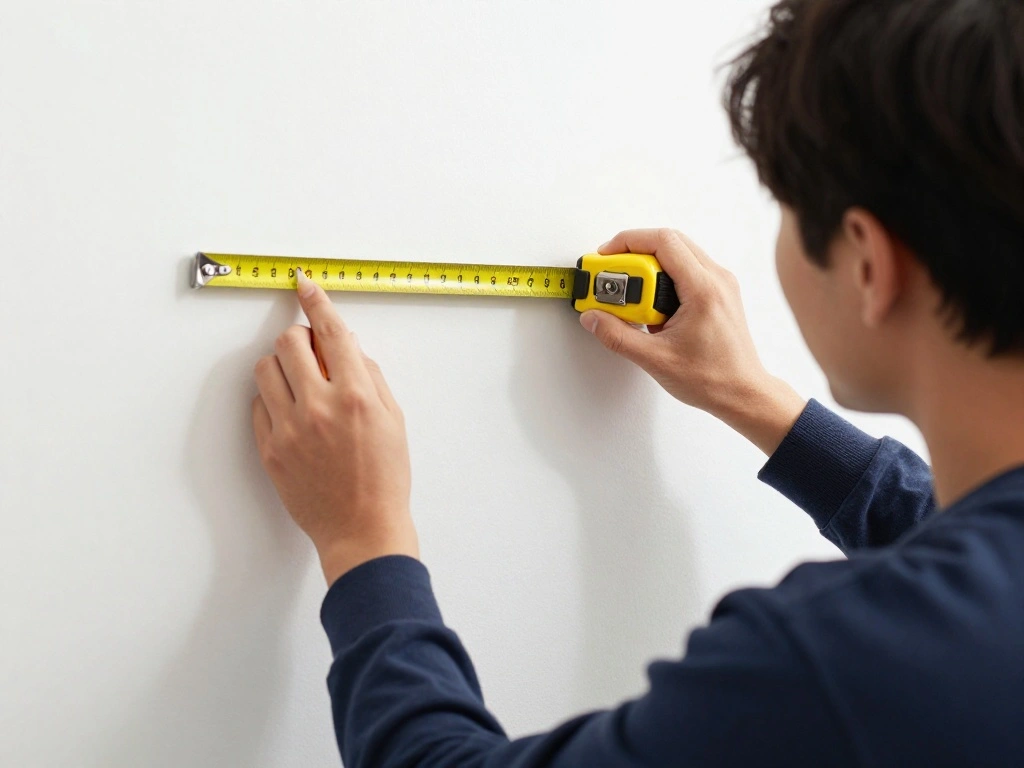
With your layout planned, it’s time to measure and mark the wall where you’ll hang your frames. Follow these sub-steps:
- Use a tape measure to find the center point of your gallery wall.
- Mark the height for the top of the frames with a pencil.
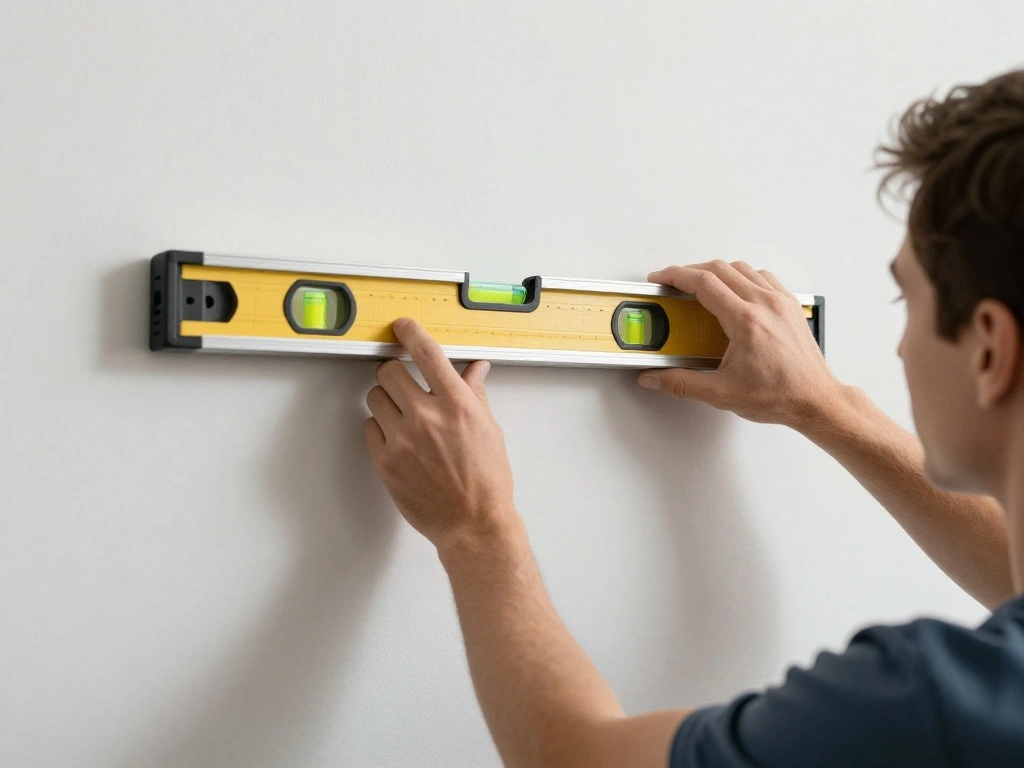
- Use a level tool to ensure your marks are straight.
Pro Tip: Measure from the floor to ensure your frames are at eye level. Warning: Double-check your measurements before drilling or hammering into the wall.
Time estimate for this step: 20-30 minutes.
Step 4: Measure and Mark the Wall
Editor’s Choice

313 Measure Mate – Ultimate Home-Improvement Tool – With Level and Ruler…

2 Pack Carpenter Pencils Mechanical Pencils with 12 Refills, Constructio…
3-in-1 Picture Hanging Tool, All-in-One Art Hanging Kit with Leveling, P…
Step 5: Hang Your Frames
Now it’s time to hang your frames! This step is where your hard work pays off. Follow these sub-steps:
- Starting with the center frame, use a hammer or wall hooks to secure it to the wall.
- Continue hanging frames according to your planned layout.
- Use a level tool to ensure each frame is straight as you hang them.
Pro Tip: If using command strips, follow the instructions carefully for the best results. Warning: Ensure the frames are securely attached to avoid any accidents.
Time estimate for this step: 30-60 minutes.
Recommended Products

MAXIMUM FRAME SIZE 8 X 10 INCHES: One package includes 18 pairs (36 strips total) of the Command Small Picture Hanging Strips; four wall adhesive strip pairs hold 4 pounds; maximum frame of 8 x 10 inches

MAXIMUM FRAME SIZE 24 X 36 INCHES: One package includes eight pairs (sixteen strips total) of the Command 20 lb X-Large Heavyweight Picture Hanging Strips; four wall adhesive strip pairs (eight strips) holds 20 pounds; maximum frame of 24 x 36 inches

DAMAGE-FREE PICTURE HANGERS: Includes 16 pairs (32 strips) of White Command Medium (10lb) Picture Hanging Strips, unique hassle-free wall hangers for hanging pictures without nails or damage
Step 5: Hang Your Frames
Editor’s Choice

WORKPRO 16 oz Claw Hammer with Fiberglass Handle, All Purpose Hammer wit…
Step 6: Step Back and Enjoy
With all frames hung, take a moment to step back and admire your work! This final step is crucial for ensuring everything looks as expected. Follow these sub-steps:
- Stand at a distance to view the entire gallery wall.
- Make any minor adjustments if necessary.
- Consider adding decorative elements like plants or shelves near your gallery wall.
Pro Tip: Take a photo to remember how the space looked before any additional decor. Warning: Don’t rush this final step; take your time to ensure you’re happy with the arrangement.
Time estimate for this step: 15-30 minutes.
Step 6: Step Back and Enjoy
Editor’s Choice

Yaetm 16×20 Picture Frame Matted to 11×14 Set of 4, Natural Solid Oak Wo…

QsQueen Scalloped Wood Wall Shelf – 17 Inch Floating Shelf with Wood B…

Easy to Grow Live Houseplants (6 Pack), Deluxe Collection of Assorted Ai…
Pro Tips
- Mix Frame Styles: Combining different frame styles can add depth and interest.
- Use Art Templates: Consider creating paper templates of your frames for easier layout planning.
- Seasonal Changes: Swap out artwork seasonally for a fresh look throughout the year.
- Lighting Matters: Use adjustable lighting to highlight your gallery wall.
- Personal Touch: Incorporate personal items like travel souvenirs or quotes to make it uniquely yours.
Recommended Products
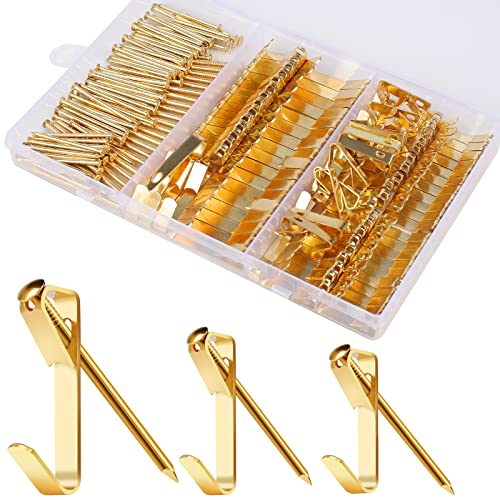
Great Assortment: You will receive 90 sets of picture hanging hardware, including 20 sets of 50LB hooks,50 sets of 30LB hooks, and 20 sets of 20LB hooks with 94 nails, With different 3 sizes of professional hanging kits very convenient.

Perfect Picture Hanging Kits: 310Pcs Accessories Including Wire, Hooks, Nails, etc. In A Hardware Box

EFFORTLESS ORGANIZATION: Our 303pcs Heavy Duty Picture Hanging Kit boasts an exceptional design with categorized compartments, saving you precious time that would otherwise be spent searching for the right hardware. Plus, when you're done using it, everything neatly tucks away, eliminating any post-project mess. Can replace picture hanging strips.
Pro Tips
Editor’s Choice

Hapfish Picture Lights for Wall Battery Operated, Wireless Art Light for…

Creating Your Picture Book Dummy: A Layout Guide for 32, 40, & 48 Page P…
Common Mistakes to Avoid
Warning: Not measuring your wall space can lead to an unbalanced gallery. Always measure before hanging frames.
Warning: Overcrowding your wall makes it look chaotic. Aim for a balanced look with space between frames.
Warning: Not checking the frame level can result in crooked displays. Always use a level tool for accuracy.
Common Mistakes to Avoid
Editor’s Choice

Torpedo Level Magnetic, Firecore 9 Inch Shockproof Small Leveler Tool wi…
CRAFTSMAN 25-Ft Tape Measure with Fraction Markings, Retractable, Self-L…
Troubleshooting Section
Problem: The frames appear crooked after hanging.
Solution: Use a level to adjust frames individually.
Problem: Artwork looks overcrowded on the wall.
Solution: Remove one or more pieces to create a balanced look.
Problem: Frames are not securely attached.
Solution: Double-check the mounting method and reinforce as necessary.
Troubleshooting Section
Editor’s Choice

22 Pcs Drill Free Adhesive Wall Hooks, 20 lb Capacity Picture Hanging Ho…

PREXISO Multi Surface Laser Level LED Light Vial, 30Ft Horizontal & Vert…
Variations/Alternative Methods
- Gallery Ledge: Use a ledge to display frames, allowing easy changes without wall damage.
- Grid Layout: Arrange frames in a neat grid for a modern look.
- Mismatched Frames: Use frames of different colors and styles for a playful, eclectic feel.
Variations/Alternative Methods
Editor’s Choice
15 Pack Picture Frames Collage Wall Decor, Gallery Frame Set for Wall Mo…

Heimlove Picture Ledge Shelf, Floating Shelves Set of 2, 24 Inches Pictu…
FAQs
- What if I don’t have enough artwork? Consider printing high-quality images or using decorative paper to fill frames temporarily.
- How long should I wait before changing the artwork? It’s up to you, but consider seasonal changes for variety.
- Is it safe to hang heavy frames? Yes, just ensure you use proper wall anchors for heavier pieces.
FAQs
Editor’s Choice

50 Pack Small Sawtooth Picture Hangers – Steel Picture Hanging Solutions…

SUNBEAUTY 6Pcs Hanging Butterflies, Large Butterfly Decorations, 3D Pape…

WWN Vintage Bathroom Canvas Wall Art Victorian Funky Woman in Bathtub Pi…
Conclusion
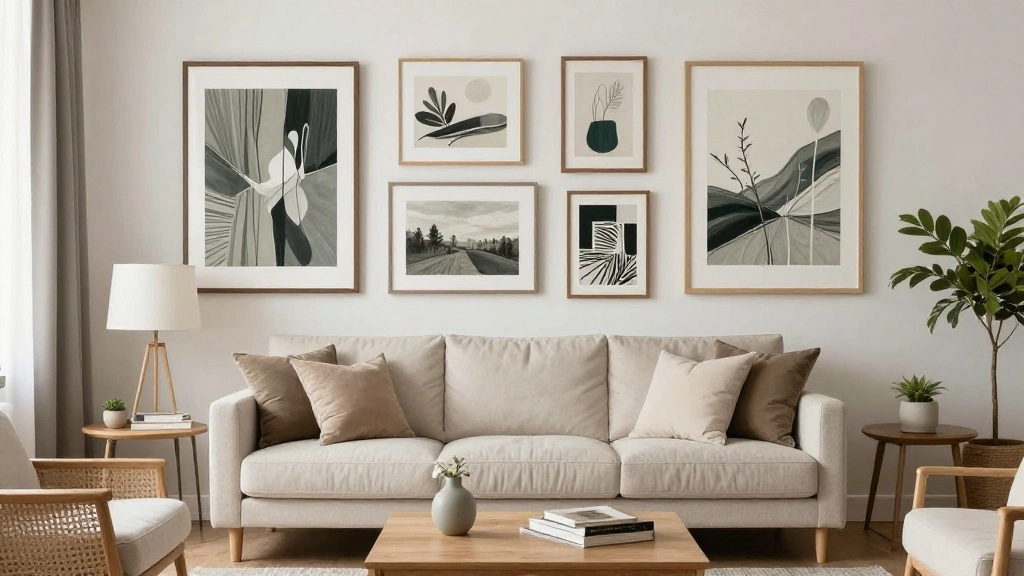
Congratulations! You’ve successfully created a stunning gallery wall using IKEA frames. Take a moment to admire your hard work and enjoy the personal touch it brings to your home. If you’re inspired, consider expanding your decor by adding more pieces or experimenting with different themes.
Keep your gallery wall fresh by rotating artwork or adding new frames over time. Remember, the best gallery walls reflect your personal journey and experiences. Now, go ahead and show off your creative flair!