
Are you tired of staring at a dull wall behind your bed? A plain wall can make your bedroom feel uninviting and less personal. Transforming your space into a cozy retreat is more attainable than you think. A DIY headboard wall using paint, wallpaper, or fabric can add character and warmth to your bedroom, creating a focal point that reflects your style.
In this guide, you will learn how to create a stunning headboard wall with minimal effort and expense. You’ll explore different materials—paint, wallpaper, or fabric—and how to apply each effectively. By the end of this project, you’ll have a beautiful backdrop for your bed that enhances your bedroom’s aesthetic.
This project is rated as beginner in skill level and can be completed in approximately 2-3 hours, depending on your chosen method. Get ready to unleash your creativity and elevate your bedroom decor!
TL;DR Summary
- Create a DIY headboard wall using paint, wallpaper, or fabric.
- Learn step-by-step instructions suitable for beginners.
- Estimated time: 2-3 hours for completion.
- Enhance your bedroom’s aesthetic with a personalized touch.
TL;DR Summary
Editor’s Choice

Zinsser 02774 PERMA-WHITE Mold & Mildew Proof Interior Paint, Quart, Egg…

15.7″ X 118″ Black Silk Wallpaper Embossed Self Adhesive Peel and Stick …

House2Home Upholstery Fabric 60 Inch x 3 Yard, Black Fabric, Cambric Dus…
Prerequisites/Materials Needed
- For Paint:
- Paint (1-2 quarts depending on wall size)
- Paintbrushes and rollers
- Painter’s tape
- Drop cloths
- Sandpaper
- For Wallpaper:
- Wallpaper (enough to cover the desired area)
- Wallpaper adhesive
- Wallpaper smoother
- Utility knife
- For Fabric:
- Fabric (enough to cover the desired area)
- Staple gun
- Wooden board (if making a padded headboard)
- Foam padding (optional)
Prerequisites/Materials Needed
Editor’s Choice

Pro Grade Paint Brushes, 5-Piece Paint Brush Set, Flat & Angle Brushes f…

Arrow T50 Heavy Duty Staple Gun Kit, All Chrome Steel Stapler, with 3750…

Roman Seam Repair Adhesive – Sealer for Wallpaper Tears and Loose or Ove…
Skill Level & Time Estimate
Skill Level: beginner
Total time estimate: 2-3 hours
Skill Level & Time Estimate
Editor’s Choice

Bates- Paint Roller Kit, 19 pcs, Roller Set with Microfiber Sleeves & Fr…

Roman’s E-Z Hang Peel & Stick Wallpaper Helper, Clear, Non-Staining, 3…

Upholstery Staple Gun Heavy Duty, YEAHOME 4-in-1 Stapler Gun with 4000 S…
Step 1: Choose Your Material
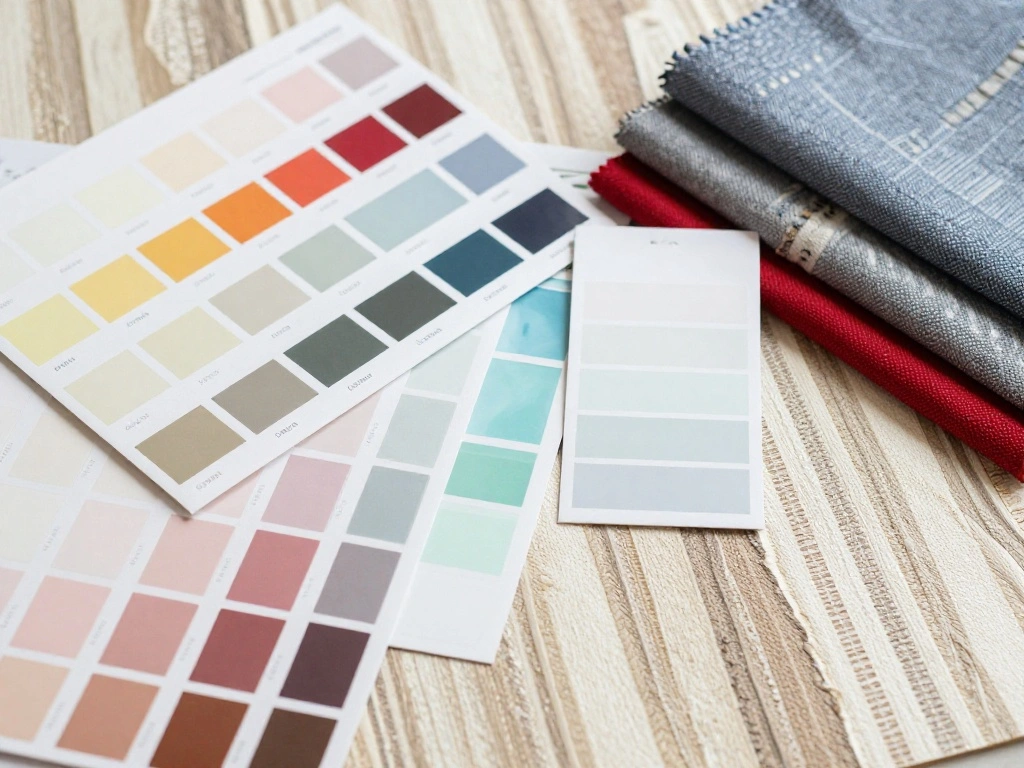
Decide whether you want to use paint, wallpaper, or fabric for your headboard wall. Each option provides a different aesthetic and feel.
- Consider the existing color scheme of your bedroom.
- Think about the texture you want to add.
- Research styles that inspire you.
Pro Tip: If you are unsure, purchase samples of paint or wallpaper to see how they look in your space before committing.
Why this matters: Choosing the right material sets the tone for how your bedroom will feel.
Time estimate: 15 minutes.
Step 1: Choose Your Material
Editor’s Choice

Be Your Own Kind of Beautiful Vinyl Wall Decals Sayings Pink Art Letteri…

Riyidecor Girly Pink Shower Curtain 60Wx72H Inch Fashion Cute Women Insp…
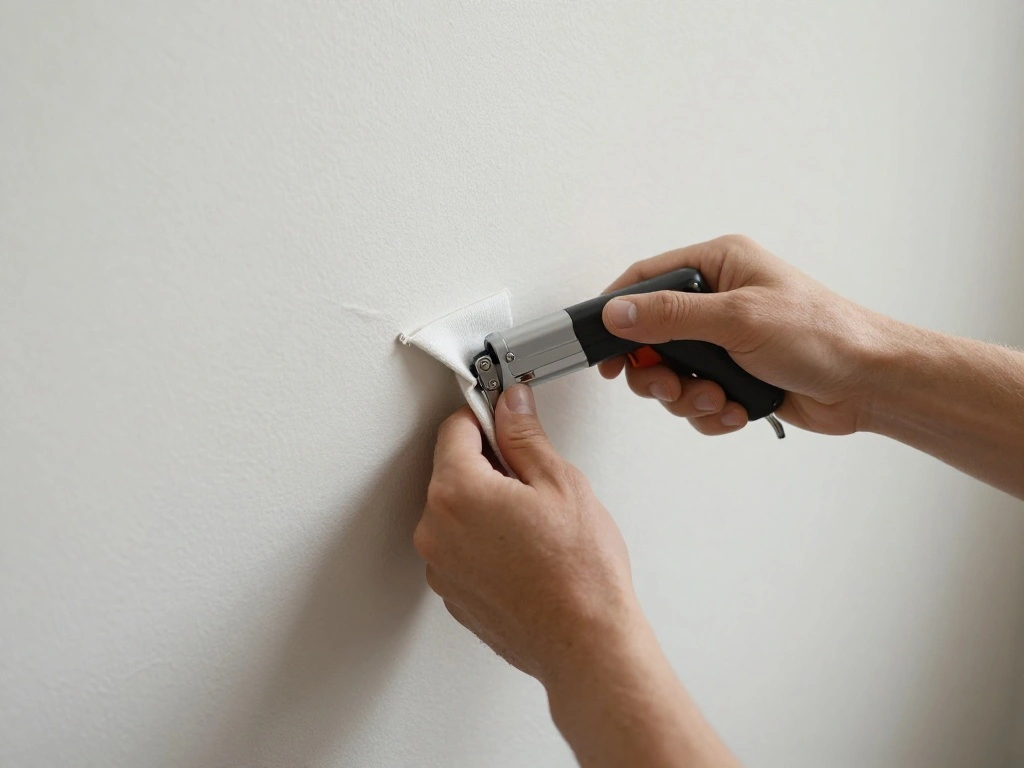
Step 2: Prepare the Wall

Before applying any material, prepare the wall to ensure a smooth finish.
- Remove any furniture or decor from the wall.
- Wash the wall with soap and water to remove dust and grease.
- Patch any holes or imperfections with spackle and sand smooth.
Warning: Ensure the wall is completely dry before proceeding to the next step.Why this matters: Proper preparation ensures the longevity of your headboard wall.
Time estimate: 30 minutes.
Step 2: Prepare the Wall
Editor’s Choice

Drywall Repair Kit,2 Pack Wall Mending Agent,Wall Spackle with Scraper, …

24 Pcs Sanding Sponge 80-3000 Grit Sandpaper Assortment, Washable & Reus…

Aunt Fannie’s All Purpose Wood Spray Cleaner, No-Wax Formula, Perfect fo…
Step 3: Measure and Mark
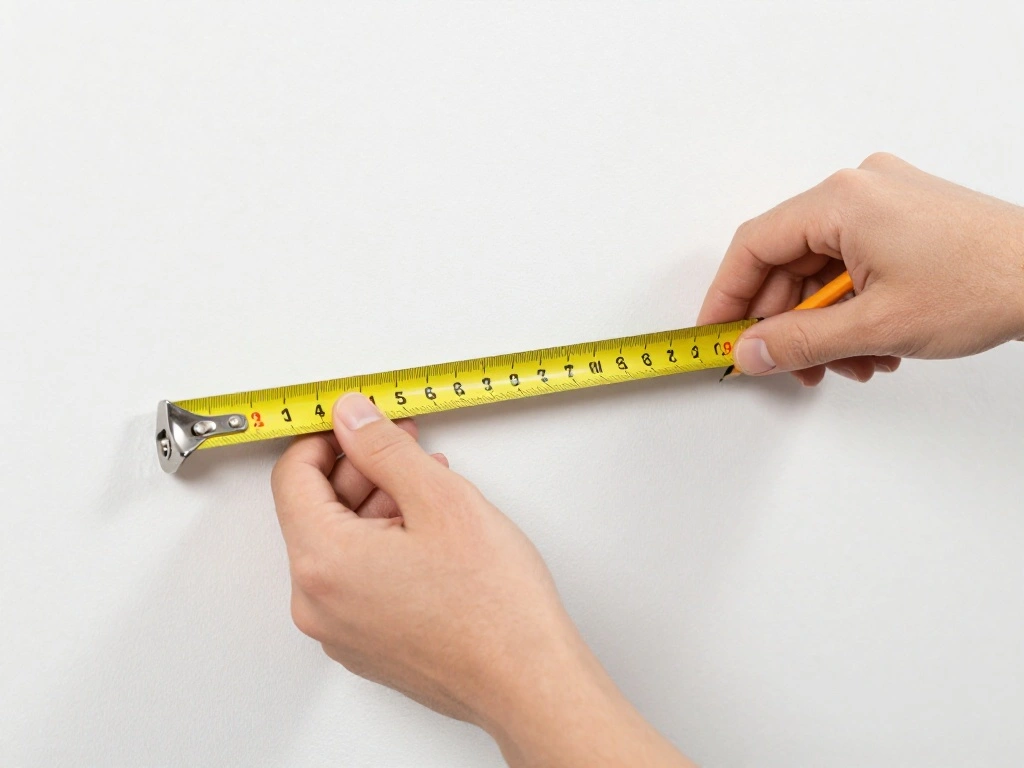
Accurate measurements will ensure your headboard wall looks professional.
- Use a measuring tape to determine the dimensions of the area you want to cover.
- Mark the corners and edges lightly with a pencil.
- Use a level to draw straight lines where necessary, especially for wallpaper or fabric installations.
Pro Tip: Double-check your measurements to avoid any costly mistakes.
Why this matters: Accurate measurements help create a balanced and visually appealing design.
Time estimate: 20 minutes.
Step 3: Measure and Mark
Editor’s Choice

Digital Caliper, Sangabery 0-6 inches Caliper with Large LCD Screen, Aut…

3Pcs Circular Bubble Level Bullseye Degree Marked Surface Round Spirit L…

Nicpro Carpenter Pencil with Sharpener, Mechanical Pencils Set with 26 R…
Step 4: Apply Paint (if chosen)

Getting the paint on the wall is where your project starts to come to life!
- Use painter’s tape to protect edges and corners.
- Pour paint into a tray and load your brush or roller.
- Start painting from the top down, using even strokes.
- Allow the first coat to dry completely before applying a second coat if necessary.
Warning: Ensure good ventilation while painting to avoid inhaling fumes.Why this matters: The paint finish sets the tone for the headboard wall.
Time estimate: 1-2 hours (including drying time).
Step 4: Apply Paint (if chosen)
Editor’s Choice

4 Rolls Premium Painters Tape, Blue Tape, Masking Tape, Paint Tape for M…

Bates- Paint Tray Set, 9 Inch, 12 pcs, 1x 9 Inch Paint Roller Tray, 10x …
Bates- Paint Roller Kit, 19 pcs, Roller Set with Microfiber Sleeves & Fr…
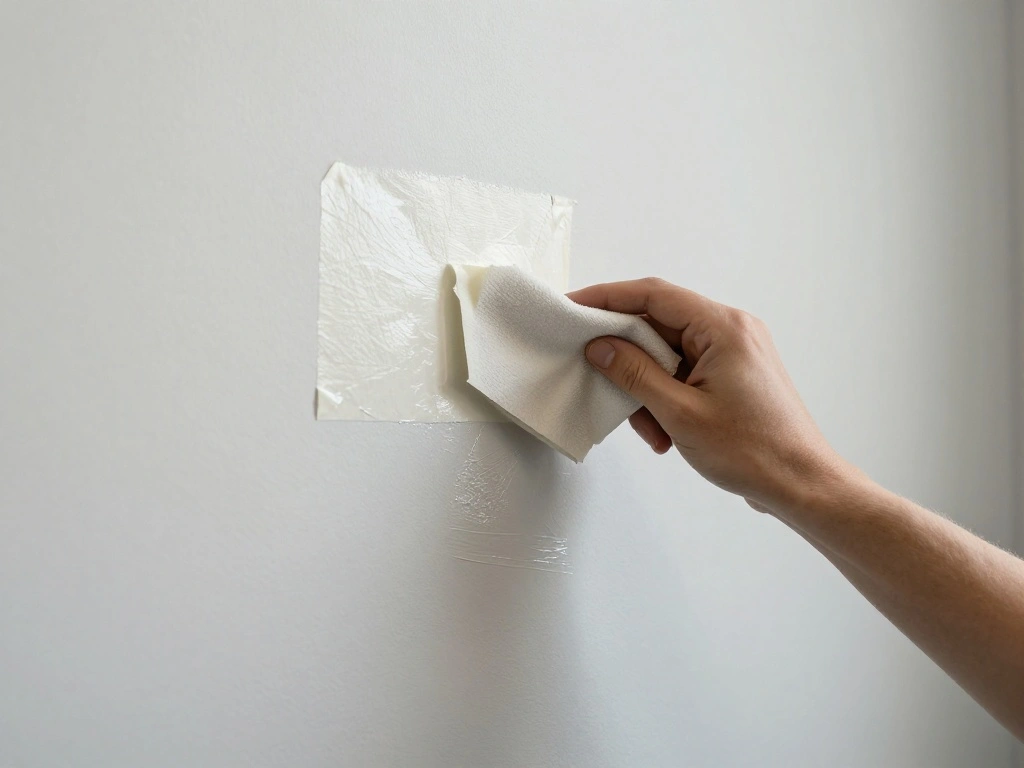
Step 5: Hang Wallpaper (if chosen)
If you opted for wallpaper, now it’s time to hang it!
- Mix the wallpaper adhesive according to the package instructions.
- Apply adhesive to the back of the wallpaper or directly to the wall, depending on the type.
- Start at the top and press the wallpaper onto the wall, smoothing out air bubbles as you go.
- Trim excess wallpaper at the bottom with a utility knife.
Pro Tip: Use a wallpaper smoother tool to eliminate air bubbles and ensure a flat finish.
Why this matters: Proper application prevents peeling and ensures a polished look.
Time estimate: 1-2 hours.
Step 5: Hang Wallpaper (if chosen)
Editor’s Choice

Roman PRO-880 Wallpaper Adhesive & Paste for Any Wallcovering – Ultra Cl…

WORKPRO Folding Utility Knife, Quick Change Box Cutter, Pink Razor Knife…

Art3d Smoothing Tool Kit for Applying Peel and Stick Wallpaper, Vinyl Ba…
Step 6: Attach Fabric (if chosen)
For a fabric headboard wall, you will need to attach your fabric securely.
- If using foam padding, cut it to size and attach it to the wall with adhesive.
- Lay the fabric over the foam (if used) or directly on the wall, ensuring it is straight.
- Use a staple gun to secure the fabric at the top, pulling it taut as you go.
- Trim any excess fabric at the bottom when finished.
Warning: Be cautious with the staple gun to avoid injury.Why this matters: A well-placed fabric can create a luxurious feel in your bedroom.
Time estimate: 1-2 hours.
Step 6: Attach Fabric (if chosen)
Editor’s Choice

African Tribal Woman Print Fabric Tapestry Decorative Wall Art Tableclot…

SHALL Light Duty Staple Gun for Wood – Pink Upholstery Staple Gun with 1…

GoTo Foam 1″ Height x 24″ Width x 72″ Length 44ILD (Firm) Upholstery Cus…
Step 7: Add Finishing Touches

Complete your headboard wall with decor that enhances its presence.
- Add artwork, mirrors, or decorative wall hangings.
- Consider adding LED strip lights or sconces for ambient lighting.
- Incorporate pillows or throws on the bed that match the new wall.
Pro Tip: Coordinate colors and textures to create a cohesive look.
Why this matters: Finishing touches personalize your space and complete the transformation.
Time estimate: 30 minutes.
Step 7: Add Finishing Touches
Editor’s Choice
Utopia Bedding Bed Pillows for Sleeping (White), Queen Size Set of 4, Ho…

Flupuro 2 Pack DIY Corner Floor Lamps, ICRGB Floor Lamp with Music Sync …

Pigort 3 Pieces Metal Flowers Wall Art- Rustic Farmhouse Decor Minimalis…
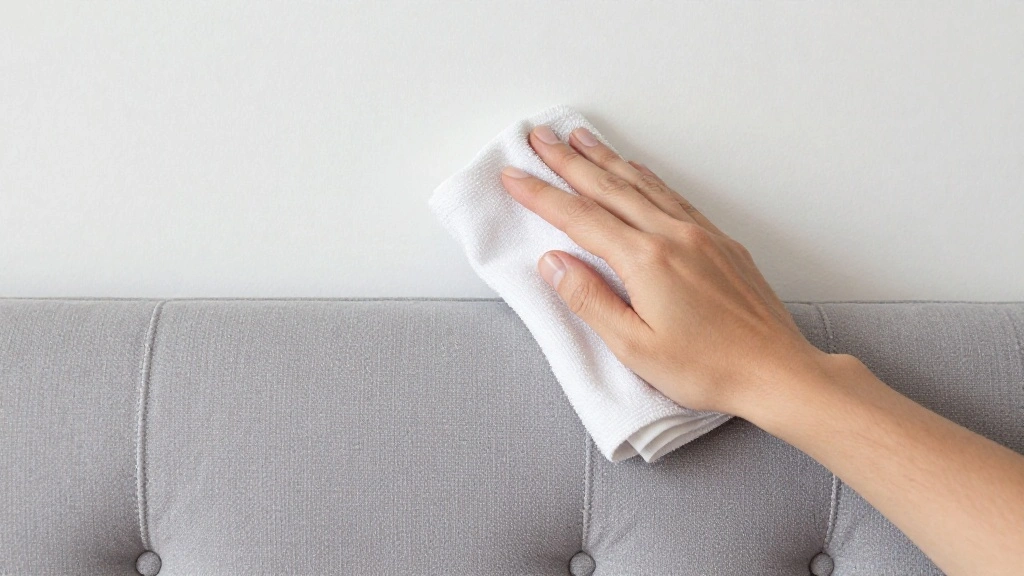
Step 8: Clean Up
Now that your headboard wall is complete, it’s time to clean up your workspace.
- Remove painter’s tape, if used.
- Clean brushes, rollers, or tools with soap and water (or according to material instructions).
- Dispose of any waste materials properly.
Warning: Ensure all tools are stored safely and out of reach of children.
Why this matters: Keeping your workspace tidy is essential for safety and organization.
Time estimate: 15 minutes.
Step 8: Clean Up
Editor’s Choice

Hefty Load & Carry Heavy Duty Contractor Large Trash Bags, 42 Gallon, 26…
4 Rolls Premium Painters Tape, Blue Tape, Masking Tape, Paint Tape for M…

GENERAL’S The Masters Brush Cleaner and Preserver – Non-Toxic – Clea…
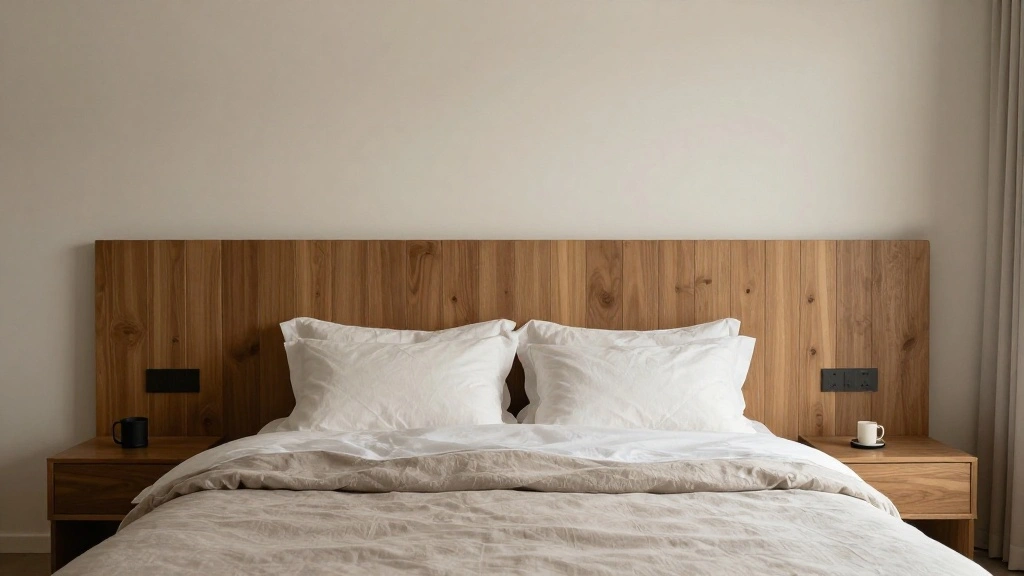
Step 9: Enjoy Your New Space
Your DIY headboard wall is complete! Step back and admire your hard work.
- Take a moment to appreciate the transformation.
- Invite friends or family to see your new decor.
- Consider taking ‘before and after’ photos to commemorate the change.
Pro Tip: Rearranging furniture to complement the new headboard wall can further enhance the room.
Why this matters: Enjoying your work reinforces the effort put into the project.
Time estimate: 10 minutes.
Step 9: Enjoy Your New Space
Editor’s Choice

Sexy Woman Body Painting on Canvas Wall Art Nude Abstract Modern Prints …
20pcs Pack Girls/Women DIY Satin Fabric Covered Ribbon Headbands Hairband

Drydiet Colorful Cheetah Print Wallpaper 15.8″ x 118″ Macarons Leopard W…
Step 10: Maintain Your Headboard Wall
Regular maintenance will keep your headboard wall looking fresh.
- Dust the wall regularly to prevent buildup.
- If using paint, touch up any scratches or marks as needed.
- For wallpaper or fabric, check for peeling or loose edges and repair them promptly.
Pro Tip: Schedule seasonal checks to ensure everything stays in great shape.
Why this matters: Maintenance preserves the beauty of your work and extends the lifespan of your headboard wall.
Time estimate: 15 minutes per season.
Step 10: Maintain Your Headboard Wall
Editor’s Choice

Fabuloso Microfiber Cleaning Cloths for Home & Car, Lint-Free Scratch-Fr…

Fillable Touch Up Paint Pen, 6 Pack Reusable and Refillable Paint Pens w…
Drywall Repair Kit,2 Pack Wall Mending Agent,Wall Spackle with Scraper, …
Pro Tips
- Choose Quality Materials: Invest in high-quality paint, wallpaper, or fabric for longevity and better appearance.
- Test a Small Area: Always test a small area first to see how the material looks in your space.
- Keep It Simple: Sometimes less is more; don’t overcrowd the wall with too many decorations.
- Involve a Friend: Having someone help can make the process quicker and more enjoyable.
- Stay Organized: Keep all your tools and materials organized to streamline the process.
Pro Tips
Editor’s Choice

Marine Vinyl Upholstery Faux Leather: Meneng Black Grain Faux Leather 54…

Modern Peel and Stick Wallpaper 17.3”×78.8” Self Adhesive Wallpaper B…
Zinsser 02774 PERMA-WHITE Mold & Mildew Proof Interior Paint, Quart, Egg…
Common Mistakes to Avoid
Warning: Not measuring correctly can lead to wasted materials and uneven applications. Always double-check your measurements before cutting or applying materials.
Warning: Skipping wall preparation can lead to an uneven finish; always clean and patch the wall beforehand.
Warning: Using low-quality materials may result in peeling or fading; invest in good quality paint or wallpaper.
Warning: Rushing your project can lead to mistakes. Take your time to ensure a quality finish.
Common Mistakes to Avoid
Editor’s Choice

Tape Measure 25 Ft – Metal Retractable Tape Measure with Fractions, Easy…

Paint Your Own Sunflower Coaster with Markers,Arts and Crafts for Adul,6…
House2Home Upholstery Fabric 60 Inch x 3 Yard, Black Fabric, Cambric Dus…
Troubleshooting Section
Problem: Paint is streaky or uneven.
Solution: Reapply with a roller, ensuring you use even pressure.
Problem: Wallpaper bubbles or peels.
Solution: Use a wallpaper smoother to press out bubbles or reapply adhesive.
Problem: Fabric is wrinkled.
Solution: Use a steam iron on low to carefully smooth wrinkles.
Problem: Color does not match the existing decor.
Solution: Consider adding decor elements in complementary colors to balance the space.
Troubleshooting Section
Editor’s Choice

Downy Wrinkle Releaser Spray | All In One Wrinkle Release Spray, Odor El…

Mister Rui 4 Inch Foam Paint Roller Kit, 8 Pack – Mini Roller Set with 4…

ROMAN’s Wallpaper Smoothing Tool for Home Improvement, Wallpaper Smoot…
Variations/Alternative Methods
Consider these alternative methods for your headboard wall:
- Stenciling: Use stencils to create patterns with paint for a unique look. Pros: Customizable design. Cons: Time-consuming.
- Wood Paneling: Install wood planks for a rustic feel. Pros: Durable and stylish. Cons: More complex installation.
- Removable Wallpaper: For renters, removable wallpaper allows for easy changes. Pros: No damage to walls. Cons: May not last as long as traditional wallpaper.
Variations/Alternative Methods
Editor’s Choice
15.7″ X 118″ Black Silk Wallpaper Embossed Self Adhesive Peel and Stick …

12 Inch Letter Stencils Symbol Numbers Craft Stencils, 42 Pcs Reusable A…

TONOR Wood Slatwall Panels, 4 Pack 47.2″ x 23.6″/ 120 x60cm(31ft²) Acou…
FAQs
What if I don’t have a steady hand for painting? Use painter’s tape for clean lines, or opt for wallpaper for a more forgiving application.
How long should I wait between paint coats? Allow at least 2-4 hours for the first coat to dry before applying a second coat.
Is it safe to hang heavy items on wallpaper? Not usually; check the wallpaper’s weight limit and use appropriate wall anchors.
What if I don’t like the color after painting? You can always repaint; just ensure the previous coat is completely dry before applying new paint.
FAQs
Editor’s Choice

KURUI 140Pcs #8 Self Drilling Drywall Anchors with Screws Kit, Heavy Dut…
Roman’s E-Z Hang Peel & Stick Wallpaper Helper, Clear, Non-Staining, 3…
4 Rolls Premium Painters Tape, Blue Tape, Masking Tape, Paint Tape for M…
Conclusion
Congratulations! You’ve successfully created a stunning DIY headboard wall that enhances your bedroom’s decor. Take a moment to appreciate your hard work—you deserve it!
Now that your project is complete, consider exploring additional decor projects, such as creating matching throw pillows or adding artwork that complements your new headboard wall. Keep your creativity flowing and enjoy your rejuvenated space!