
Creating a warm and inviting home is a task that fills many of us with excitement and creativity. Lately, I’ve been craving fresh ways to infuse my walls with personality without breaking the bank. If you’ve been feeling the same, you’re in for a treat! This post is all about clever and stylish command strip wall art ideas that look totally intentional and will elevate your space without a permanent commitment.
If you’re someone who loves DIY projects, minimalist aesthetics, or just wants to shake up your home decor on a budget, this guide is for you. Whether you’re a seasoned DIYer or a newbie to the craft scene, you’ll find something here that sparks your creativity. I’ve pulled together 12 unique art ideas that are simple, impactful, and perfect for transforming any room into a personal gallery.
Get ready to explore an array of easy home decor solutions that will make your walls pop! From gallery walls to interactive art for kids, these removable wall art ideas are not only beautiful but also allow you to express yourself in fun and imaginative ways. Let’s dive in and discover how you can effortlessly refresh your home decor.
Key Takeaways
– Discover 12 distinct command strip wall art ideas that bring a polished look to any space without commitment.
– Explore budget-friendly options that allow you to decorate creatively, including fabric wall hangings and seasonal decor swaps.
– Learn how to display personal memories and inspiration through travel memories displays and quote art, adding a personal touch to your home.
– Find interactive art ideas perfect for kids, ensuring your living space is not just stylish, but also engaging and fun.
– Gain insights into minimalist and nature-inspired art styles, making it easy to achieve a chic, cohesive look in any room.
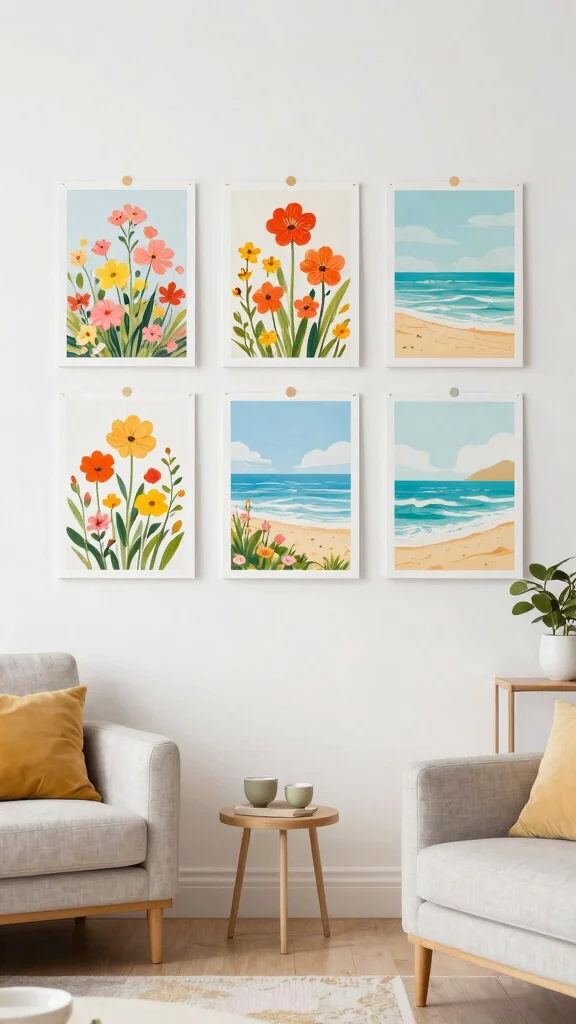
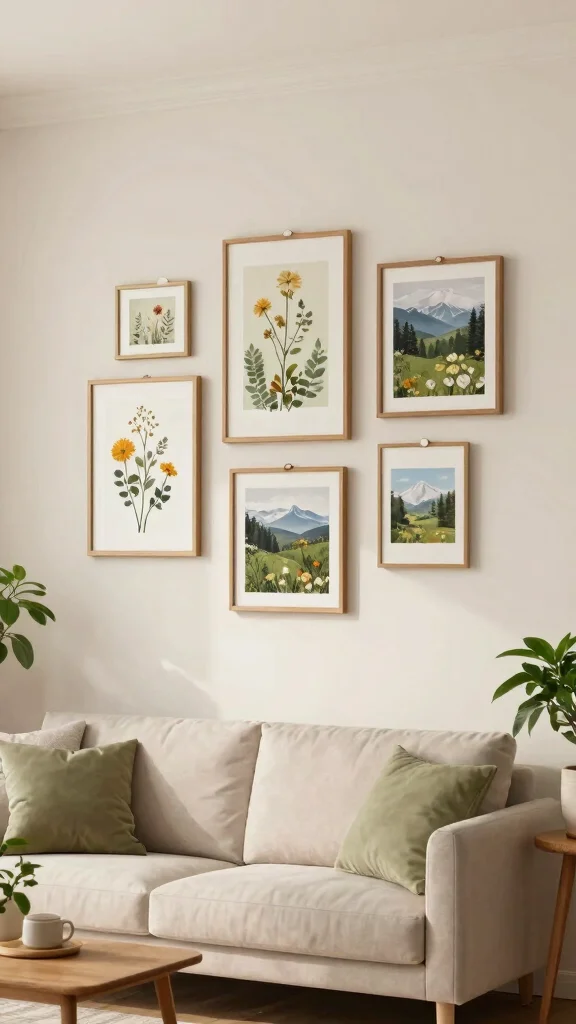
1. Gallery Wall of Prints

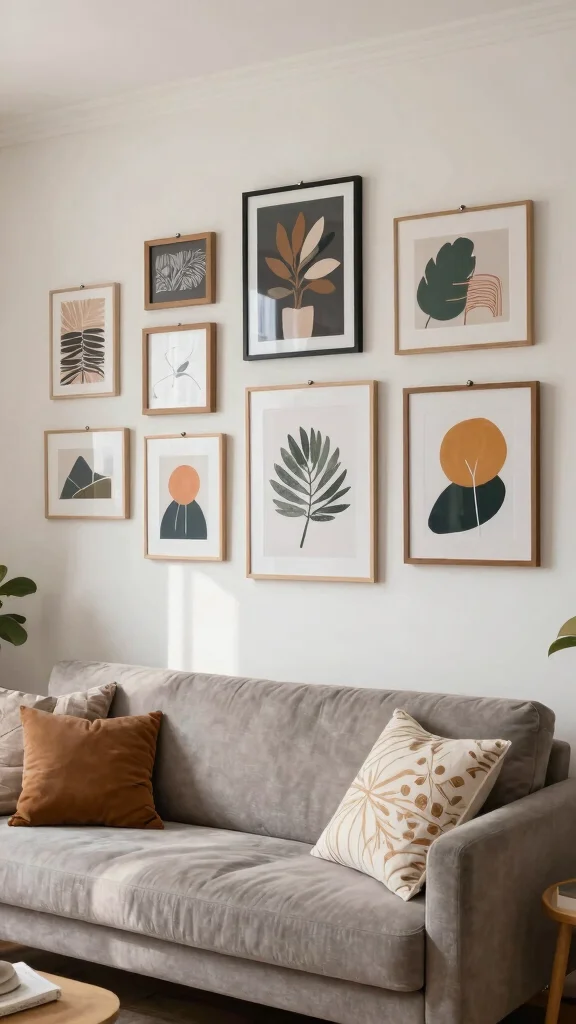
A gallery wall is a fantastic way to infuse your room with character and charm. By using command strips, you can effortlessly showcase a curated collection of prints that highlight your passions and adventures. Opt for a blend of styles, like modern abstracts or vintage posters, to create a captivating visual story that represents your individuality.
To start, lay your chosen pieces on the floor to experiment with different arrangements until you find the perfect one. Once you’re satisfied, stick them up with command strips, allowing for easy changes whenever you seek a fresh look!
Tips:
– Use a level to ensure a straight display.
– Mix frame styles for an eclectic vibe.
– Maintain a cohesive color scheme for harmony.
With just a little effort, your walls will radiate your unique personality and style.
Pro tip: Command strip wall art ideas can transform a space with just a few prints—no nails needed. Mix modern abstracts with vintage posters to tell your story, and lay pieces on the floor first to find the perfect arrangement.
Gallery Wall of Prints
Editor’s Choice

ANERZA 16 PCS Black Girl Wall Art Decor, African American Gallery Wall P…
SUMGAR 4×6 Picture Frame 6×4 Photo Frame White Wood Farmhouse Boho Wall …

Command 20 lb XL 8 Pairs Heavyweight Picture Hanging Strips (16 Strips),…
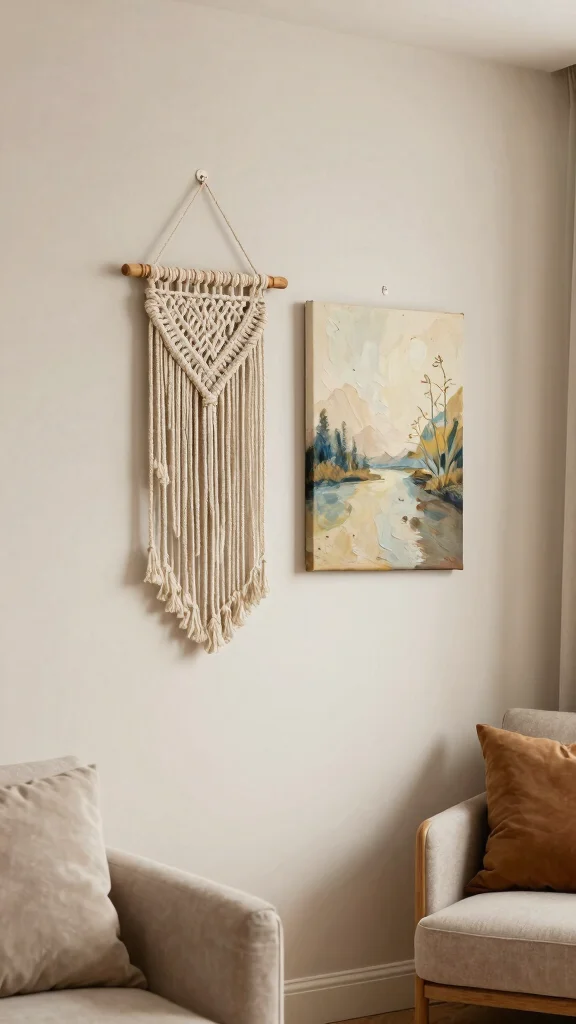
2. Fabric Wall Hangings

Add a touch of warmth and texture to your walls with fabric art! Utilizing lightweight materials like cotton or linen, you can create stunning wall hangings that can be easily mounted with command strips. Choose patterns that complement your existing color scheme or solid shades to foster a soothing atmosphere.
To craft your fabric art, stretch the material over a frame or hang it directly for a relaxed bohemian look. If you’re feeling creative, embellish it with tassels or fringe for extra flair!
Insights:
– Ensure the fabric is snug to prevent sagging.
– Layer different fabrics for depth and visual interest.
– Fabric art can enhance the coziness of any space.
The beauty of fabric art is its versatility; simply peel it off and swap it for something new whenever inspiration strikes!
📹 Related Video: How to Hang a Tapestry in 3 Easy Ways
Fabric Wall Hangings
Editor’s Choice
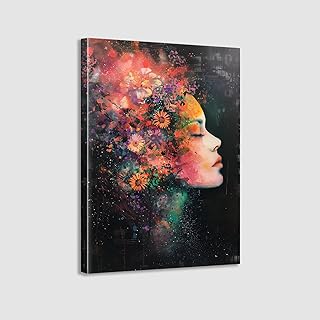
Framed Canvas Wall Art Beautiful Woman With Colorful Flowers, White Flow…
Relaxing Garden Pressed Flower Craft Kit for Adults & Women, DIY Floatin…
3. Inspirational Quote Art
Brighten your space and uplift your mood with inspirational quote art! Using command strips to display beautifully framed quotes can create an encouraging atmosphere. Select phrases that resonate with you—be it from beloved authors or personal affirmations—that inspire positivity.
You can either purchase ready-made quotes or design your own using accessible tools. Choose simple frames that allow the words to shine, and position them in places like home offices or bedrooms for added motivation.
Suggestions:
– Use contrasting colors for better readability.
– Surround quotes with plants or photos for a curated feel.
– Change quotes seasonally to keep your decor fresh.
This DIY decor idea not only beautifies your space but also serves as a daily reminder to embrace positivity!
Inspirational Quote Art
Editor’s Choice

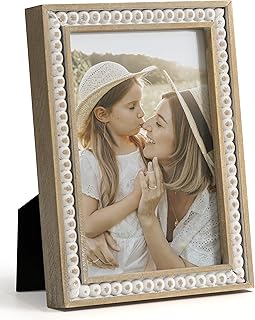
Sheffield Home Scalloped Edge Rounded Dots buble 4×6 Photo Frame, Decora…

Inspirational Wall Art for Bedroom, Motivational Office Wall Art Decor, …
20 lb XL 8 Pairs Heavyweight Picture Hanging Strips (16 Strips), Damage-…
4. Minimalist Line Art
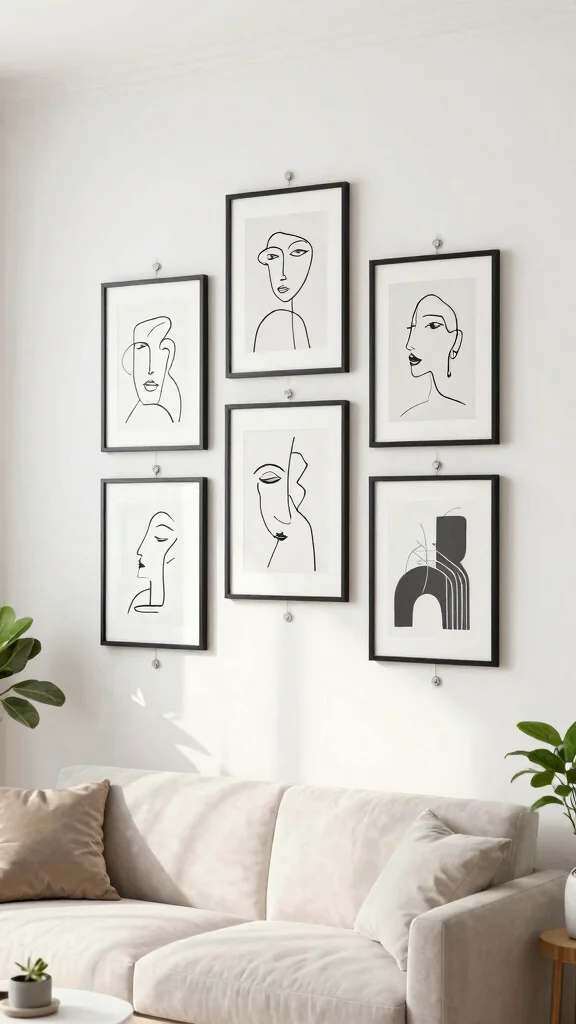
Minimalist line art offers a chic, modern touch, perfect for display with command strips! This art style employs simple lines to form stunning visuals that elevate your space without overwhelming it. You can purchase prints or create your own using a black marker on white paper.
These art pieces work beautifully when grouped for a striking effect. The clean lines contribute to a sophisticated aesthetic, especially suited for contemporary interiors. Stick them up with command strips and rearrange as your style evolves!
Tips:
– Keep frames simple—black or white combinations work best.
– Pair with diverse art for an eclectic touch or keep it singular for a sleek look.
– Use line art to guide the eye through the room for a cohesive flow.
This style adds personality and elegance to your decor effortlessly!
Turn walls into calm with minimalist line art—draw simple black-on-white lines, or print clean outlines; group 3–5 pieces for a cohesive, modern display. Use command strip wall art ideas to keep the setup quick, remixable, and intentionally sleek.
Minimalist Line Art
Editor’s Choice

Qykwz Black Women Floral Wall Art Prints, Elegant Modern African America…

Family Picture Frame, Best Friend Picture Frame Gifts for Best Friend Wo…
Kingdder 16.4 ft Bling Car Trim Self Adhesive Bling Car Accessories for …
5. 3D Wall Art Installations
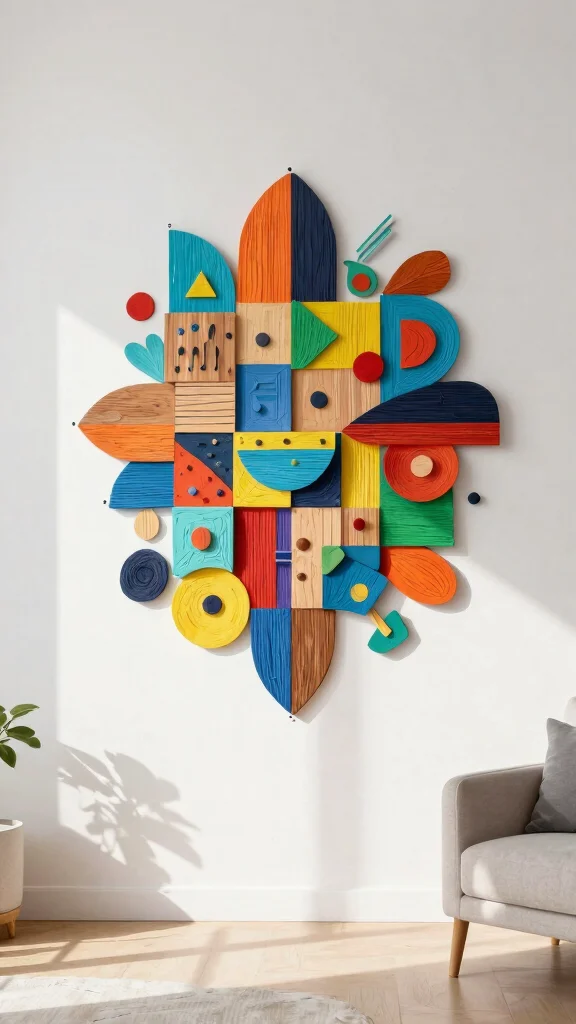
For a truly eye-catching display, consider crafting 3D wall art! Incorporate elements like wooden shapes, shells, or handcrafted designs that can be easily affixed with command strips. Think creatively—use found objects or make your own unique pieces! The added depth creates a stunning focal point in any room.
Arrange your 3D elements in an engaging layout that complements your existing decor. This type of installation not only invites interaction but also adds dimension, making your art truly pop.
Suggestions:
– Paint 3D elements in cohesive colors for a unified look.
– Use lighting to create shadows that enhance your installation.
– Combine various materials for added texture and intrigue.
Transform your space into a vibrant conversation starter with these distinctive pieces!
3D wall art with command strip wall art ideas makes rooms feel bigger and more personal—without drilling. Pro tip: start with 3 shapes in a triangle, add a shell or wood piece, and step back to adjust until it clicks. You’ll get a layered, gallery-ready look in minutes.
📐 Perfect Your Gallery Wall
Transform your space effortlessly with our step-by-step workbook for stunning wall displays using Command Strips.
How To Install Command Strip Wall Art
Tools You’ll Need:
– Command strips
– Level
– Measuring tape
– Pencil
– Clean cloth
– Frame or artwork you want to hang
Step 1: Measure & Prep
Before you start, measure the space where you want to hang your art. Use a measuring tape to find the center point. Mark this lightly with a pencil. This will help you position your artwork perfectly. Make sure the wall is clean; wipe it down with a clean cloth to remove dust or oils. ✔ Clean the surface
✔ Measure your wall space
✔ Mark the center point
Step 2: Choose the Right Command Strips
Select Command strips based on the weight of your artwork. The packaging gives you weight limits, so check that to ensure a secure hold. For heavier pieces, use the large or heavy-duty strips. For lighter items, the small or medium strips will suffice. ✔ Check the weight limit
✔ Choose the appropriate size
Step 3: Attach Strips to the Frame
Take the Command strips and peel off the backing. Stick them onto the back of your frame or artwork. Make sure to press firmly for at least 30 seconds for a strong bond. If you’re using multiple strips, keep them evenly spaced for balance. ✔ Peel and stick
✔ Press firmly for 30 seconds
✔ Space strips evenly
Step 4: Position Your Artwork
Align the artwork with the marked center point on your wall. Use a level to ensure it’s straight before pressing it against the wall. Once positioned, press firmly against the wall for about 30 seconds. This ensures the strips adhere properly. ✔ Align with center mark
✔ Use a level for accuracy
✔ Press firmly against the wall
Step 5: Wait Before Adjusting
After hanging, it’s best to let the adhesive set for at least an hour before adjusting or moving the artwork. This will help the strips hold better. If you need to adjust, gently pull the artwork away from the wall to reposition it. ✔ Let it set for at least an hour
✔ Adjust carefully if needed
Step 6: Remove Safely
When it’s time to take down your art, pull the tab on the Command strip straight down, not outward. This will release the adhesive without damaging your wall. If any residue is left, clean it gently with a cloth. ✔ Pull straight down
✔ Clean any residue
⏱ Time: ~30 minutes | 💡 Tip: Always test a small area of the wall first to ensure the strips adhere well to your paint or wall surface!
With these steps, you can create a beautiful gallery of command strip wall art that enhances your home decor without the hassle of nails or damage!
3D Wall Art Installations
Editor’s Choice

Toyvian 100pcs Wood Craft Shapes House Shaped Unfinished Wood Embellishm…
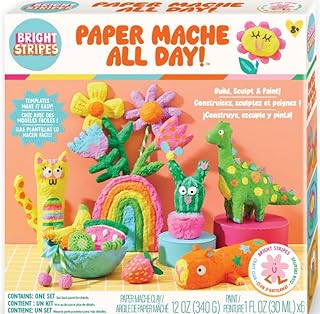
Bright Stripes Paper Mache All Day Craft Kit for Kids Ages 8+ | DIY Scul…

20 lb X-Large Picture Hanging Strips, 16 Pairs White Command Strips Heav…
6. Travel Memories Display

Celebrate your adventures by transforming travel memories into a stunning wall display! Gather postcards, maps, and photographs from your journeys and frame them using command strips. This arrangement not only beautifies your wall but also narrates your personal travel story.
You can opt for a collage format or a structured layout based on your style. Adding small labels or dates can enhance the visual journey for viewers, infusing warmth into your space.
Tips:
– Use a variety of frame sizes for visual interest.
– Highlight significant trips with larger pieces surrounded by smaller items.
– Update your display as you collect new memories!
This DIY decor serves as a beautiful reminder of cherished experiences and adventures.
Travel Memories Display
Editor’s Choice

Double Sided Adhesive Pads,Heavy Duty Mounting Tape,48Pcs 3mm Thickness …

Forever Friends Picture Photo Frame, Unique and Cute Picture Frame, Frie…

Everlywell At-Home Women’s Health Collection Kit, Measures 11 Biomarkers…
7. Seasonal Decor Swaps
One of the great advantages of command strips is their ease of use, making seasonal decor swaps a breeze! You can create a rotating collection of artworks or decorations that capture the essence of each season. Think botanical prints for spring, beach themes for summer, autumn leaves, or festive winter motifs.
By regularly updating your wall art, you keep your home feeling fresh and inviting, ensuring it remains cozy throughout the year. This approach is budget-friendly as you can store off-season pieces away and only display your favorites.
Insights:
– Invest in versatile frames for quick art changes.
– Organize seasonal decor in labeled bins for easy access.
– Consider theming entire rooms for greater impact.
When executed creatively, this method adds vibrancy and character to your living space!
Seasonal Decor Swaps
Editor’s Choice
Framed Canvas Wall Art Beautiful Woman With Colorful Flowers, White Flow…

Nacome Solar Garden Outdoor Statues Turtle with Succulent and 7 LED Ligh…
Command 20 lb XL 8 Pairs Heavyweight Picture Hanging Strips (16 Strips),…
8. Handcrafted Artwork
Unleash your creativity by showcasing handcrafted wall art! This can range from painted canvases to DIY projects like macramé or woven pieces. The uniqueness of each item tells its own story, adding a personal touch to your home.
Use command strips to easily mount your creations, allowing you to express your artistic side while customizing your decor. This DIY approach not only enhances the aesthetic but also makes your home feel genuinely yours.
Suggestions:
– Host crafting nights with friends for collaborative artwork.
– Use natural materials for a rustic vibe.
– Make sure your art aligns with your existing color palette for a cohesive look.
Your walls can become a beautiful showcase of your creativity and individuality!
Handcrafted Artwork
Editor’s Choice

MIGO Creates DIY Macrame Kit for Beginners with 9 Macrame Projects Ebook…

15 lb Large Picture Hanging Strips 14 Pairs (28 Strips), Damage-Free Han…

Mepase 6 Pcs Painting Artist Gift Sets for Women Include Canvas Tote Bag…
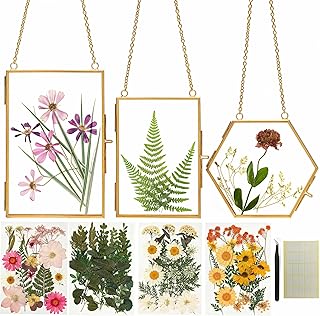
9. Nature-Inspired Art
Invite the beauty of the outdoors inside with nature-inspired wall art! Use pressed flowers, leaves, or landscape photographs to create a serene environment that can be easily mounted with command strips. This decor not only beautifies your space but also promotes a sense of calm and relaxation.
Consider framing natural elements in clear frames to create a floating effect, or incorporate dried plants for added texture. Nature-themed art beautifully complements minimalist interiors, crafting a stylish yet restful ambiance.
Tips:
– Choose a color palette that reflects the natural world.
– Layer art pieces for depth and interest.
– Incorporate planters or natural textures to unify the theme.
With these elements, your home will transform into a tranquil oasis!
Nature-Inspired Art
Editor’s Choice
Framed Canvas Wall Art Beautiful Woman With Colorful Flowers, White Flow…

2 Pcs Woman Reading in Bathtub Canvas Wall Art, Vintage Green Botanical …
10. Custom DIY Art Kits
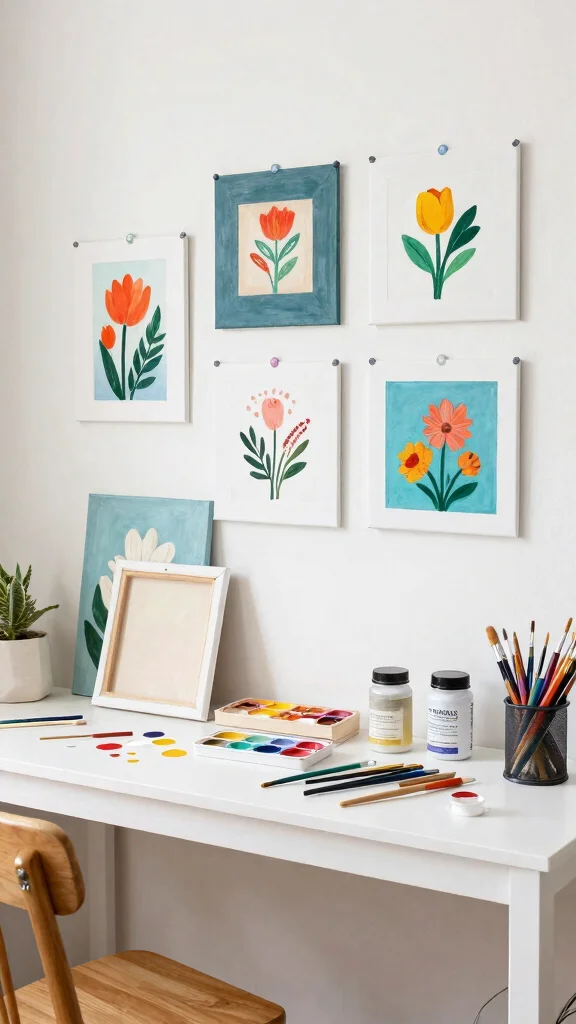
For the adventurous spirit, create custom DIY art kits for a truly personalized touch! Gather materials like paint, canvas, and brushes to craft art that resonates with you. Use command strips for easy display and rotation of your masterpieces. This idea not only allows for personal expression but also makes for a fun and engaging activity.
It’s a great way to bond with family or friends, turning your wall art into shared memories. Each new creation will tell a beautiful story of your artistic journey.
Suggestions:
– Choose eco-friendly materials for a sustainable approach.
– Document your process by photographing each artwork.
– Organize your art by themes for a cohesive gallery.
This DIY wall decor idea enhances your living space while nurturing a love for creativity!
Custom DIY Art Kits
Editor’s Choice
Mepase 6 Pcs Painting Artist Gift Sets for Women Include Canvas Tote Bag…

10PCS Palette Knife, Stainless Steel Painting Knife Set, Flexible Spatul…

Nude Black Woman Art, Sexy Woman Painting – Canvas Wall Art for Living R…
11. Interactive Art for Kids
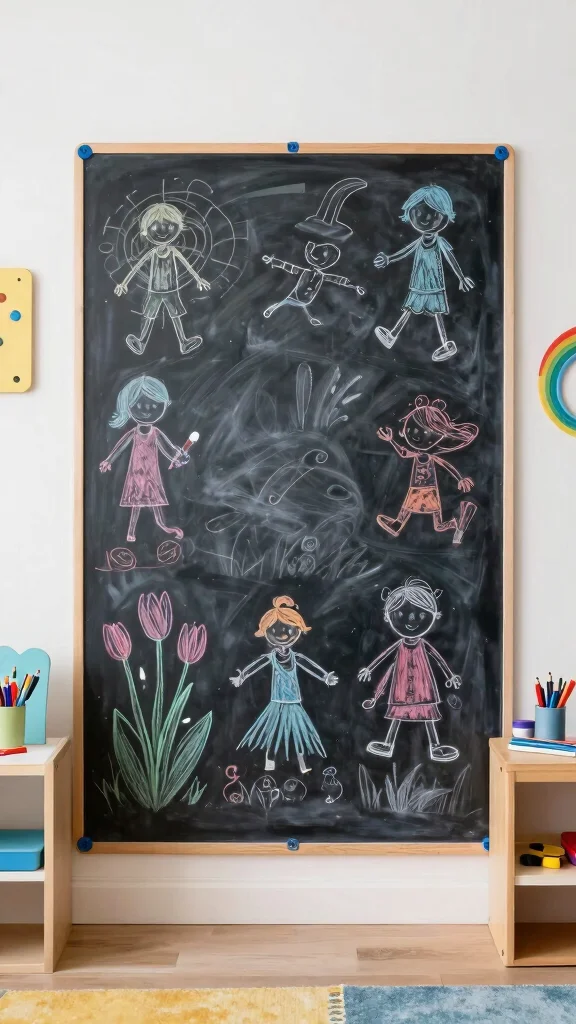
Encourage creativity in family spaces by creating interactive art for kids! Utilize command strips to hang chalkboards, whiteboards, or fabric panels for their drawing enjoyment. This approach not only sparks imagination but also adds a playful vibe to your home.
Regularly rotate their artwork as their skills develop, allowing them to personalize their space. The flexibility of command strips makes it easy to adapt as their interests change.
Insights:
– Designate a specific area for their creations to maintain order.
– Incorporate their favorite colors to make it special.
– Ensure materials are safe and suitable for children.
This method keeps your home dynamic and reflects your family’s vibrant energy!
Interactive Art for Kids
Editor’s Choice

SWANCROWN Fabric Bulletin Board Enclosed Wall-Mounted Display Case for O…

HAMIGAR Whiteboard Sticker for Wall 18″ x 79″ Dry Erase Board Wallpaper …

ONUPGO Chalkboard Labels-180pcs Waterproof Reusable Blackboard Stickers …
12. Artistic Mirrors
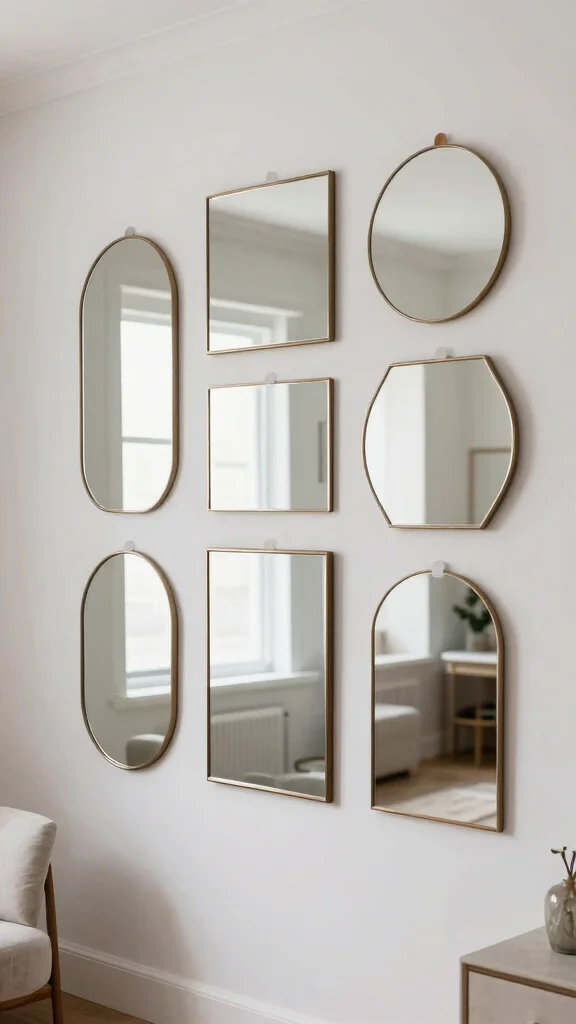
Mirrors can elevate your decor beyond mere functionality—they can be captivating art pieces! Using command strips, you can mount decorative mirrors that serve both practical and aesthetic purposes in your home. Choose shapes and sizes that align with your style. Mirrors can create illusions of more space and light, making rooms feel airy and open.
Consider arranging smaller mirrors in a creative layout or using a large statement mirror as the focal point of a room. The reflective quality can brighten your space, making it feel more inviting.
Suggestions:
– Frame mirrors with interesting textures or colors.
– Mix various mirror styles for a unique gallery effect.
– Use mirrors to reflect beautiful views or natural light sources.
Incorporate these artistic mirrors into your decor for an elegant touch!
Artistic Mirrors
Editor’s Choice

ZAVOOS 4 Piece Vintage Mirror Comb Set, Metal Antique Handheld Mirror wi…

BONNYCO Gold Mirrors for Wall Pack of 3, Round Wall Mirrors Bedroom Room…
Command 20 lb XL 8 Pairs Heavyweight Picture Hanging Strips (16 Strips),…
Conclusion
These command strip wall art ideas not only elevate your decor but also allow you to express your creativity in a hassle-free way.
With just a few command strips, you can transform your walls into a gallery of personal expression, making your home truly yours. So why wait? Dive into these easy DIY wall decor projects today and let your imagination run wild!
Note: We aim to provide accurate product links, but some may occasionally expire or become unavailable. If this happens, please search directly on Amazon for the product or a suitable alternative.
This post contains Amazon affiliate links, meaning we may earn a small commission if you purchase through our links, at no extra cost to you.
Frequently Asked Questions
What are some budget-friendly command strip wall art ideas that still look intentional?
Here are budget-friendly command strip wall art ideas that look deliberate and stylish. This approach keeps your walls fresh without committing to nails or heavy frames.
Printable art in a light frame or mounted on foam board is a quick, budget-friendly art solution that’s also easily removable.
A grid of lightweight geometric shapes cut from poster board, painted to your palette, creates a cohesive gallery vibe with minimal effort.
A photo wall using lightweight prints (4×6 or 5×7) arranged in a simple layout works great for DIY wall decor and stays easily removable.
Textured panels made from cork, fabric, or felt mounted on thin backing boards offer tactile interest without bulk, keeping things easy home decor and creative room decorations friendly.
Thin wood veneer or canvas panels, kept light and paired with multiple strips, give a natural touch that still reads as intentional.
How much weight can command strips safely support for wall art?
Weight varies by product, so always check the packaging. In general, small strips hold lighter items, while larger strips distribute weight across several units. For command strip wall art ideas, plan to use multiple strips per piece and avoid heavy frames. If you’re hanging something larger, distribute weight across 4–6 strips and test with a light piece first. For moisture-prone areas or thicker frames, consider a lightweight backing board to help spread the load and keep things removable wall art rather than permanently mounted décor.
What layout tips help create a cohesive command strip wall art display without nails?
Map it before you mount it. Decide between a grid, a salon-style cluster, or a linear row to suit your space. Measure the wall and the pieces, then lay out on the floor to preview spacing.
Use painter’s tape on the wall to mark the exact positions; start with an anchor piece at eye level, then add others with consistent spacing (2–3 inches for a tight look, 4–6 inches for more air). Use backing boards or identical frames for a unified feel, and stick to a consistent color or theme to achieve a polished, intentional look.
Can command strip wall art be used in bathrooms or humid spaces?
Yes, you can use command strip wall art ideas in bathrooms or other humid spaces if you choose the right materials. Favor moisture-resistant surfaces like acrylic prints, laminated photos, metal, or sealed canvas. Avoid fabric, wood veneer that can warp, or fragile glass. Keep items away from direct water spray and use a vented bathroom to reduce humidity. If in doubt, test a small piece first and replace any that starts to peel.
How do I remove command strip wall art without damaging walls or leaving residue?
Removal is usually simple and reassuring. Start by gently pulling the tab to release the adhesive, or slide a fingernail under the edge to lift. If it won’t budge, warm the adhesive with a hair dryer for 15–20 seconds to soften it, then peel slowly at a 45-degree angle. Use a soft cloth dampened with warm soapy water or isopropyl alcohol to wipe away residue, then wipe dry. Return the wall to its previous look and reuse the strips later on new projects. This is the essence of removable wall art.
Related Topics
home decor
command strip wall art
DIY wall decor
minimalist design
removable wall art
budget-friendly art
easy home decor
creative room decorations
quick projects
beginner friendly
wall art techniques
modern aesthetics